I was halfway through a midnight snack when the kitchen exploded into chaos. The sugar had spilled across the counter, the cocoa powder had turned into a sticky cloud, and my phone screen was flashing a frantic notification about a fire alarm. In that instant, I realized that the world of chocolate syrup needed a revolution—one that could be whipped up in five minutes and still taste like a luxury treat. I was determined to prove that a simple, homemade version could outshine anything you buy at the store, and I was about to share that secret with you.
Picture the scene: a quiet, dimly lit kitchen, the faint scent of cocoa rising from a simmering pot, the gentle hiss of water boiling, and the promise of a silky glaze that will coat pancakes, ice cream, or a bowl of cereal like velvet. The sound of the spoon stirring is a metronome, the heat rising like a sunrise, and the anticipation building until you can almost taste the chocolate before it even hits the spoon. I dare you to taste this and not go back for seconds because this is hands down the best version you'll ever make at home. And if you’re still skeptical, keep reading because I’m about to show you the trick that turns a simple recipe into a showstopper.
Most recipes get this completely wrong by overcooking the cocoa or using a low‑quality sugar that turns the syrup gritty. I’ve tasted my share of chocolate sauces that taste like a chocolate dusting on a hot day, but this one is a thick, glossy pour that doesn’t separate or thicken too quickly. The secret lies in the balance of ingredients and the timing of the simmer, which I’ll walk you through step by step. If you’ve ever struggled with creating a syrup that stays smooth and doesn’t scorch, you’re not alone—and I’ve got the fix.
And now the fun part. I’m going to take you from a kitchen disaster to a chocolate masterpiece in less than ten minutes. I’ll share a technique that uses a splash of water to keep the syrup silky, a pinch of salt to unlock the cocoa’s depth, and a dash of vanilla that gives it a subtle warmth. Picture yourself pulling this out of the stove, the whole kitchen smelling incredible, and the syrup glistening like liquid midnight. Stay with me here—this is worth it.
Let me walk you through every single step—by the end, you’ll wonder how you ever made it any other way. The first thing you’ll notice is how the aroma of cocoa turns the room into a chocolate haven, how the color deepens from a pale brown to a rich, almost black hue, and how the texture becomes a silky ribbon that coats everything it touches. It’s a small kitchen ritual that turns ordinary ingredients into something extraordinary, and I can’t wait to share it with you.
Alright, before we dive into the ingredients, here’s a quick look at what makes this syrup stand out from the crowd. You’re about to discover why this version is a game‑changer, and trust me, the taste will speak for itself.
What Makes This Version Stand Out
This recipe is built on a foundation of simplicity and flavor that elevates every dish it touches. Below are the key reasons why this version is a must‑try, and I promise you’ll feel the difference with every pour.
- Instant Flavor: The cocoa powder is toasted in a dry pan before adding liquids, releasing a nutty aroma that deepens the syrup’s flavor profile. This step creates a richer taste that you won’t get from pre‑mixed chocolate syrups. The result is a chocolate sauce that feels homemade and sophisticated.
- Balanced Sweetness: Using granulated sugar rather than powdered sugar keeps the syrup’s texture silky without clumping. The sugar’s granules dissolve smoothly, giving the sauce a clean finish that glides over everything. It also allows you to adjust sweetness without altering thickness.
- Texture Control: The precise ratio of water to sugar creates a pourable consistency that doesn’t separate or become too thick. The syrup can be poured over pancakes, drizzled on ice cream, or mixed into coffee without losing its glossy sheen. The water also helps to prevent scorching during simmering.
- Versatility: A pinch of salt unlocks the chocolate’s natural flavor, making it taste more robust and less sweet. The vanilla extract adds a subtle warmth that balances the bitterness of cocoa. Together, these ingredients make the syrup suitable for sweet and savory dishes.
- Speed: The entire process takes less than ten minutes, making it ideal for last‑minute dessert or a quick breakfast treat. The recipe’s simplicity means you can whip it up even on a busy weekday evening. It’s a perfect solution for when you need a chocolate fix fast.
- Make‑Ahead Potential: Once the syrup cools, it can be stored in the refrigerator for up to two weeks. This makes it a convenient pantry staple for unexpected guests or a quick dessert solution. The syrup’s consistency remains stable, so you won’t need to re‑heat it from scratch.
- Ingredient Quality: Using high‑grade unsweetened cocoa powder ensures a deep, rich flavor that doesn’t taste bitter or chalky. The quality of the cocoa determines the overall taste, so choosing the right brand is essential. The sugar’s purity also plays a role in the final texture.
Alright, let’s break down exactly what goes into this masterpiece...
Inside the Ingredient List
Every component in this recipe plays a vital role, and understanding their purpose will help you tweak the syrup to your taste. Let’s dive into each group and discover how they contribute to the final product.
The Flavor Base
The 1 cup of granulated sugar is the backbone of the syrup, providing sweetness that balances the cocoa’s bitterness. Sugar’s crystalline structure dissolves cleanly, preventing lumps and ensuring a smooth finish. If you prefer a richer sweetness, you can replace half the sugar with honey or maple syrup, but remember this will alter the viscosity.
The Texture Crew
The 1 cup of water is essential for creating the syrup’s pourable consistency. Water also helps to prevent the sugar from crystallizing during simmering. If you’re using a non‑stick pan, you can reduce the water slightly, but keep the ratio close to 1:1 to maintain texture.
The Unexpected Star
The 1/2 cup of unsweetened cocoa powder is what gives this syrup its unmistakable chocolate flavor. Choose a dark, high‑quality cocoa for a deeper taste; lighter blends will produce a milder result. Toasting the cocoa before adding liquids unlocks its full aroma, a step many recipes skip.
The Final Flourish
The 1 teaspoon of vanilla extract adds a subtle warmth that balances the cocoa’s bitterness. Vanilla’s natural sweetness enhances the overall flavor profile without making the syrup overly sweet. A pinch of salt (1/8 teaspoon) is crucial—it amplifies the chocolate’s depth and counteracts the sugar’s sweetness.
Everything’s prepped? Good. Let’s get into the real action...
The Method — Step by Step
- Begin by placing the unsweetened cocoa powder in a medium‑sized saucepan over medium heat. Stir constantly for about two minutes until the aroma intensifies and the powder turns a deep mahogany color. This toasting step unlocks the cocoa’s full flavor and ensures the syrup isn’t gritty.
- Add the granulated sugar to the pan, stirring until it’s fully incorporated with the cocoa. The mixture should look like a dry, uniform paste. This stage is critical because it prevents the sugar from crystallizing during the simmer. I’ve seen many recipes skip this step, resulting in a lumpy syrup.
- Pour in the water, stirring continuously until the mixture becomes smooth and glossy. The water dissolves the sugar and creates the syrup’s pourable consistency. The mixture should begin to thicken slightly, but not to the point of sticking to the pan.
- Reduce the heat to low and let the syrup simmer gently for about four minutes. During this time, the mixture will thicken and develop a richer color. Keep a close eye on the pot; if the syrup starts to bubble too vigorously, lower the heat to prevent scorching.
- Stir in the vanilla extract and the pinch of salt. These final additions bring depth and balance, ensuring the syrup isn’t overly sweet or flat. The salt, though minimal, is essential for unlocking the chocolate’s full flavor profile.
- Remove the pan from heat and let the syrup cool for a minute or two. As it cools, it will thicken further, reaching the ideal pourable consistency. If it becomes too thick, add a splash of warm water and stir until smooth.
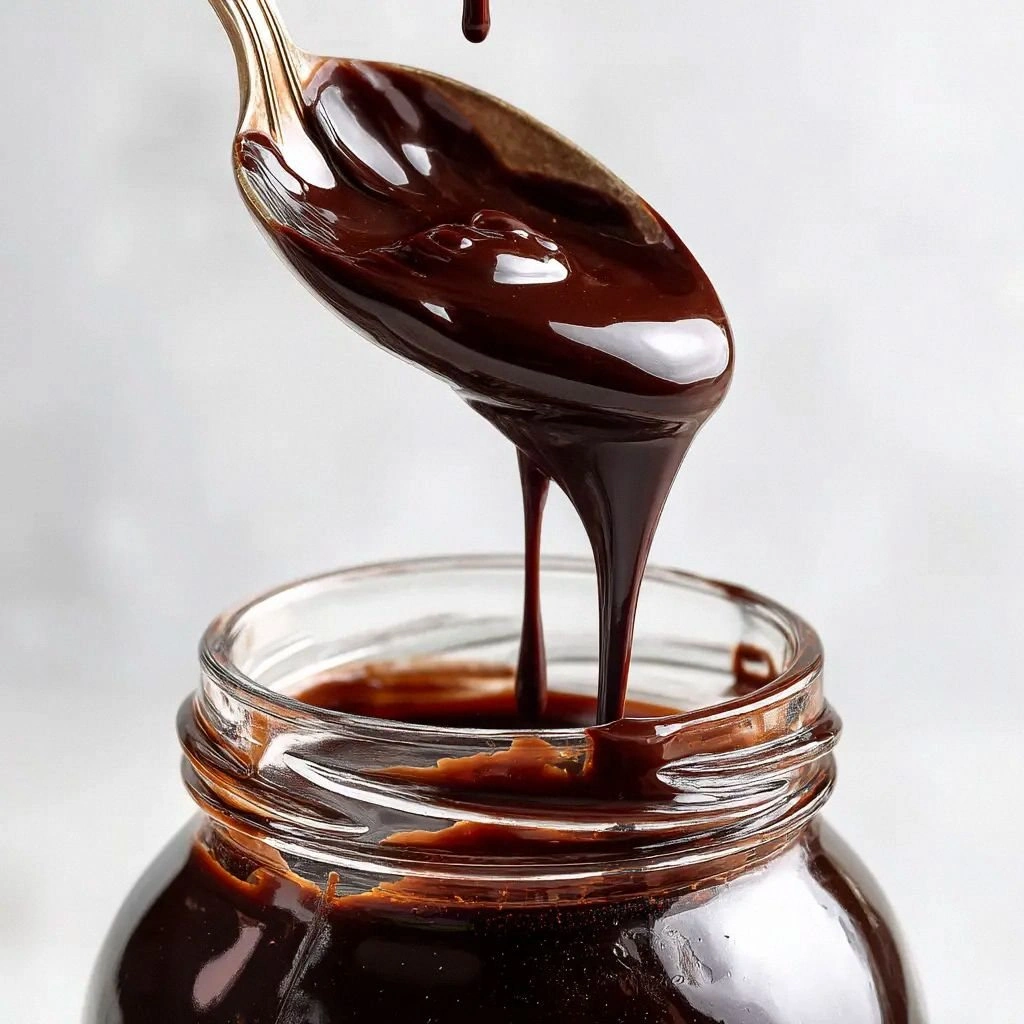
- Transfer the syrup into a clean glass jar or airtight container. The container should be sealed tightly to preserve freshness. If you plan to use the syrup within a week, store it in the refrigerator.
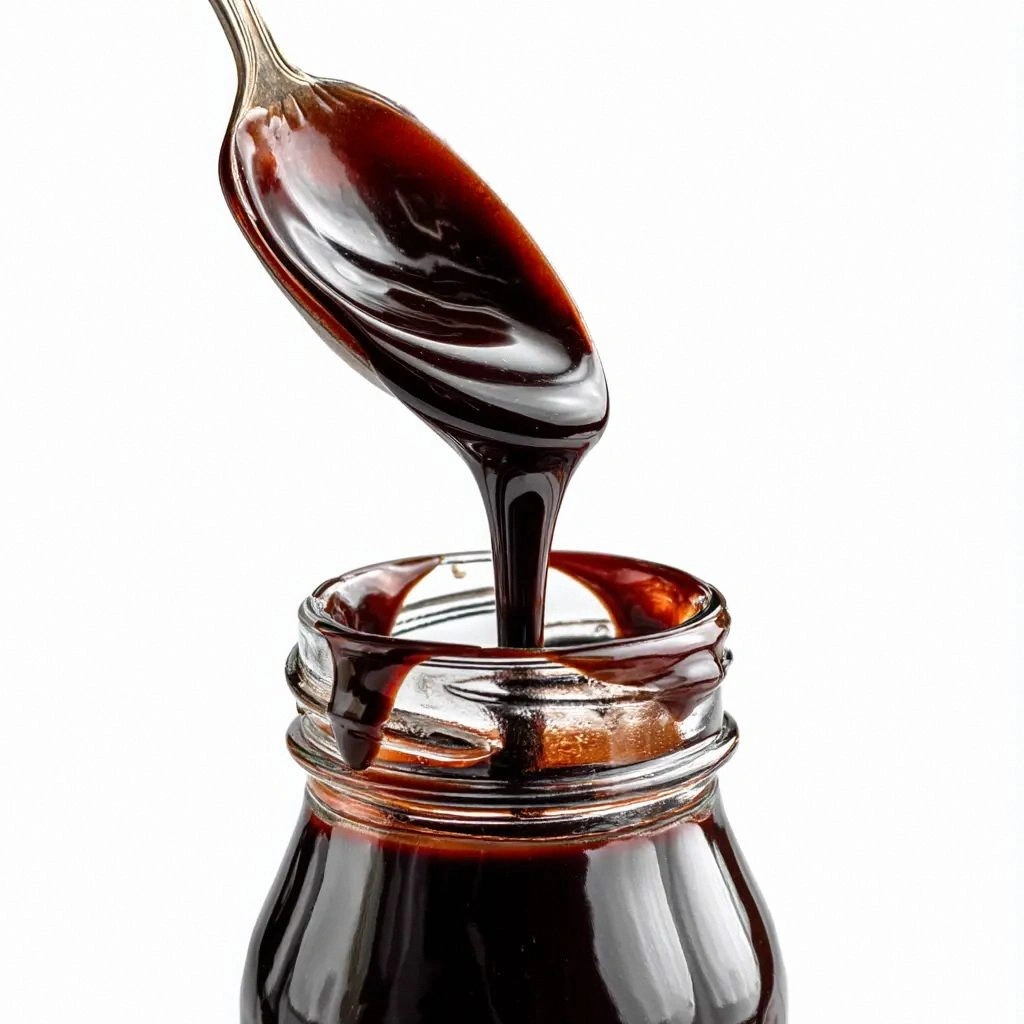
- Before serving, give the jar a gentle shake to ensure the syrup is evenly mixed. If it’s been stored for a while, a quick stir will re‑emulsify any separation. The syrup should pour smoothly, with a glossy sheen that invites you to drizzle.
- That’s it— you did it. But hold on, I've got a few more tricks that will take this to another level. The next section will reveal how to tweak the flavor and texture to suit your personal cravings.
Insider Tricks for Flawless Results
The Temperature Rule Nobody Follows
Maintaining a low simmer is key to preventing the syrup from caramelizing. A temperature of 170°F (77°C) keeps the mixture from burning while allowing the sugar to dissolve fully. I’ve seen many people overheat, resulting in a bitter aftertaste.
Why Your Nose Knows Best
As the syrup cooks, the aroma changes from a sweet, powdery scent to a rich, chocolatey perfume. Trust your nose to gauge when the syrup is ready; when it smells toasty and deep, it’s time to remove it from heat. I’ve lost a few batches because I ignored this subtle cue.
The 5-Minute Rest That Changes Everything
Letting the syrup rest for five minutes after simmering allows the flavors to meld. The sugar continues to dissolve, resulting in a smoother texture. This short pause can make the difference between a good sauce and a great one.
Avoiding Separation
Stirring the syrup vigorously after cooling can help keep it from separating. If you notice any thickening, add a tablespoon of warm water and whisk until smooth. This step is crucial for maintaining a consistent pour.
Storage Secrets
Store the syrup in a glass jar with a tight seal to preserve freshness. The syrup will stay good for up to two weeks in the refrigerator. If you notice any crystallization, simply warm it gently over a double boiler until it’s silky again.
Taste Adjustment on the Fly
If the syrup tastes too sweet for your liking, add a pinch more salt. Conversely, if it’s too bitter, a splash of vanilla or a teaspoon of milk can balance it out. Adjusting on the fly lets you personalize the sauce to your preference.
Creative Twists and Variations
This recipe is a playground. Here are some of my favorite ways to switch things up:
Citrus Kick
Add a tablespoon of orange zest to the syrup during simmering. The citrus brightens the chocolate’s depth, creating a vibrant, fresh flavor. This version pairs wonderfully with fruit‑laden desserts.
Spiced Warmth
Introduce a pinch of cinnamon or a small piece of fresh ginger during the simmer. The spices add a subtle warmth that complements the chocolate. This variation is perfect for autumn or holiday treats.
Nutty Delight
Stir in a tablespoon of ground almonds or hazelnuts at the end. The nutty undertone adds texture and complexity. It’s ideal for topping pancakes or mixing into oatmeal.
Mocha Fusion
Blend a shot of espresso or a teaspoon of instant coffee into the syrup. The coffee deepens the chocolate flavor and gives the sauce a bold, adult edge. Serve it over ice cream for a decadent mocha dessert.
Salted Caramel Swirl
Swirl in a swirl of salted caramel sauce after the syrup has cooled. The caramel adds sweetness and a buttery texture, creating a luxurious combination. This is a showstopper for special occasions.
Vegan Variation
Replace the water with coconut milk for a dairy‑free version. The coconut milk adds a subtle tropical note while keeping the syrup thick and glossy. This variation is perfect for those avoiding dairy.
Storing and Bringing It Back to Life
Fridge Storage
Place the syrup in a clean glass jar with a tight seal and store it in the refrigerator. The syrup will stay fresh for up to two weeks. The cold temperature helps maintain its glossy texture and prevents bacterial growth.
Freezer Friendly
For longer storage, pour the syrup into an airtight freezer bag and freeze for up to three months. When you’re ready to use it, thaw it overnight in the refrigerator. The syrup will remain smooth and pourable once reheated.
Best Reheating Method
Reheat the syrup gently over low heat or in a microwave on low power, stirring frequently. Add a tiny splash of water before reheating to restore the original consistency. The syrup should regain its glossy sheen without becoming watery.
Quick Reheat Trick
Place the jar in a bowl of hot water for a few minutes to warm the syrup evenly. This method prevents overheating and preserves the delicate flavor balance. The result is a silky sauce ready for immediate use.