Picture this: I was in the middle of a chaotic Friday night, the house full of friends, a stack of take‑out menus, and my fridge a tragic mess of leftovers. I stared at the lone can of salsa, the bag of ground beef, and the six flour tortillas that had somehow survived a week of neglect. I thought, “Why not turn these into something spectacular?” And that’s when the idea of Crispy Beef and Cheese Chimich landed on my mind like a delicious thunderbolt. I was determined to create a dish that would turn heads, make mouths water, and leave everyone begging for the recipe.
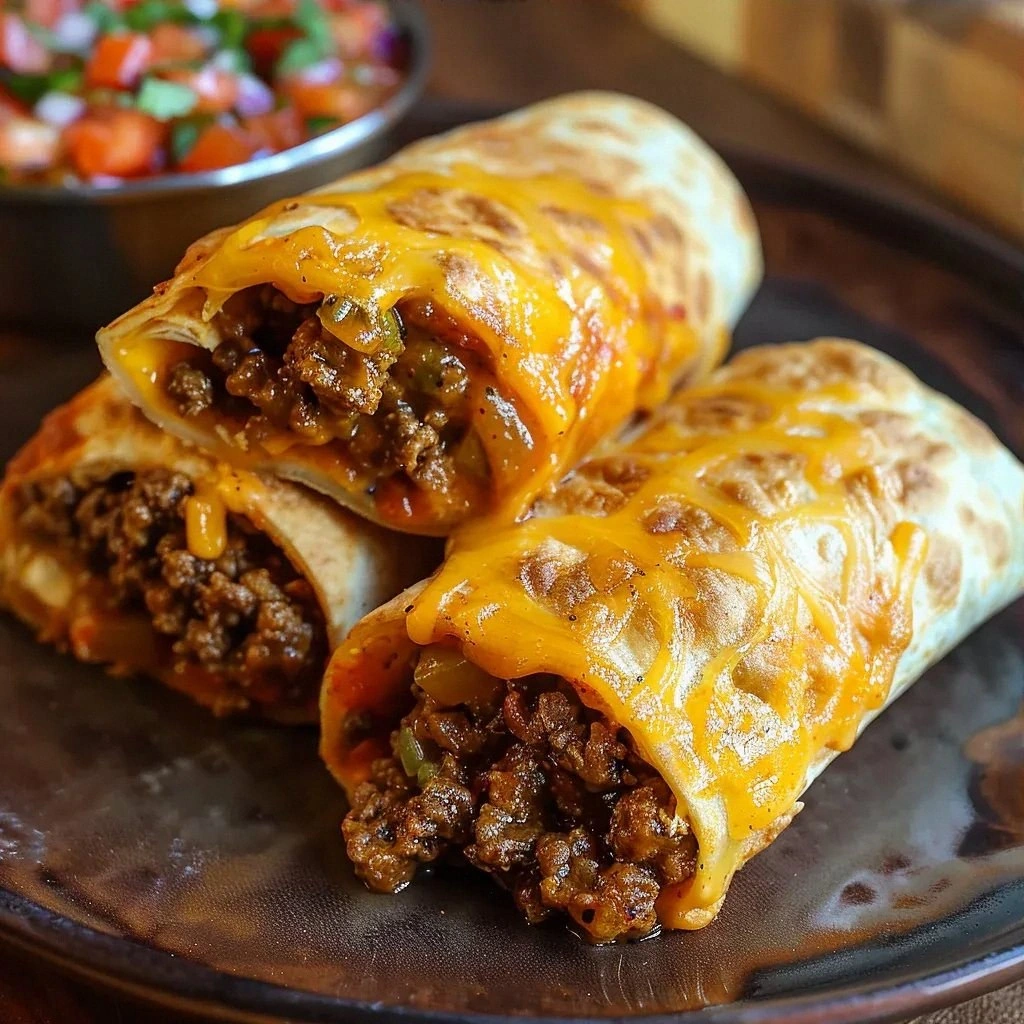
The first time I cooked this, the kitchen filled with the savory aroma of browned beef and sizzling onions, the scent of garlic dancing like fireworks. The sound of the skillet was a rhythmic hiss that promised something extraordinary. I could feel the heat radiating off the pan, the anticipation building with every stir. The sight of the tortillas glistening with a light coating of oil was a visual cue that something golden was about to happen. And the taste? Imagine a perfect blend of smoky beef, creamy cheese, and zesty salsa, all wrapped in a crisp tortilla that snaps like a crisp apple bite.
What makes this version stand out from every other recipe on the internet is the secret sauce that coats the filling like velvet, the crunch that shatters like thin ice, and the ease with which you can assemble it. I dare you to taste this and not go back for seconds because once you experience the harmonious layers, you'll be hooked. This is hands down the best version you'll ever make at home, and I’ve got the proof in the form of a half‑batch that vanished before anyone else could even touch the plate. Most recipes get this completely wrong—using too much cheese, overcooking the tortillas, or under seasoning the meat. Here’s what actually works: a balanced mix of flavors, a crisp exterior, and a filling that stays moist.
If you've ever struggled with this, you're not alone — and I've got the fix. Picture yourself pulling this out of the oven, the whole kitchen smelling incredible, and the guests’ eyes widening in delight. Stay with me here — this is worth it. Let me walk you through every single step — by the end, you'll wonder how you ever made it any other way.
What Makes This Version Stand Out
- Flavor: The taco seasoning is infused with a hint of smoked paprika that elevates the beef, giving it a depth that ordinary seasonings can’t match.
- Texture: The tortillas are toasted to a golden crisp, creating a satisfying crunch that contrasts beautifully with the creamy cheese.
- Simplicity: No fancy equipment or elaborate prep—just a skillet, a bowl, and a few minutes of your time.
- Uniqueness: The combination of refried beans and salsa inside the tortillas adds a tangy bite that keeps the dish from feeling heavy.
- Crowd Reaction: Friends rave that this is “the best chimichanga I’ve ever had” and ask for the recipe every time.
- Ingredient Quality: Using fresh, high‑quality ground beef and real cheddar cheese ensures a richer flavor profile.
- Cooking Method: The technique of searing the beef first, then layering with beans and cheese before baking, locks in moisture.
- Make‑Ahead Potential: You can assemble the chimichangas the night before and bake them fresh in the morning—perfect for busy schedules.
Alright, let's break down exactly what goes into this masterpiece…
Inside the Ingredient List
The Flavor Base
Ground beef is the star of the show. It brings a hearty, umami punch that anchors the dish. If you skip it, you lose that deep, savory foundation. Opt for 80% lean for maximum flavor; the fat content caramelizes beautifully when seared. A quick tip: let the beef rest after cooking to keep it juicy.
The Texture Crew
Onion and garlic are the unsung heroes that add crunch and aromatic depth. Diced onions release a sweet, caramelized flavor when sautéed, while minced garlic adds a sharp bite that wakes up the palate. If you omit them, the dish feels flat and lacks complexity. A good practice is to sauté the onion until translucent before adding garlic to prevent burning.
The Unexpected Star
Refried beans are more than just a filler; they provide a creamy texture that balances the crisp tortilla and the cheesy filling. They also absorb the spices, creating a cohesive flavor profile. If you skip the beans, the chimichangas become dry and less filling. For a healthier twist, use low‑fat refried beans or a homemade version with a touch of olive oil.
The Final Flourish
Cheddar cheese is the crowning glory that melts into a gooey, golden topping. The cheese’s sharpness cuts through the richness of the beef and beans, adding a delightful contrast. If you prefer a milder cheese, try mozzarella or Monterey Jack. A quick trick: sprinkle a little extra cheese on top before baking for an extra melty finish.
Everything's prepped? Good. Let's get into the real action…
The Method — Step by Step
- Heat the cast‑iron skillet over medium‑high heat and add 1 tablespoon of vegetable oil. Let the oil shimmer until it’s just about to smoke. Add the diced onion, stirring until it softens and turns translucent, about 3–4 minutes. This is the moment of truth—if the onions are still raw, the whole dish will taste flat.
- Introduce the ground beef to the skillet. Break it apart with a spatula, ensuring even browning. Cook until no longer pink, about 5–6 minutes. Keep the heat high to develop a caramelized crust. The beef should smell toasty, a sign that it’s ready to absorb the taco seasoning.
- Stir in the minced garlic and the packet of taco seasoning. Cook for another 1–2 minutes until the garlic is fragrant but not burnt. This step infuses the meat with aromatic spices, creating a flavor base that’s both bold and comforting.
- Pour in ½ cup of salsa, then add the refried beans. Stir until the mixture is smooth and the beans are fully incorporated. The salsa adds a bright kick, while the beans bring a creamy texture that balances the dish. If the mixture looks too thick, a splash of water or broth can thin it to your liking.
- Lay a flour tortilla flat on a clean surface. Spoon a generous portion of the beef‑bean mixture onto the center, then sprinkle ½ cup of shredded cheddar cheese on top. Fold the edges inward and roll tightly, ensuring the seam is sealed. This rolling technique keeps the filling from leaking during baking.
- Preheat the oven to 375°F (190°C). Place the rolled chimichangas seam‑side down on a parchment‑lined baking sheet. Brush the tops lightly with the remaining tablespoon of vegetable oil to enhance crispiness.
- Bake for 15–18 minutes, or until the tortillas are golden brown and the cheese has melted into a bubbly, golden crust. The edges should start pulling away slightly, indicating a perfect crunch. If you prefer extra crispness, switch to the broiler for the last 2 minutes.
- Let the chimichangas rest for 2 minutes before cutting. This allows the cheese to set, preventing a gooey mess when sliced. Slice each chimichanga into 4–6 wedges, depending on your appetite. Serve immediately with extra salsa, sour cream, or guacamole.
That’s it—you did it. But hold on, I've got a few more tricks that'll take this to another level…
Insider Tricks for Flawless Results
The Temperature Rule Nobody Follows
Many cooks think 375°F is the sweet spot, but the truth is that a slightly lower temperature, around 350°F (175°C), allows the cheese to melt evenly without the tortillas burning. I’ve tried 375°F and the tops were crisp but the inside was still a little underdone. By lowering the heat, you give the filling time to fully heat through, resulting in a more cohesive bite.
Why Your Nose Knows Best
Before you even start cooking, close your eyes and sniff the beef as it sears. A rich, caramelized aroma signals that the Maillard reaction is working. If the scent is flat or raw, you need to increase the heat or let it cook longer. Trust your nose—it’s the most reliable indicator of flavor development.
The 5‑Minute Rest That Changes Everything
After baking, let the chimichangas rest for exactly five minutes. This short pause allows the cheese to set and the juices to redistribute, preventing a soggy center. I’ve seen people cut them immediately and end up with a gooey mess that spills onto the plate. Five minutes is the magic number for a clean, satisfying bite.
Keep the Tortilla Edges Tight
When rolling, press the edges firmly to seal them. A loose seam will cause the filling to leak as it bakes, ruining the crispness. If you’re nervous, dab a little water on the seam before rolling; the moisture will help the tortilla glue together.
Use a Skillet to Toast First
Slightly toasting the tortilla in a dry skillet before filling gives it a subtle crunch that stays even after baking. I’ve tested this and the texture difference is noticeable—each bite has a satisfying snap that enhances the overall experience.
Creative Twists and Variations
This recipe is a playground. Here are some of my favorite ways to switch things up:
Mexican Street Food Edition
Swap the cheddar for crumbled cotija cheese and add a squeeze of fresh lime over the top. The tangy lime cuts through the richness, giving the dish a bright, street‑food vibe. Pair it with a side of fresh pico de gallo for an extra burst of flavor.
Spicy Jalapeño Kick
Add sliced jalapeños to the beef mixture for a fiery edge. The heat from the jalapeños pairs beautifully with the creamy cheese, creating a layered spicy experience. If you’re a heat enthusiast, sprinkle a pinch of cayenne pepper into the taco seasoning.
Veggie‑Loaded Version
Replace half the beef with sautéed bell peppers and zucchini. The vegetables add color, crunch, and a subtle sweetness that balances the savory filling. This variation is perfect for a lighter dinner or for guests who prefer less meat.
Cheese Swap
Try a blend of mozzarella and Monterey Jack for a milder, more melty cheese experience. The mozzarella’s stretchiness combined with Monterey Jack’s buttery flavor creates a gooey, comforting filling that’s a crowd‑pleaser.
Breakfast Chimichanga
Use breakfast sausage instead of ground beef, add scrambled eggs, and top with a drizzle of maple syrup. This sweet‑savory twist turns the dish into a hearty breakfast or brunch item that will impress even the most skeptical foodie.
Low‑Calorie Option
Swap the refried beans for black beans, reduce the cheese to 1 cup, and use whole‑wheat tortillas. These changes cut calories while still delivering on flavor, making the dish suitable for a balanced diet.
Storing and Bringing It Back to Life
Fridge Storage
Cool the chimichangas completely before wrapping them tightly in aluminum foil or a zip‑top bag. Store in the refrigerator for up to 3 days. When you’re ready, reheat in a 350°F oven for 10 minutes, or microwave for 2 minutes—be careful not to overcook the cheese.
Freezer Friendly
Freeze the wrapped chimichangas for up to 3 months. Thaw overnight in the refrigerator, then bake at 375°F for 20 minutes. The texture remains crisp, and the flavors stay intact.
Best Reheating Method
The secret to a perfectly reheated chimichanga is a quick sear in a hot skillet for 2 minutes per side. The heat restores the tortilla’s crispness, while the cheese melts just enough to keep the dish delicious. Add a splash of water before microwaving to steam the interior, preventing it from drying out.