I still remember the day my air conditioner died during the worst heat wave of the decade. There I was, standing in my sweltering kitchen at 2 PM, sweat dripping down my forehead like a broken faucet, desperately craving something cold and chocolatey. My brain was screaming for ice cream, but my heart wanted that nostalgic hot chocolate comfort. That's when it hit me — what if I could capture the soul-warming essence of hot chocolate and transform it into an ice-cold summer sensation? What happened next in that steamy kitchen changed my summer forever, and I'm about to let you in on the secret that made my neighbors line up at my door like I was giving away free concert tickets.
Picture this: the sound of ice cubes crunching in your blender like fresh snow underfoot, the rich aroma of premium cocoa swirling through the air, and that magical moment when everything transforms into a cloud of chocolate perfection so thick your spoon stands straight up. This isn't just another frozen drink recipe — this is what happens when winter comfort food crashes into summer refreshment and creates something utterly revolutionary. I dare you to taste this and not go back for seconds, because honestly, I ate half the batch before anyone else got to try it, and I'm not even sorry about it.
The first sip tastes like someone captured your favorite childhood memories in a glass — that moment when you came inside from building snowmen and mom handed you steaming hot chocolate, but somehow it's ice-cold and makes you forget the temperature outside entirely. The texture hits different too, not like those watery smoothies you get at chain stores, but luxuriously thick like a chocolate cloud that melts on your tongue and leaves you wondering if you just experienced a dessert or a religious moment. Most recipes get this completely wrong by using regular ice and ending up with a separated, watery mess that tastes like disappointment with a hint of cocoa.
Here's what actually works: we're going to create a frozen base that's so intensely chocolatey it'll make your taste buds do a happy dance, then blend it with just enough ice to create that perfect slushy texture that coats your mouth like velvet. The secret ingredient? It's not what you think, and when I reveal it, you're going to wonder why nobody told you this years ago. Stay with me here — this is worth it, because by the end of this recipe, you'll wonder how you ever survived summer without this frozen hot chocolate bliss in your arsenal.
What Makes This Version Stand Out
Let me be brutally honest here — most frozen hot chocolate recipes taste like someone dumped some Swiss Miss into a blender with ice and hoped for the best. This version? This is hands down the best version you'll ever make at home, and I'm not just saying that because I'm biased from drinking three of these yesterday. Here's why this recipe will ruin all other frozen drinks for you forever:
- Intense Chocolate Depth: We're using both hot chocolate mix AND chocolate syrup because one-dimensional chocolate is for amateurs. The combination creates layers of chocolate flavor that dance between sweet and rich, giving you that complexity that makes people close their eyes involuntarily when they taste it.
- Cloud-Like Texture: The ratio of ice to liquid is precisely calibrated to create that perfect thickness that requires effort to suck through a straw but isn't so thick you need a spoon. It's like drinking a chocolate cloud that somehow manages to be both refreshing and indulgent.
- Stupidly Simple Method: No fancy equipment, no overnight freezing, no simple syrups that require a culinary degree. If you can press buttons on a blender, you can make this recipe, and you'll look like a dessert wizard to everyone who tastes it.
- Pure Nostalgia Factor: This captures everything you love about hot chocolate — the warmth, the comfort, the chocolate intensity — but transforms it into summer's most refreshing treat. It's like your childhood and your adult palate had a baby, and that baby is perfect.
- Crowd-Pleasing Power: I've served this at backyard barbecues, birthday parties, and random Tuesday afternoons, and every single person asks for the recipe before they leave. Kids love it, adults crave it, and even chocolate snobs admit it's dangerously good.
- Make-Ahead Magic: Unlike most frozen drinks that turn into sad puddles if you look at them wrong, this one holds up in the freezer for up to an hour, making it perfect for entertaining when you want to enjoy your own party instead of being stuck to the blender.
Alright, let's break down exactly what goes into this masterpiece, because each ingredient pulls its weight harder than a caffeinated marathon runner. Picture yourself pulling this out of the blender, the whole kitchen smelling like Willy Wonka's dream factory, and knowing that in mere minutes, you're about to experience summer perfection in a glass.
Inside the Ingredient List
The Flavor Foundation
Let's start with the star of our show — the ice. But not just any ice will do here, my friend. We're using 2 cups of the coldest, freshest ice you can find because old ice that's been sitting in your freezer absorbing last month's fish dinner flavors will absolutely murder this drink. Fresh ice is your blank canvas, and since ice makes up about half the volume of this drink, you want it tasting like nothing but pure, cold perfection. If you've ever struggled with frozen drinks that taste flat or slightly off, you're not alone — and I've got the fix.
The milk is where things get interesting, and here's where most recipes completely miss the mark. You need exactly 1 cup of whole milk because the fat content is crucial for that creamy texture that makes this drink feel indulgent rather than icy. Skim milk will give you a watery disaster that separates faster than oil and vinegar, while cream will be too heavy and won't blend properly with the ice. Whole milk hits that sweet spot where it adds richness without weighing down the drink, creating that perfect balance between refreshing and decadent.
The Chocolate Dynamic Duo
Now we're getting to the good stuff — the chocolate components that make this drink legendary. We're using 1/4 cup of hot chocolate mix, but not that sad, chalky stuff that's been sitting in your pantry since last winter. You want the good stuff, the kind that smells like actual chocolate when you open the tin, not just sugar with brown coloring. The hot chocolate mix brings that nostalgic flavor we all crave, plus it contains just enough cornstarch to help thicken the drink slightly and prevent separation.
But here's where the magic happens — we're also adding 2 tablespoons of chocolate syrup, and this isn't just doubling down on chocolate for fun. The syrup brings a different chocolate profile than the powder, creating layers of chocolate flavor that make each sip interesting. The syrup also contains stabilizers that help emulsify the drink, keeping everything perfectly blended instead of having chocolate powder floating around like sad little islands. If you skip either component, you'll end up with a one-dimensional drink that tastes like it came from a gas station machine.
The Cloud Creator
One cup of whipped cream goes into this drink, and yes, you read that right — we're blending whipped cream right into the frozen mixture. This isn't just being extra for the sake of it. The air bubbles in the whipped cream create tiny pockets that give our frozen hot chocolate that incredible lightness that makes it feel like you're drinking a chocolate cloud. Regular cream would be too dense and would freeze into little butter chunks, but whipped cream maintains its structure while adding that airy texture that separates good frozen drinks from great ones.
The key here is using fresh whipped cream, not the canned stuff that's been sitting in your fridge since Thanksgiving. Fresh whipped cream has better structure and flavor, plus it doesn't contain all those stabilizers and preservatives that can give your drink a slightly artificial aftertaste. If you absolutely must use canned whipped cream, go for the real cream varieties, not the oil-based imposters that taste like sweetened plastic.
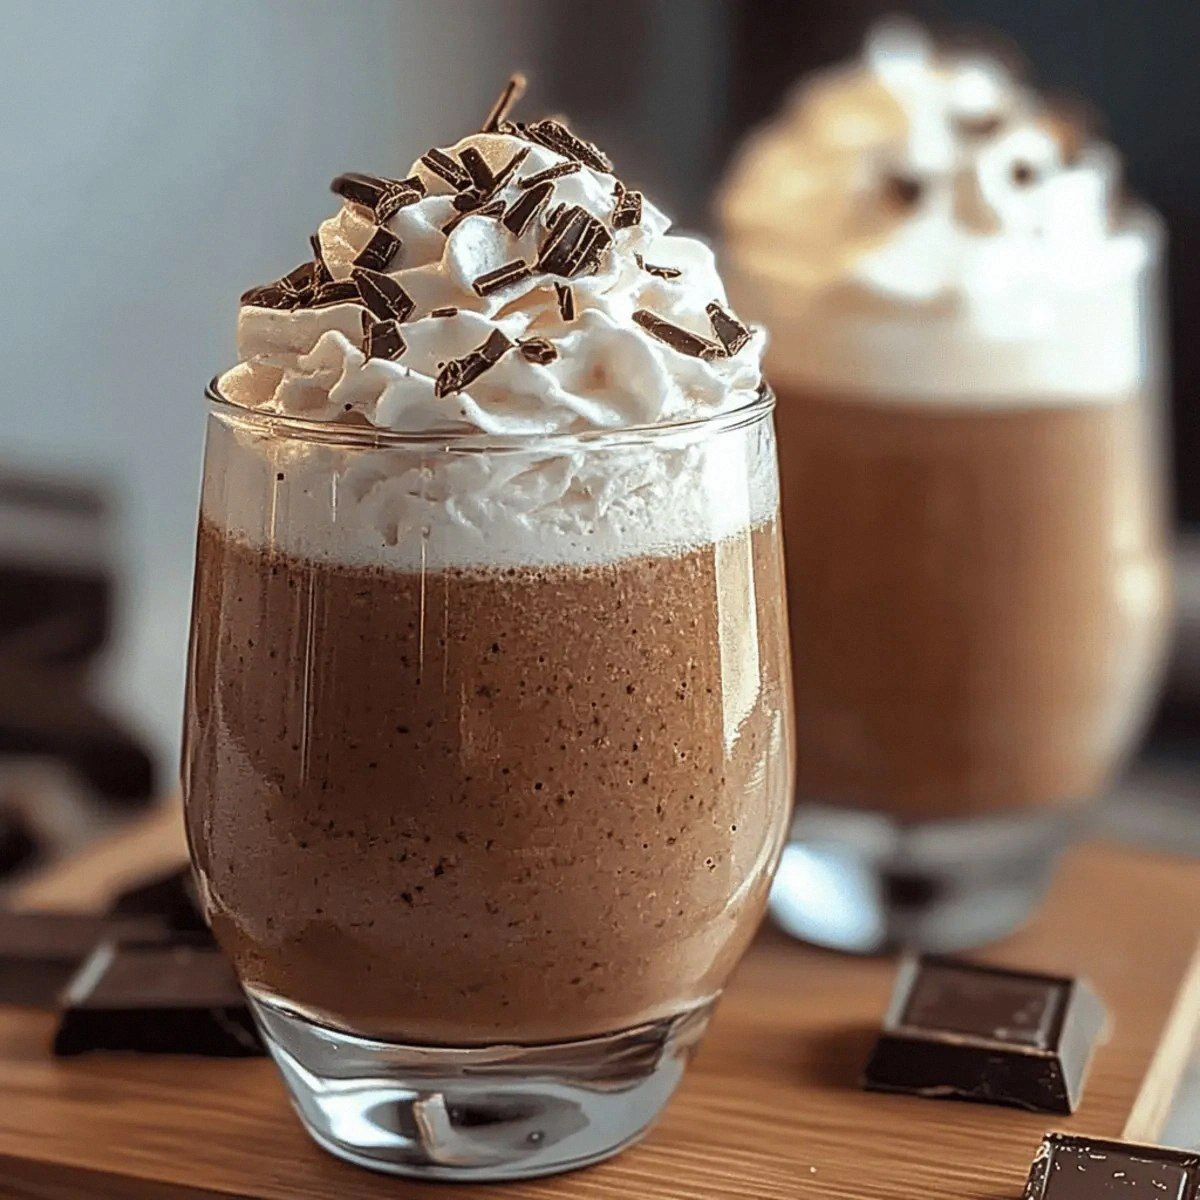
The Grand Finale
We're finishing with chocolate shavings or sprinkles, and this isn't just about making your drink Instagram-worthy (though it absolutely will). The garnish adds textural contrast and visual appeal, but more importantly, it signals to your brain that this is a special treat. When you see those chocolate curls sitting on top of your drink like little chocolate fireworks, your anticipation builds and the first sip becomes that much more satisfying.
Pro tip: make your own chocolate shavings by running a vegetable peeler along the edge of a good quality chocolate bar. The shavings will be fresher, taste better, and melt slightly on contact with the drink, creating little rivers of pure chocolate that run through your frozen creation. Store-bought sprinkles work in a pinch, but if you want to elevate this from great to unforgettable, those fresh shavings are worth the extra two minutes of effort.
Everything's prepped? Good. Let's get into the real action, because the next part is where we transform these simple ingredients into something that'll make you the most popular person at every summer gathering from now until September.
The Method — Step by Step
- Start by pulling out your blender and giving it a quick once-over. You want the pitcher completely clean and dry because any leftover smoothie residue or water droplets will dilute your chocolate intensity, and we simply cannot have that. Position your blender on a stable surface because we're about to create a chocolate tornado in there, and the last thing you want is your blender doing the cha-cha across your counter while you're trying to achieve frozen perfection.
- Okay, ready for the game-changer? Add your ice first, but here's the crucial part — use crushed ice if you have it, or give your ice cubes a quick smash in a plastic bag with a rolling pin. The smaller ice pieces will blend more evenly, creating that smooth, consistent texture that makes restaurant frozen drinks so much better than homemade ones. That sizzle when the ice hits the blender pitcher? Absolute perfection, and it's the sound of summer magic about to happen.
- Pour in your milk next, letting it cascade over the ice like a chocolate waterfall in the making. The cold milk hitting the ice creates that initial chill that starts our drink at the perfect temperature. Make sure you're using cold milk straight from the fridge because room temperature milk will start melting your ice before we even get started, and we'll end up with a watery mess that tastes like chocolate disappointment.
- Now comes the moment of truth — add your hot chocolate mix, but don't just dump it in there like you're feeding livestock. Spoon it in carefully, letting it fall in a light rain over the milk. This prevents clumping, which is the enemy of smooth texture. The powder should sit on top of the liquid initially, creating a little chocolate island that'll blend perfectly once we start the motor.
- Time for our chocolate syrup, and here's where we get a bit artistic. Drizzle it in a spiral pattern over the top of everything — this isn't just for show (though it does look pretty). The syrup will create little chocolate ribbons throughout the drink as it blends, giving us those beautiful marbled swirls that make each sip slightly different and completely addictive.
- This next part? Pure magic. Add your whipped cream right into the blender, but here's the trick — don't stir it in yet. Just let it sit on top like a fluffy cloud waiting to be transformed. The whipped cream will incorporate slowly as we blend, maintaining some of its airy structure while adding that incredible lightness that makes this drink feel like you're sipping on chocolate air.
- Blend everything together for exactly 20-30 seconds, but don't walk away from the blender here. You want to watch as the mixture transforms from a lumpy mess into a smooth, velvety chocolate dream. The sound will change too — it'll go from a harsh grinding to a smooth whirring when everything's perfectly blended. When you see the vortex in the center pulling everything down smoothly, you're there.
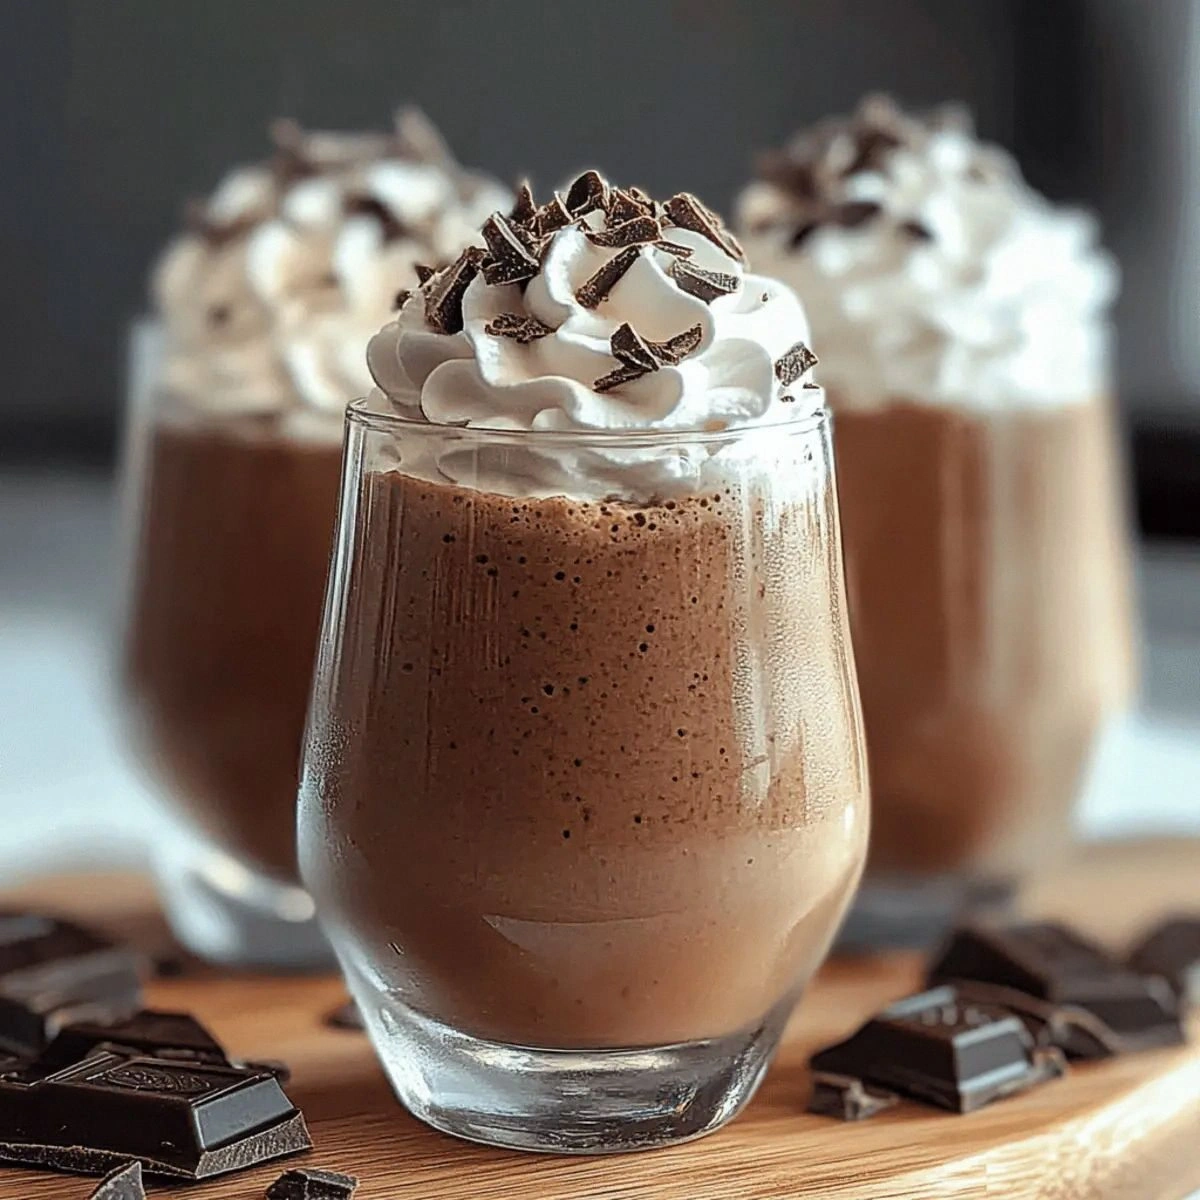
- Now for the fun part — pour your creation into glasses that have been chilling in the freezer for at least 10 minutes. The contrast between the frozen drink and the frosty glass creates that authentic ice cream shop experience that makes everything taste better. The mixture should flow like lava but pile up in the glass, creating those beautiful layers that beg to be Instagrammed.
- Finish with your chocolate shavings or sprinkles, letting them fall like chocolate snow over the top of your creation. Don't be stingy here — this is your moment to go full dessert artist. The garnish will slowly sink into the drink, creating little chocolate pockets that surprise you with extra richness as you sip. Serve immediately with a straw and a long spoon, because you're going to want to savor every last drop of this frozen chocolate paradise.
That's it — you did it. But hold on, I've got a few more tricks that'll take this to another level, including the temperature rule that nobody follows but makes all the difference between good and legendary.
Insider Tricks for Flawless Results
The Temperature Rule Nobody Follows
Here's the thing that separates the pros from the amateurs — everything needs to be cold, but not just cold, it needs to be the RIGHT kind of cold. Your milk should be at 38°F, your ice should be fresh from the freezer (not sitting there half-melted), and yes, even your hot chocolate mix should be stored in a cool, dry place. If any component is too warm, you'll end up with a separated mess that tastes like chocolate water with ice chunks floating in it like tiny bergs of disappointment.
I learned this the hard way when I made a batch for a pool party using milk that had been sitting out while I prepped other food. The drink turned into this weird chocolate soup within minutes, and my friends still tease me about my "chocolate sludge" a year later. Now I keep all my ingredients in the coldest part of the fridge, and I even chill my blender pitcher for 15 minutes before making these. Is it extra? Absolutely. Is it worth it? Every single time.
Why Your Nose Knows Best
Here's something most people never think about — your sense of smell is actually running this whole operation. When you're blending, pause for a second and take a whiff. You should smell fresh chocolate and cold dairy, nothing else. If you detect even a hint of staleness or freezer burn from your ice, start over. Your nose is your quality control manager, and it's never wrong about chocolate.
A friend tried skipping this step once — let's just say it didn't end well. She used ice that had been sitting in her freezer for months, absorbing every smell from frozen fish to leftover lasagna. The resulting drink tasted like chocolate with a fishy afternote that nobody could quite identify but everyone agreed was deeply wrong. Trust your nose, people. It's been perfecting the art of detecting bad food for millions of years.
The 5-Minute Rest That Changes Everything
This might sound counterintuitive for a frozen drink, but hear me out — after you blend, let the drink rest for exactly 3-5 minutes before serving. This isn't about being patient (though it is agonizing). During this rest, the tiny air bubbles you created while blending have a chance to stabilize, and the temperature equalizes throughout the drink. What you get is a smoother, more cohesive texture that doesn't separate into layers of ice and chocolate.
I discovered this by accident when I got distracted by a phone call after blending a batch. When I came back five minutes later, the drink had transformed from good to absolutely magical. The texture was somehow creamier, the flavors had melded perfectly, and it stayed thick and luxurious instead of separating like most frozen drinks do. Now I build this rest into my process, using those few minutes to prep my garnishes or set up serving glasses.
The Garnish Game-Changer
Don't just sprinkle and run — how you garnish actually affects how the drink tastes and feels. For chocolate shavings, use a vegetable peeler on a cold chocolate bar, but here's the key: hold the chocolate at room temperature for exactly 5 minutes before shaving. Too cold and you get dust, too warm and you get chocolate smears. You want those perfect curls that will melt slightly on contact with the cold drink, creating little chocolate rivers throughout.
If you're using sprinkles, go for the long ones called jimmies, not the tiny round balls that taste like colored sugar. Jimmies have actual chocolate in them and will slowly dissolve into your drink, adding little bursts of chocolate as you sip. The round ones just sit there like colorful gravel, adding nothing but artificial color and a weird crunchy texture that ruins the smooth experience.
Creative Twists and Variations
This recipe is a playground. Here are some of my favorite ways to switch things up:
Mexican Chocolate Fire
Add 1/4 teaspoon of cinnamon and a tiny pinch of cayenne pepper to the blender before mixing. The cinnamon adds warmth while the cayenne gives you this incredible slow burn that builds as you drink. It's like a chocolate hug that turns into a gentle slap on the back — surprising but weirdly addictive. My spice-loving friends go absolutely wild for this version, and it's become my signature twist for adult gatherings.
Salted Caramel Dream
Replace the chocolate syrup with caramel sauce and add a generous pinch of flaky sea salt. The salt intensifies all the flavors and creates this incredible sweet-salty-chocolate combination that's basically crack in drinkable form. The caramel adds butterscotch notes that play beautifully with the chocolate, creating a flavor profile so complex people will think you went to culinary school.
Mint Chocolate Avalanche
Add 3-4 fresh mint leaves to the blender (not extract — trust me on this). Fresh mint gives you this bright, clean flavor that makes the whole drink taste like a frozen Thin Mint cookie. The key is using just enough mint to be noticeable but not so much that it tastes like toothpaste. One friend described it as "Christmas morning in a glass," and now she requests it year-round.
Peanut Butter Paradise
Blend in 2 tablespoons of creamy peanut butter for the Elvis Presley of frozen drinks. The peanut butter adds protein and richness that transforms this from a snack into a meal replacement. It's like drinking a frozen peanut butter cup, and it's so satisfying that I've had it for breakfast more times than I'll admit publicly. The peanut butter also helps stabilize the drink, keeping it thick longer.
Espresso Chocolate Fusion
Add 1 shot of cooled espresso or 2 tablespoons of strong coffee. The coffee enhances the chocolate flavor (they're flavor BFFs) while giving you a gentle caffeine boost that makes this perfect for afternoon slumps. It's like a frozen mocha but better, because the coffee notes are subtle and complex rather than bitter and overwhelming.
Coconut Chocolate Bliss
Replace half the milk with full-fat coconut milk and toast some coconut flakes for garnish. This version tastes like a frozen Mounds bar but without that artificial coconut flavor that haunts candy aisles. The coconut milk adds this incredible richness and tropical vibe that makes you want to put on a lei and find a beach somewhere.
Storing and Bringing It Back to Life
Fridge Storage
If you absolutely must store leftovers (though I've never met anyone who had leftovers), pour the drink into an airtight container and refrigerate immediately. It'll keep for up to 2 hours, but honestly, it's never as good as fresh. The texture changes as the ice melts, and you'll lose that magical thickness that makes this drink special. If you do need to store it, give it a quick re-blend with a handful of fresh ice to bring back some of that frozen magic.
Freezer Friendly
Here's a trick that'll blow your mind — pour any leftover into popsicle molds and freeze for chocolate fudgsicles that'll make store-bought ones taste like frozen sadness. The high dairy content prevents them from freezing rock-solid, so they're perfectly creamy and scoopable straight from the freezer. I've started making double batches just to have these popsicles on hand for emergency chocolate cravings.
Best Reheating Method
I can't believe I'm saying this, but if your frozen hot chocolate has melted into chocolate soup, don't panic. Pour it back into the blender with a cup of fresh ice and re-blend for 15-20 seconds. It won't be quite as perfect as the original, but it'll be pretty darn close. Add a tiny splash of milk if it's too thick to blend properly. It's like resurrection for your drink, and it beats starting from scratch when you're desperate for that chocolate fix.