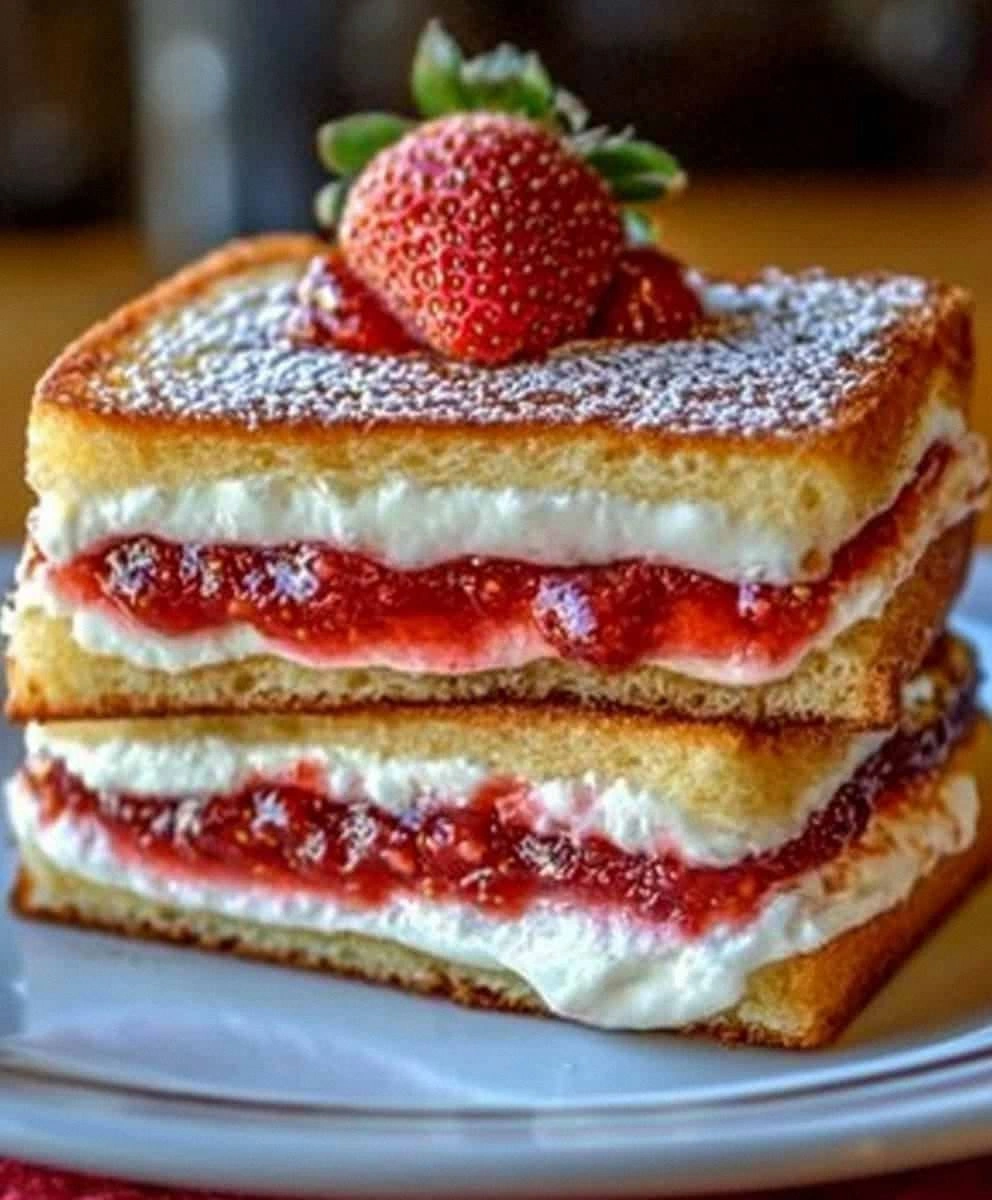
I still remember the day I accidentally created the most outrageous dessert of my life. It was one of those sticky summer afternoons when the air conditioner decided to quit and the only thing in my fridge was a block of cream cheese, some sad strawberries, and a loaf of bread that was one day away from becoming croutons. I was supposed to be making a sensible salad, but somewhere between the heat-induced delirium and my raging sweet tooth, I thought: "What if I could fry cheesecake?" Not bake it, not chill it — but actually fry it like a grilled cheese sandwich that went to dessert heaven. Twenty minutes later, I bit into something so gloriously wrong it had to be right: golden-crispy edges giving way to molten strawberry cheesecake filling that oozed out like edible lava. The first sandwich never even made it to a plate. I stood over the stove, burning my tongue because I couldn't wait, and proceeded to make four more because apparently I have no self-control when faced with fried dessert miracles.
Here's the thing about fried desserts — most people get them completely backwards. They either go too heavy, creating these greasy gut-bombs that sit in your stomach like dessert-shaped regrets, or they go too dainty, ending up with something that tastes like a sad, warm smoothie between bread. This version hits that magical middle ground where the outside shatters like caramelized sugar glass while the inside stays cool and creamy, creating this temperature contrast that makes your brain short-circuit in the best possible way. The strawberries get jammy and concentrated, the cream cheese takes on this almost mascarpone-like richness, and the bread becomes this golden envelope of crunch that makes you wonder why we ever settled for regular French toast.
I've made this for birthday brunches, midnight cravings, and once — memorably — for a potluck where people literally formed a line at my front door after the first person posted about them on social media. They're that dangerous. The best part? You probably have everything you need right now, and if you don't, the grocery store versions work just fine. No fancy equipment, no overnight chilling, no mysterious techniques that require a culinary degree. Just pure, unfiltered indulgence that happens in under thirty minutes from "I want dessert" to "I need to hide these from myself."
What I'm about to share isn't just a recipe — it's a life skill. Because once you know how to turn cheesecake into a handheld, fryable, crowd-destroying phenomenon, you become that person. The one people text at midnight for the recipe. The one whose parties get moved to the front of everyone's social calendar. The one who understands that sometimes the best things in life are the ones that sound slightly insane until you try them. Let me walk you through every single step — by the end, you'll wonder how you ever made it any other way.
What Makes This Version Stand Out
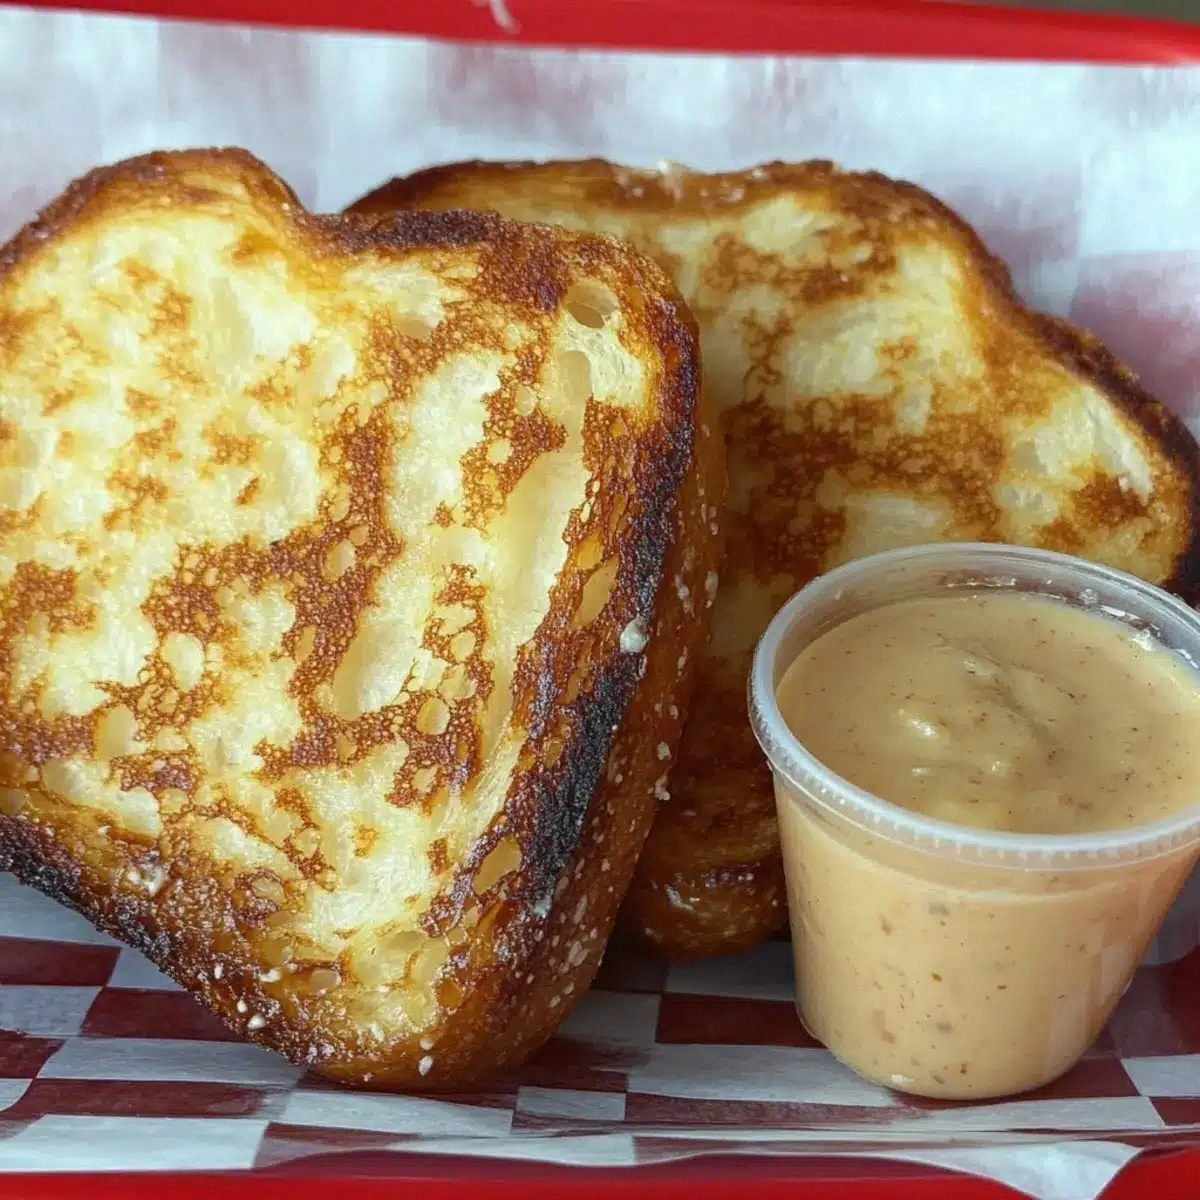
Crunch Factor: We're talking shatteringly crisp exterior that crackles like a crème brûlée crust, thanks to a triple-coating system that would make fried chicken jealous. The flour-egg-breadcrumb sequence creates these micro-layers of crunch that stay crispy even as the filling melts into dreamy cheesecake territory.
Strawberry Magic: Instead of just slapping raw berries in there, we let them macerate for exactly five minutes with a pinch of sugar, turning them into these jammy pockets of concentrated summer flavor that burst like fruit caviar when you bite through the crispy shell.
Temperature Play: The contrast between the hot, crispy exterior and the cool, creamy interior creates this sensory confusion that makes your taste buds do a happy dance. It's like eating a warm brownie with cold ice cream, but somehow more addictive.
Cheesecake Shortcut: No water baths, no springform pans, no overnight chilling. Just cream cheese, sugar, and vanilla whipped into submission in under two minutes. We're hacking the system and making cheesecake happen in real-time, because patience is overrated when dessert is calling.
Bread Revolution: Most recipes use thick-cut bread and end up with raw centers or burnt exteriors. We're using regular sandwich bread, trimmed and rolled thin, which fries evenly and creates the perfect ratio of crispy shell to creamy filling. It's like dessert origami that actually tastes good.
Make-Ahead Champion: You can assemble these babies, freeze them on a baking sheet, then fry them straight from frozen when the craving hits. They're like dessert time capsules waiting to make your future self incredibly happy.
Portion Control (Sort Of): Each sandwich is perfectly portioned, which means you can justify eating two because they're "individual servings." I'm not saying this is health food, but at least you know exactly how much joy you're consuming.
Alright, let's break down exactly what goes into this masterpiece...
Inside the Ingredient List
The Flavor Base
Cream cheese is the star here, and not the low-fat kind that tastes like disappointment and sadness. You want the full-fat block that's been sitting on your counter for exactly thirty minutes — soft enough to whip but not so warm it turns into soup. The powdered sugar dissolves instantly into the cream cheese, creating this smooth, sweet base that tastes like the filling of the world's best cheesecake, minus all the drama of actual cheesecake baking. Vanilla extract is non-negotiable — it's what makes this taste like dessert and not like you're just eating sweetened cream cheese on toast, which honestly doesn't sound terrible either.
Fresh strawberries are where most people mess this up. They grab those giant, tasteless berries that look like they were sculpted from wax and wonder why their sandwiches taste like watery disappointment. You want the small, dark red berries that actually smell like strawberries when you stick your nose in the container. If they're not fragrant, skip them and use frozen berries instead — they've been picked at peak ripeness and will give you better flavor than those sad, grocery store imposters.
The Texture Crew
Bread choice will make or break your sandwich destiny. White sandwich bread is classic because it's soft, neutral, and fries up like dessert clouds. But brioche? Brioche is what happens when bread decides to become cake, and it takes these sandwiches into stratospheric levels of indulgence. The egg content in brioche creates this golden, almost croissant-like exterior that shatters under your teeth while somehow managing to taste like butter and dreams.
Panko breadcrumbs are your ticket to crunch town — they're larger, flakier, and absorb less oil than regular breadcrumbs, which means they stay crispy longer instead of turning into sad, oil-soaked mush. If all you have is regular breadcrumbs, give them a quick pulse in the food processor to break them down slightly smaller. You want them fine enough to coat evenly but not so fine they disappear into the breading abyss.
The Unexpected Star
Cinnamon in the sugar coating is optional but highly recommended — it adds this warm, aromatic note that makes the whole thing taste like someone fried a churro and stuffed it with cheesecake. Just a pinch though; we're not trying to make French toast here (though honestly, that sounds amazing too). The granulated sugar in the final coating isn't just for sweetness — it creates these tiny caramelized pockets that add another layer of crunch and make the whole thing shimmer like it's wearing a sugar disco ball.
The Final Flourish
Vegetable oil is the unsung hero here — you want something neutral that won't compete with your dessert flavors. Peanut oil works great if you're feeling fancy (and aren't feeding anyone with allergies), while canola is the reliable friend that never lets you down. The key is maintaining the right temperature: too low and your bread absorbs oil like a dessert sponge, too high and the outside burns before the inside gets melty. You're aiming for that sweet spot where the oil shimmers but doesn't smoke, around 350°F if you're the type who owns a thermometer, or "medium-high heat" if you're like me and prefer the "drop a breadcrumb in and see if it sizzles" method.
Everything's prepped? Good. Let's get into the real action...

The Method — Step by Step
- Start by letting your cream cheese lounge on the counter like it's on vacation — thirty minutes of softening time means the difference between smooth, dreamy filling and lumpy cream cheese that refuses to cooperate. While it's relaxing, toss your sliced strawberries with a teaspoon of sugar and let them sit. This isn't just busy work — the sugar draws out the juices and concentrates the flavor, turning ordinary berries into strawberry essence. You want them to release their liquid but not turn into complete mush, so five minutes is perfect timing. If you've ever tasted a strawberry that's been kissed by sugar and time, you know this step is non-negotiable.
- In a bowl that makes you happy (because cooking should spark joy), beat your now-room-temperature cream cheese with the powdered sugar and vanilla until it looks like the filling of the world's most perfect cheesecake. Don't be shy here — really whip it good for about a minute until it's lighter than your problems and smoother than your best pickup line. Taste it. I dare you to taste this and not go back for seconds. This is the moment where you'll understand why people risk everything for dessert. If it seems too thick, remember that the strawberries will add moisture, so resist the urge to thin it out.
- Lay out your bread slices like you're hosting the world's most important tea party, and using a rolling pin, gently flatten each slice to about half its original thickness. This isn't about making bread pancakes — you're creating a pliable canvas that won't tear when you roll it around the filling. Think of it as bread origami preparation. Trim the crusts if you're feeling fancy (or if your bread crusts could double as shoe leather), but honestly, the crusts add character and crunch, so I leave them on like the rebel I am.
- Spread a generous layer of cream cheese mixture on each slice, staying about half an inch from the edges because nobody wants exploding sandwich syndrome. Arrange your now-jammy strawberries in a single layer over half the slices — this isn't the time to be stingy, but don't go overboard or your sandwiches will become strawberry volcanoes. Top with the remaining bread slices and press gently to seal, like you're giving them a little sandwich hug. The filling should feel substantial but not like you're trying to stuff a cheesecake into a bread sleeping bag.
- Set up your breading station like a professional with commitment issues: flour in one shallow dish, beaten eggs in another, and breadcrumbs mixed with cinnamon in a third. This isn't just about being organized — it's about creating an assembly line that prevents your hands from becoming breaded themselves. Season each component lightly with salt; yes, even dessert needs a touch of salt to make the sweet sing. The flour helps the egg stick, the egg helps the breadcrumbs stick, and the breadcrumbs create that golden armor that makes angels weep with joy.
- Now for the fun part: dredge each sandwich first in flour (shake off the excess like you're shaking off bad decisions), then dip in egg (let the excess drip off — we're not making egg soup here), and finally press into the breadcrumbs. Don't be gentle — really press those breadcrumbs on there like you're trying to make them part of the bread family. Flip and press again, making sure every millimeter is coated. This isn't the time for light touches; you want full coverage or you'll end up with bald spots that leak cream cheese like dessert lava.
- Heat about half an inch of oil in a heavy skillet over medium-high heat until it shimmers like a dessert mirage. Test it by dropping in a breadcrumb — it should sizzle enthusiastically but not go crazy. Too hot and the outside burns before the inside warms; too cool and you get oil-soaked sadness. You're aiming for that perfect temperature where the sandwiches turn golden in about two minutes per side. If you're unsure, err on the side of slightly cooler — you can always crank it up, but you can't unburn dessert.
- Gently lower your breaded beauties into the oil using tongs or a spatula, being careful not to crowd the pan like an overeager party host. These need personal space to brown evenly. After about two minutes, when the bottom is golden and gorgeous, flip them over like you're turning the page to the best chapter of your life. The second side usually cooks faster, so keep an eye on them. That sizzle when it hits the pan? Absolute perfection. Don't walk away from the stove here — these go from golden to "call the fire department" in about thirty seconds.
- Remove your golden treasures to a paper towel-lined plate and immediately toss them in the cinnamon-sugar mixture while they're still hot. The residual heat helps the sugar adhere, creating this slightly caramelized coating that makes them look like they belong in a bakery window. Let them rest for exactly two minutes — any longer and you'll lose that temperature contrast that makes these special, any shorter and you'll burn your tongue like I do every single time because apparently I never learn. Serve them whole or slice them diagonally if you want to show off that cross-section that looks like dessert geology.
That's it — you did it. But hold on, I've got a few more tricks that'll take this to another level...
Insider Tricks for Flawless Results
The Temperature Rule Nobody Follows
Here's where most people sabotage their sandwich success: they don't let the cream cheese come to room temperature, resulting in a filling that's either lumpy from over-mixing or tears through the bread like an angry cat. Your cream cheese should be spreadable but not melty — think butter that's been out for twenty minutes, not thirty seconds in the microwave (which, let's be honest, always ends in half-melted disaster). If you're impatient (and I feel you), cube the cream cheese and let it sit in a warm spot for ten minutes. A friend tried skipping this step once — let's just say it didn't end well, and her Instagram story from that day is still referred to as "The Lump Incident."
Why Your Nose Knows Best
When selecting strawberries, ignore the giant ones that look like they've been hitting the gym — you want the small, dark berries that smell like summer even through plastic containers. If you can't smell strawberries when you stick your nose near them, they won't taste like anything either. Size matters here, and smaller berries pack more flavor per square inch. In a pinch, frozen strawberries actually work better than those cotton-ball-textured giants they sell in winter. Just thaw them for ten minutes and pat them dry, or better yet, use the juice that collects as extra strawberry flavor in your cream cheese mixture.
The 5-Minute Rest That Changes Everything
After you assemble your sandwiches but before you bread them, let them hang out in the fridge for five minutes. This isn't just chef-y nonsense — it firms up the cream cheese so it doesn't squish out when you're pressing on the breadcrumbs. It's like giving your sandwiches a little spa treatment before their hot oil vacation. During this time, you can set up your breading station and heat your oil, making the whole process feel less like a frantic race and more like a well-orchestrated dessert ballet. Plus, it gives you a moment to appreciate the fact that you're about to fry cheesecake, which is honestly something worth pausing to appreciate.
The Oil Reuse Reality Check
After frying dessert, your oil is basically liquid gold infused with cinnamon-sugar memories. Strain it through cheesecloth or a coffee filter, store it in a jar, and use it for savory frying — it adds this subtle sweetness that makes fried chicken absolutely legendary. Just don't try to use it for more dessert frying unless you want everything to taste like the ghost of sandwiches past. I learned this the hard way when my second batch came out tasting like they'd been fried in a carnival, which sounds fun but actually just tastes confusing.
The Freezer Hack That Saves Lives
These sandwiches are freezer-friendly superstars. Assemble them completely, freeze on a baking sheet until solid, then transfer to a freezer bag. When the craving hits (and it will), drop them frozen into 325°F oil for about three minutes per side. They come out even better than fresh because the center stays cool while the exterior gets crispy, creating that temperature contrast that makes grown adults weep with joy. I keep a stash in my freezer for emergencies, which in my house includes Tuesday nights, Sunday mornings, and any day that ends in "y."
Creative Twists and Variations
This recipe is a playground. Here are some of my favorite ways to switch things up:
The Chocolate Avalanche
Replace half the strawberries with chocolate chips, or better yet, use chocolate brioche for the bread. The chips melt into these lava pockets of chocolate that combine with the cream cheese to create something that tastes like a fried black forest cake. Dark chocolate keeps it sophisticated, milk chocolate makes it taste like childhood, and white chocolate adds this caramelized sweetness that pairs beautifully with the strawberries. Just don't use all three unless you're trying to create a dessert that requires a nap and possibly a confession.
The Tropical Getaway
Swap strawberries for diced mango and add a tablespoon of coconut cream to the filling. Use coconut oil for frying and roll the finished sandwiches in a mixture of sugar and toasted coconut flakes. It tastes like someone took a tropical vacation and brought back the best souvenir ever. The mango gets jammy and concentrated, while the coconut adds this floral note that makes you feel like you're eating dessert on a beach somewhere, even if you're actually standing over a hot stove in your apartment.
The Breakfast of Champions
Add a tablespoon of maple syrup to the cream cheese and use blueberries instead of strawberries. Serve these with a side of bacon for the ultimate sweet-savory breakfast that makes people question everything they thought they knew about morning food. The maple flavor gets concentrated during frying, creating these caramelized edges that taste like the best part of pancakes. I serve these at brunch and watch people try to be polite about taking seconds before finally admitting they want the whole platter.
The Adult Version
Soak the strawberries in a tablespoon of balsamic vinegar and a teaspoon of honey for ten minutes before assembling. The vinegar adds this sophisticated depth that makes the strawberries taste like they went to finishing school. You can also add a teaspoon of your favorite liqueur — Grand Marnier for orange notes, Chambord for raspberry complexity, or bourbon because everything's better with bourbon. Just don't tell your guests about the alcohol unless you want them to eat twice as many.
The Nutty Professor
Add two tablespoons of finely chopped toasted pecans or almonds to the cream cheese mixture, and use almond extract instead of vanilla. Roll the finished sandwiches in cinnamon-sugar mixed with finely chopped nuts for extra crunch. The nuts add this toasty depth that makes the whole thing taste like the best part of coffee cake got fried and became its best self. It's like your grandmother's nut roll and cheesecake had a beautiful, crispy baby.
The S'mores Situation
Use crushed graham crackers instead of breadcrumbs, add mini marshmallows to the filling, and use chocolate bread if you can find it. The graham crackers get toasty and caramelized, the marshmallows melt into gooey pockets, and the whole thing tastes like someone took campfire s'mores to finishing school. Just be careful with the marshmallows — too many and you'll have exploding sandwich syndrome, which sounds fun but actually just makes a mess and burns your fingers.
Storing and Bringing It Back to Life
Fridge Storage
Store any leftovers (though let's be real, there won't be any) in an airtight container in the fridge for up to two days. They'll lose some crunch, but they're still delicious cold or gently reheated. Separate layers with parchment paper or you'll end up with a sticky sandwich pile that requires archaeological skills to separate. The cream cheese filling actually firms up nicely when cold, creating a different but equally addictive texture experience.
Freezer Friendly
These freeze beautifully for up to two months — assemble them completely, freeze on a baking sheet until solid, then transfer to a freezer bag with parchment between layers. Label them or you'll forget what they are and accidentally try to make grilled cheese with cheesecake filling, which sounds like it might work but trust me, it doesn't. When you're ready to indulge, fry them straight from frozen at 325°F for about three minutes per side, or bake them at 400°F for 12-15 minutes if you're feeling virtuous (though let's be honest, if you're eating fried cheesecake, virtue left the building a while ago).
Best Reheating Method
The oven is your friend here — 350°F for about 8 minutes brings back most of the crunch without turning them into oil sponges. Skip the microwave unless you enjoy soggy dessert disappointments. If you're feeling fancy, pop them under the broiler for the last minute to re-crisp the exterior, but watch them like a hawk because they go from perfect to charcoal in the time it takes to check Instagram. For maximum resurrection, reheat them on a wire rack set over a baking sheet — the hot air circulation brings back that fresh-fried magic.