It all began on a rainy Thursday when I was scrambling to salvage a last‑minute dinner after my partner’s office party turned into a culinary disaster. The kitchen was a chaotic mess of over‑cooked pasta, soggy peppers, and a sauce that tasted like it had been left out too long. I stared at the steaming skillet, feeling the heat radiate like a furnace, and thought, “There has to be a better way.” That thought turned into a promise to myself: I would create a version of the classic stuffed pepper that would make even the most skeptical food critic swoon.
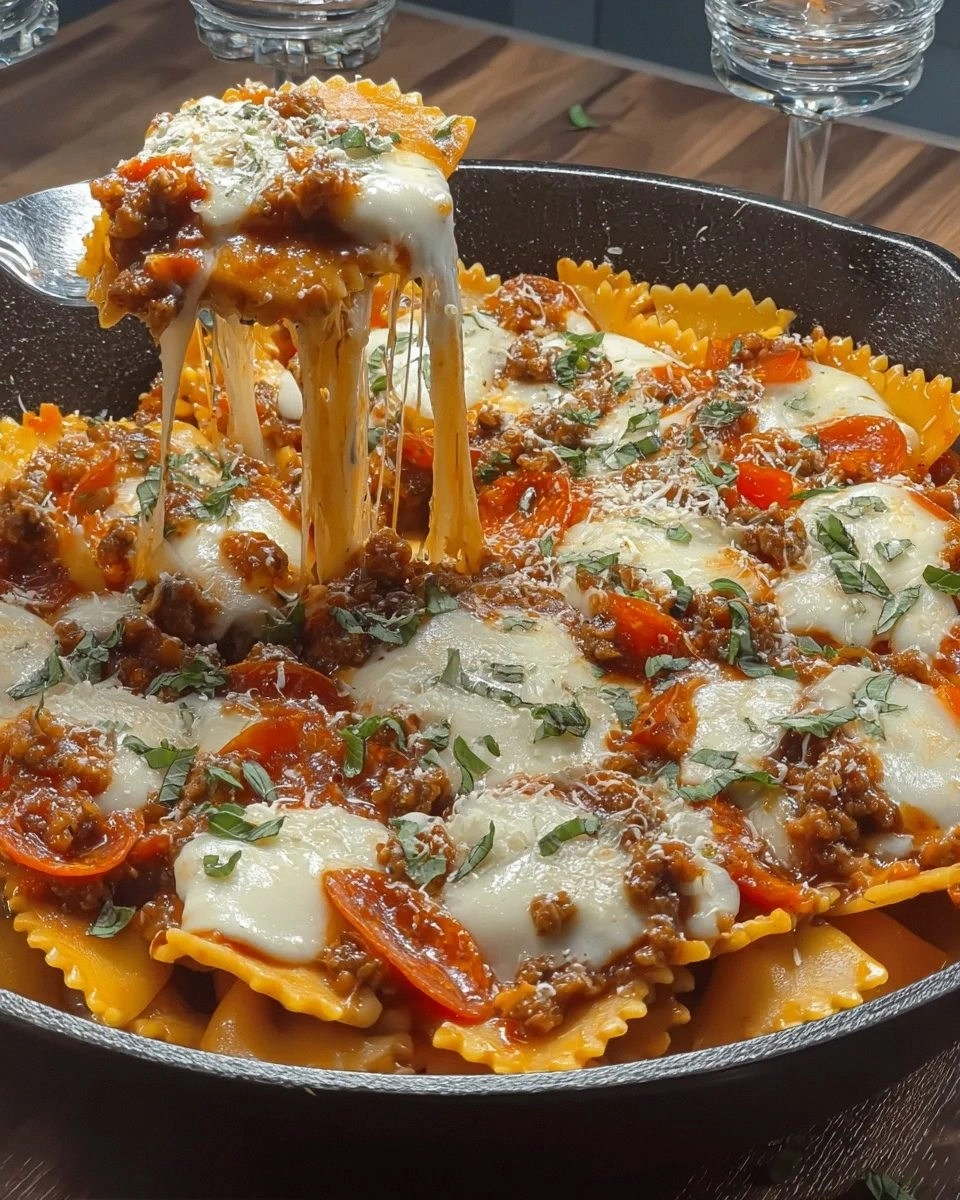
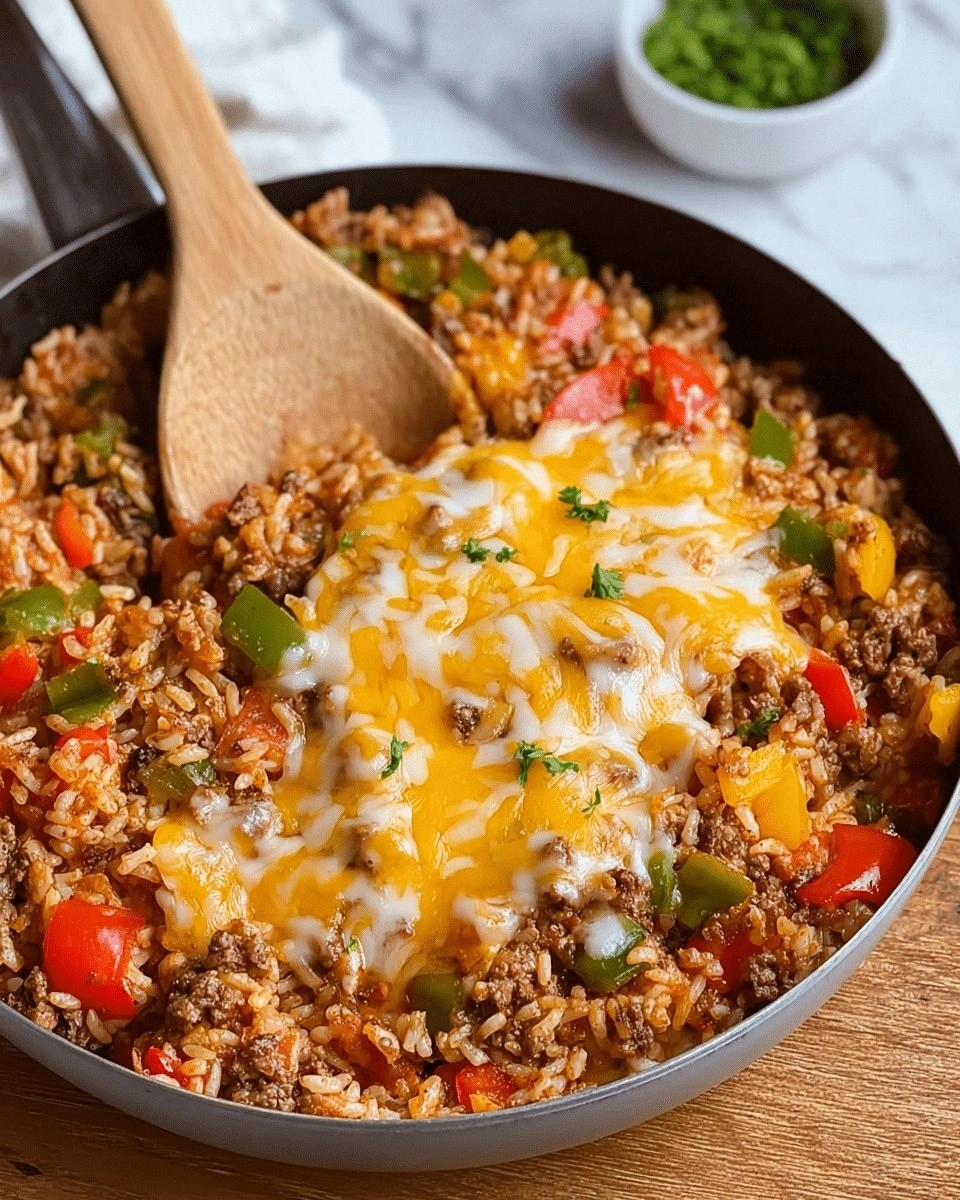
Picture this: bright, peppery bell peppers, their skins crisp like fresh summer air, sliced open to reveal a nest of golden, molten cheese that glistens under the stove’s glow. The aroma that rises is a warm, comforting hug—tomato, garlic, and herbs mingle in a fragrant dance that makes every inhale a tiny celebration. The texture is a symphony of crunchy pepper, creamy cheese, and a subtle crunch from toasted breadcrumbs that add a satisfying bite. The taste is bold yet balanced, with the savory depth of beef, the sharpness of cheddar, and the mellow sweetness of tomato sauce. It’s a dish that feels like a hug from the inside out, and I can’t wait to share every secret that makes it unforgettable.
This isn’t just another pepper recipe; it’s a revelation. I’ve spent months tweaking ratios, experimenting with different cheeses, and discovering the perfect blend of spices that elevate the flavor profile without overwhelming it. I’ve found that a splash of smoked paprika gives the sauce a subtle, smoky undertone that makes the dish feel like a slow‑cooked, rustic meal, even though it’s made in minutes. The use of fresh basil and parsley at the end adds a bright, herbal note that lifts the richness. And the best part? The method is straightforward enough that even a novice can pull it off, while seasoned cooks will appreciate the nuanced touches that elevate the dish.
I dare you to taste this and not go back for seconds. That’s the power of a dish that balances comfort with excitement, and I’m here to walk you through every single step. By the end, you’ll wonder how you ever made it any other way.
What Makes This Version Stand Out
- Flavor Fusion: The combination of mozzarella and cheddar creates a melty, gooey center that pairs perfectly with the tangy tomato sauce.
- Texture Contrast: Crispy pepper skins meet a buttery, breadcrumb‑topped crust that adds a satisfying crunch.
- Ingredient Quality: Using fresh, high‑quality cheese and ground beef ensures depth and richness in every bite.
- Time Efficiency: The entire process takes under an hour, making it ideal for busy weeknights without sacrificing taste.
- Make‑Ahead Friendly: Assemble the skillet the night before, refrigerate, and finish cooking in the morning—perfect for a quick breakfast or dinner.
- Visual Appeal: The vibrant colors of bell peppers and the golden cheese glaze make the dish Instagram‑worthy.
Inside the Ingredient List
The Flavor Base
Ground beef is the heart of this dish, providing a robust, savory foundation that contrasts beautifully with the sweet, acidic tomato sauce. Opt for a leaner cut (80/20) to keep the dish juicy without excess fat. If you’re vegetarian, swap it for crumbled tofu or lentils; the texture will still hold up. Skipping the beef will leave the dish lighter, but it loses the depth that makes it truly comforting.
The Texture Crew
Breadcrumbs are the secret to that coveted crispy top. Toast them lightly in a dry pan until golden; this step releases their natural oils and prevents sogginess. If you prefer a gluten‑free version, use almond flour or crushed cornflakes. The rice adds body and a subtle chew, balancing the richness of the cheese and meat. Cook the rice separately to ensure it’s fluffy and not mushy, which could compromise the dish’s structure.
The Unexpected Star
Parmesan cheese isn’t just a garnish; it’s a flavor enhancer that adds a nutty finish to the sauce. Grate it finely so it melts evenly and coats the pepper interior. If you’re looking for a sharper bite, add a dash of grated aged pecorino. Skipping Parmesan will make the dish slightly milder and less complex.
The Final Flourish
Fresh herbs like basil and parsley bring a bright, aromatic lift that cuts through the richness. Chop them finely so they distribute evenly throughout the skillet. If you’re not a fan of herbs, replace them with a sprinkle of dried oregano or thyme for a different herbal profile. Herbs also add a pop of color, enhancing the dish’s visual appeal.
Everything’s prepped? Good. Let’s get into the real action.
The Method — Step by Step
- Preheat your oven to 375°F (190°C). While it warms, wash the bell peppers, slice off the tops, and remove the seeds. Set the tops aside for later use as a lid. This step ensures the peppers cook evenly and the tops can be reused to cover the skillet, trapping heat and moisture.
- Heat a large skillet over medium heat and drizzle 2 tablespoons of olive oil. Add diced onions and minced garlic, sautéing until the onions become translucent and the garlic releases a fragrant aroma. This base layer builds the flavor foundation that the rest of the dish will build upon.
- Introduce the ground beef, breaking it apart with a wooden spoon. Cook until browned and no longer pink, then season with 1 teaspoon Italian seasoning, 1/2 teaspoon smoked paprika, salt, and pepper to taste. The spices infuse the meat with depth and a subtle smoky undertone that elevates the entire dish.
- Stir in the cooked rice, ensuring it’s evenly distributed with the meat. This adds body and a pleasant chew. The rice also helps absorb excess moisture, preventing the skillet from becoming soggy.
- Pour in one cup of tomato sauce, then fold in half a cup of mozzarella and half a cup of cheddar. Mix gently until the cheeses begin to melt and coat the mixture. The cheeses create a gooey, luscious texture that contrasts with the pepper’s crunch.
- Place the bell pepper halves into the skillet, filling each with the cheese‑meat‑rice mixture. Sprinkle a tablespoon of grated Parmesan on top of each pepper, then drizzle a few drops of olive oil over the entire dish. The Parmesan adds a nutty finish, while the oil keeps the top from drying out.
- Cover the skillet with the pepper tops you set aside earlier, then transfer to the preheated oven. Bake for 25 minutes, or until the peppers are tender and the cheese is bubbling and golden. The oven’s gentle heat allows the flavors to meld while keeping the pepper skins crisp.
- Remove from the oven and let the dish rest for 5 minutes. This pause lets the cheeses set slightly, making it easier to serve without spilling. While it rests, sprinkle chopped basil and parsley over the top for a fresh, herbal finish.
That’s it—you did it. But hold on, I’ve got a few more tricks that will take this to another level.
Insider Tricks for Flawless Results
The Temperature Rule Nobody Follows
Many cooks bake at 400°F, but lowering the temperature to 375°F keeps the peppers from overcooking while allowing the cheese to melt evenly. This subtle change prevents the peppers from becoming mushy and the cheese from burning. I once baked at 400°F and the tops charred, ruining the presentation. Stick to 375°F for a consistent, golden finish.
Why Your Nose Knows Best
The aroma of toasted breadcrumbs is a cue that the crust is ready. When they turn golden brown, the flavor is nutty and the texture is crisp. If you wait too long, they’ll become bitter. Keep a close eye on the color; a quick flip will save the dish from burning.
The 5-Minute Rest That Changes Everything
Letting the skillet rest after baking allows the cheese to set, reducing the risk of it sliding off when you plate the dish. It also lets the pepper’s juices redistribute, making each bite more flavorful. I’ve seen people skip this step and end up with a mess of cheese on the plate.
Add a Splash of Lemon Juice
A squeeze of fresh lemon juice before serving brightens the dish and balances the richness of the cheese. The acidity cuts through the heaviness, creating a harmonious taste profile. I love adding a drizzle of lemon after plating for a fresh, zesty finish.
Use a Cast Iron Skillet
Cast iron retains heat better than stainless steel, ensuring even cooking and a crisp bottom crust. It also adds a subtle smoky flavor that complements the paprika. If you don’t have cast iron, a heavy‑bottomed skillet will work, but the results may be slightly less consistent.
Creative Twists and Variations
This recipe is a playground. Here are some of my favorite ways to switch things up:
Mediterranean Medley
Swap ground beef for crumbled feta and olives, add a splash of white wine to the sauce, and finish with chopped mint. This version brings a tangy, briny flavor that feels like a Mediterranean getaway.
Mexican Fiesta
Replace the tomato sauce with salsa roja, add a dash of cumin, and top with shredded pepper jack cheese. Serve with a dollop of guacamole for a spicy, vibrant twist.
Vegetarian Delight
Use lentils instead of beef, and incorporate sautéed mushrooms for umami. Add a handful of spinach to the filling for extra greens. This version is hearty, protein‑rich, and satisfies the carnivore in all of us.
Cheese Lover’s Dream
Double the amount of cheddar and add a sprinkle of blue cheese on top. The sharpness of blue cheese pairs wonderfully with the mild mozzarella, creating a complex, indulgent flavor.
Low‑Carb Twist
Replace rice with cauliflower rice, and use a low‑fat cheese blend. The dish remains comforting while cutting down on carbs, perfect for a keto or low‑calorie meal plan.
Storing and Bringing It Back to Life
Fridge Storage
Cool the skillet completely before covering it with plastic wrap or an airtight lid. Store in the refrigerator for up to 3 days. The flavors deepen as the dish chills, making it even more delicious when reheated.
Freezer Friendly
Wrap the skillet tightly in foil, then place it in a freezer‑proof container. Freeze for up to 2 months. When ready to eat, thaw overnight in the fridge, then reheat in the oven at 350°F until hot and bubbly.
Best Reheating Method
Reheat in a preheated oven at 350°F for 15–20 minutes, or until the cheese is melted and the peppers are steaming. Add a tiny splash of water before reheating to create steam, which helps the dish regain its original moisture and prevents it from drying out.