Standing in my kitchen, I stared at a half‑baked batch of chicken that had somehow turned out dry and flavorless. The smell of the oven was pleasant, but the chicken itself was a sad, bland gray. I thought, “This is why I love the oven: it can rescue a flop into something amazing.” So I grabbed a handful of panko breadcrumbs, a drizzle of honey, and a splash of barbecue sauce and decided to experiment.
The first thing I noticed was the way the honey glistened on the chicken, like a honeycomb on a sunny day. The sweet aroma rose from the oven, mingling with the smoky scent of barbecue sauce and the faint, comforting hint of olive oil. The sizzling sound of the chicken as it hit the pan was almost music to my ears, a promise that something delicious was about to happen. The texture was already hinting at a crisp exterior that would crack like thin ice when bitten into.
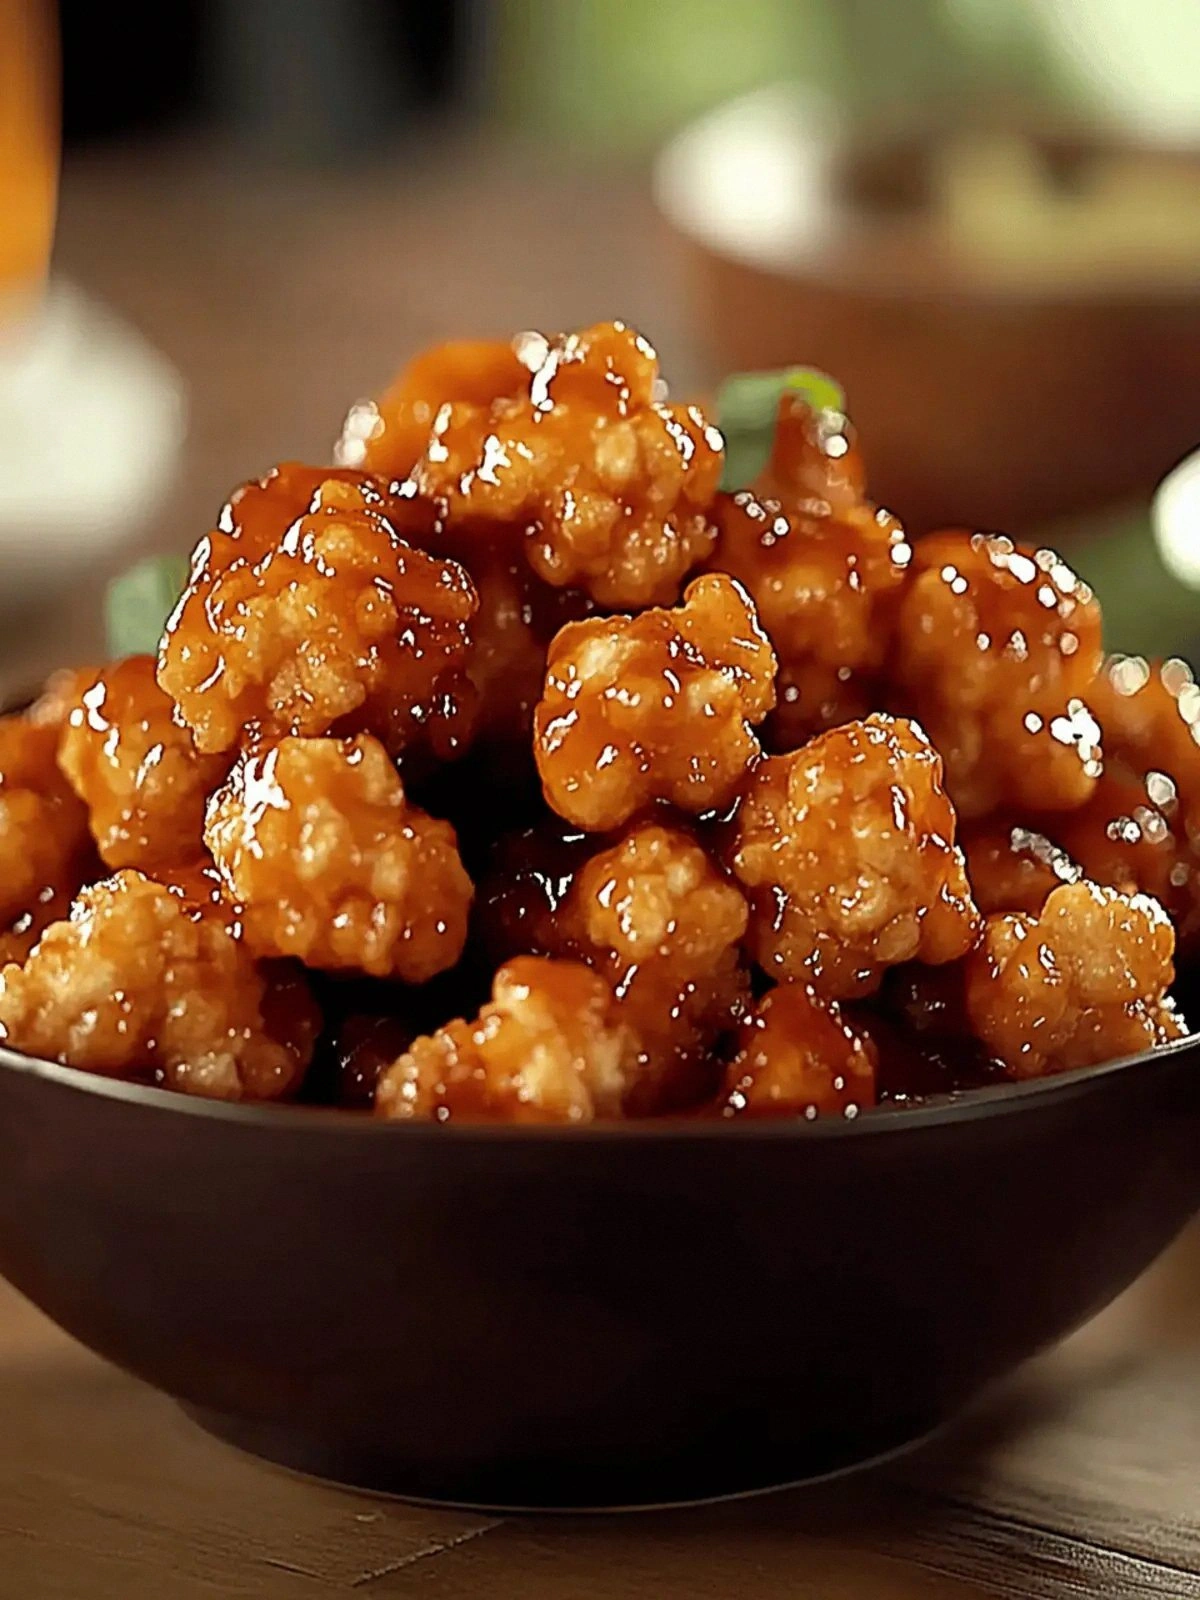
If you’ve ever wrestled with plain chicken that turns out as dry as a desert, this version is a revelation. The honey and barbecue sauce create a glaze that coats each piece like velvet, sealing in moisture while adding a caramelized crunch. The panko breadcrumbs give an airy, crunchy bite that pops in the mouth, while the olive oil keeps the coating from sticking and adds a subtle richness. I dare you to taste this and not go back for seconds; the combination of sweet, smoky, and crunchy will have you reaching for more.
This isn’t just a recipe; it’s a culinary confession. I’ll be honest — I ate half the batch before anyone else got to try it, and that was the best mistake of the night. The secret, though, isn’t in the ingredients alone; it’s in the technique that transforms ordinary chicken into a showstopper. Picture yourself pulling this out of the oven, the whole kitchen smelling incredible, and the first bite releasing a burst of flavor that feels like a hug.
But before you even touch the oven, let me walk you through every single step — by the end, you’ll wonder how you ever made it any other way. This is hands down the best version you'll ever make at home, and I’m about to reveal the trick that makes it so effortless. If you’ve ever struggled with crispy chicken, you’re not alone — and I’ve got the fix. The moment you see that golden glaze, you’ll know you’re onto something special.
What Makes This Version Stand Out
- Taste: This version delivers a complex flavor profile that balances sweet honey, smoky barbecue, and a hint of citrus from the panko. The glaze caramelizes to a glossy, caramelized sheen that keeps the chicken juicy inside. The result is a dish that feels indulgent yet surprisingly light.
- Texture: The panko breadcrumb coating creates an airy crunch that snaps like a crisp bubble. The honey glaze thickens into a thin, sticky coating that adheres to the chicken without making it soggy. The contrast between the crisp exterior and the tender interior is a satisfying mouthfeel.
- Simplicity: Only a handful of pantry staples are required, so you can whip this up in under 30 minutes. No fancy equipment or time‑consuming prep steps are needed. This recipe is a perfect example of how less can be more in the kitchen.
- Crowd Appeal: Game‑day, parties, or a quick weeknight snack, this dish wins the crowd. The sweet‑savory combo is universally loved, and the crispy texture makes it shareable. Even the pickiest eaters will be tempted to try a bite.
- Make‑ahead Potential: You can bake the chicken in advance and reheat it in the oven for a quick meal. The glaze stays intact, and the crunch remains surprisingly fresh. It’s an excellent option for meal prep or for guests that arrive late.
- Ingredient Quality: Using fresh, high‑quality chicken and real barbecue sauce makes all the difference. The honey should be a pure, unfiltered variety to achieve the right caramelization. Small details like these elevate a simple recipe to a standout.
Alright, let's break down exactly what goes into this masterpiece...
Inside the Ingredient List
The Flavor Base
At the heart of this dish lies the marriage of honey and barbecue sauce. Honey adds a natural sweetness that caramelizes beautifully, while the sauce introduces smoky, tangy depth. Together, they form a glaze that clings to the chicken, sealing in moisture. If you skip either, you lose the signature sweet‑savory balance that defines this recipe.
The Texture Crew
Panko breadcrumbs are the secret to that airy, crispy coating. Unlike fine breadcrumbs, panko flakes absorb less oil, resulting in a lighter crunch that doesn’t become soggy. The olive oil serves a dual purpose: it helps the breadcrumbs adhere and adds a subtle richness that rounds out the flavor. Skipping the oil would make the coating dry and less flavorful.
The Unexpected Star
One pound of boneless, skinless chicken breasts might seem ordinary, but selecting fresh, high‑quality chicken makes a world of difference. Look for a firm texture and a light pink color; avoid any that feel rubbery or have a strong fishy odor. If you prefer a leaner cut, you can use thighs, but be prepared for a slightly different texture.
The Final Flourish
Salt and pepper are the unsung heroes that elevate every ingredient. They enhance the natural flavors without overpowering them. The amount is to taste, but a light dusting before coating ensures each bite is balanced. If you’re watching sodium, you can reduce the salt slightly or use a low‑sodium barbecue sauce.
Everything's prepped? Good. Let's get into the real action...
The Method — Step by Step
- Preheat your oven to 400°F (200°C). Line a baking sheet with parchment paper or a silicone mat to prevent sticking. This step ensures even cooking and makes cleanup a breeze.
- Pat the chicken breasts dry with paper towels; this helps the coating adhere better. Season both sides lightly with salt and pepper, then set aside while you prepare the coating.
- In a shallow bowl, whisk together the honey and barbecue sauce until smooth. The mixture should be thick enough to coat but not runny; if it’s too thin, let it sit for a few minutes to thicken.
- Place the panko breadcrumbs in a second shallow bowl. Add the olive oil, then toss until the crumbs are lightly coated. This oil coating creates a barrier that keeps the crumbs from absorbing too much moisture.
- Dip each chicken breast first into the honey‑barbecue mixture, allowing excess to drip off, then dredge it in the oiled panko. Press the crumbs onto the surface to form an even layer. Watch out: if you press too hard, the coating can become too thick and clump.
- Place the coated chicken on the prepared baking sheet. Make sure each piece is spaced apart to allow hot air to circulate and crisp the coating.
- Bake for 18–20 minutes, then flip the chicken and bake for an additional 10–12 minutes. The chicken should reach an internal temperature of 165°F (74°C) and the coating should be golden brown and crisp.
- Remove from the oven and let the chicken rest for 5 minutes. This allows the juices to redistribute, ensuring each bite stays moist.
- Serve immediately, optionally garnishing with fresh herbs or a squeeze of lime for an extra zing.
That's it — you did it. But hold on, I've got a few more tricks that'll take this to another level...
Insider Tricks for Flawless Results
The Temperature Rule Nobody Follows
Many people bake at 375°F, but 400°F is the sweet spot for crisping the panko while keeping the chicken juicy. The higher temperature ensures the coating forms a crust quickly, trapping the steam inside the meat. If you’re using a convection oven, reduce the temperature by 25°F to avoid over‑browning.
Why Your Nose Knows Best
Before you flip the chicken, pause and inhale the aroma. A sweet, caramelized scent means the glaze has set; a raw, honeyy smell means you need more time. Trusting your nose can prevent undercooked or over‑baked pieces.
The 5‑Minute Rest That Changes Everything
Letting the chicken rest after baking allows the juices to redistribute. Skipping this step can leave the meat dry and the coating brittle. Even a quick 5‑minute pause makes a noticeable difference.
Use a Wire Rack for Even Heat
Elevating the chicken on a wire rack while baking creates airflow around each piece, ensuring uniform crispness. This simple trick eliminates the need to flip the chicken for even cooking.
Keep the Sauce Warm
Warm the barbecue sauce slightly before mixing with honey. A cold sauce can cause the honey to solidify, making it difficult to coat evenly. Warm sauce also enhances the smoky flavor.
Creative Twists and Variations
This recipe is a playground. Here are some of my favorite ways to switch things up:
Spicy Sriracha Honey
Swap half the honey for sriracha to add heat. The spicy kick balances the sweetness, creating a bold flavor profile. Great for those who like a little fire.
Herb‑Infused Panko
Mix dried thyme, rosemary, or oregano into the panko before coating. The herbs add aromatic depth and a Mediterranean feel. Serve with a side of tzatziki for a Greek twist.
Maple‑Glazed Version
Replace honey with pure maple syrup for a richer, caramel flavor. The syrup’s thicker consistency results in an even more glossy glaze. Perfect for a cozy fall snack.
Almond Crust
Use finely chopped toasted almonds in place of panko. The nutty crunch offers a different texture and a nutty aroma. Pair with a side of roasted sweet potatoes.
Asian Fusion
Substitute the barbecue sauce with hoisin or teriyaki sauce and add a splash of sesame oil. The sweet and savory notes create an Asian‑inspired glaze. Garnish with sliced scallions for freshness.
Cheesy Finale
Sprinkle shredded cheddar or parmesan on top of the chicken during the last 5 minutes of baking. The cheese melts into a gooey topping that complements the sweet glaze. A perfect comfort‑food upgrade.
Storing and Bringing It Back to Life
Fridge Storage
Store leftovers in an airtight container for up to 3 days. Keep the chicken on a paper towel to absorb excess moisture. When ready to eat, reheat in a toaster oven at 350°F until warmed through.
Freezer Friendly
Wrap each piece individually in foil and place in a freezer bag. Freeze for up to 2 months. Thaw overnight in the fridge before reheating.
Best Reheating Method
Reheat in a preheated oven at 375°F for 10 minutes, or until the coating is crisp again. Add a tiny splash of water to the pan before reheating; the steam helps restore moisture and crispness.