Picture this: I’m standing in a cramped kitchen, the oven preheating to a blistering 475°F, and my friends are eyeing my culinary ambitions with a mix of curiosity and skepticism. I’ve spent the last week experimenting with pizza toppings that go beyond the usual pepperoni, mozzarella, and marinara, and the result? A dish that feels like a secret handshake between garlic and dill pickles. The aroma that fills the room—sharp, buttery, and slightly vinegary—makes the whole house buzz with anticipation.
I’ve been a self‑proclaimed “garlic lover” for years, but this recipe takes that affection to a whole new level. I first discovered the idea after a disastrous attempt at a classic garlic pizza that ended with a soggy crust and a garlic smell that lingered in the fridge for days. That experience taught me that garlic needs a partner that can cut through its intensity and bring a contrasting brightness. Enter the dill pickle, a crunchy, tangy, and unexpectedly harmonious companion.
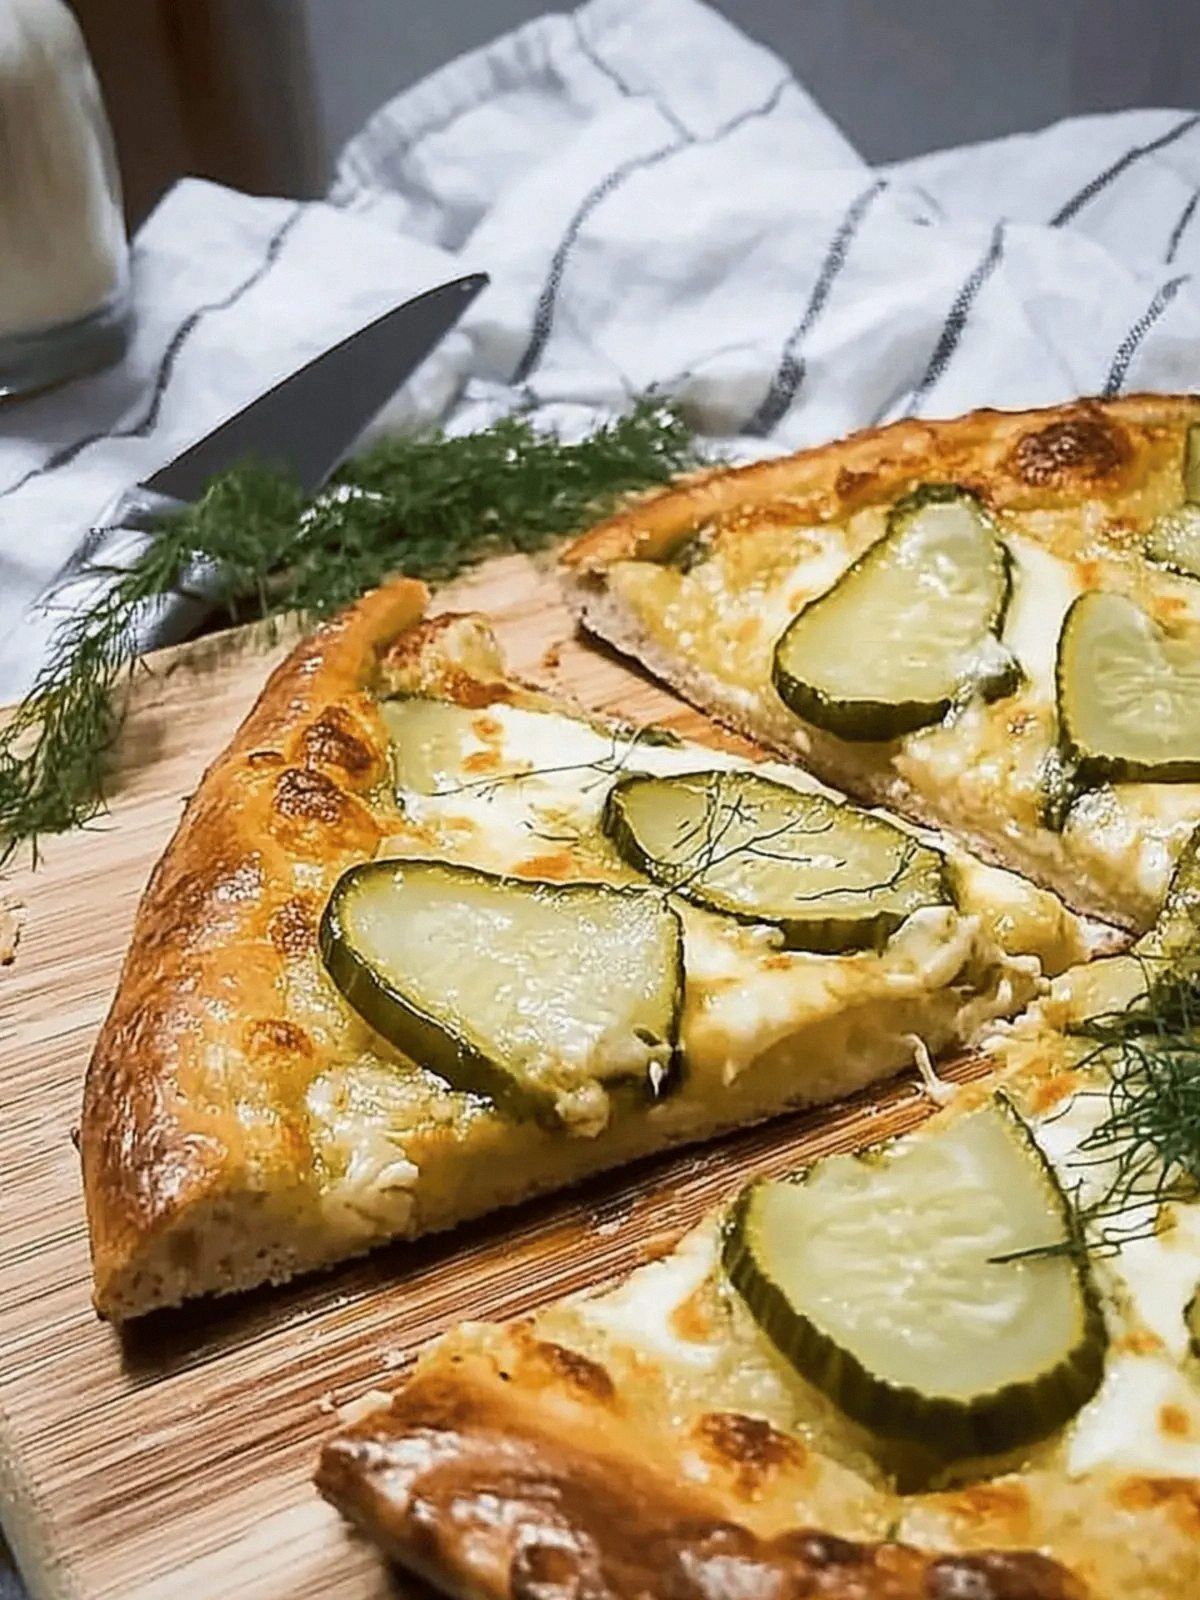
The first bite is a revelation: the crust is crisp, the cheese melts into a velvety blanket, and the pickles add a pop of bite that shatters the silence of a dull pizza night. The garlic, sautéed just until golden, releases a sweet aroma that lingers like a memory you can taste. The dill, fresh and fragrant, lifts the whole flavor profile with a green, herbaceous note that feels like a breath of fresh air. I dare you to taste this and not go back for seconds.
What makes this version stand out is that it doesn’t rely on pre‑made sauces or heavy toppings. Instead, it uses a simple olive oil and garlic base that coats the crust like velvet, then layers on cheese, pickles, and dill. The result is a harmonious balance of textures—crunchy, gooey, and slightly crunchy—paired with a flavor profile that is both familiar and daring. I’ll be honest — I ate half the batch before anyone else got to try it.
Most recipes get this completely wrong by adding pickles after baking, which can cause them to mush and release brine that drenches the pizza. This version flips that script by slicing the pickles thin, patting them dry, and tossing them in the olive oil and garlic mixture before they hit the oven. That simple tweak keeps the crunch intact and ensures the pickles’ tangy bite remains front and center. The dill is added at the very end, just before the pizza exits the oven, so its fresh, herbal aroma is preserved.
If you’ve ever struggled with balancing bold flavors on pizza, you’re not alone — and I’ve got the fix. This recipe is a playground where garlic, dill pickles, and fresh dill collide in a way that feels both adventurous and comforting. The result is a pizza that’s hands down the best version you’ll ever make at home, and it’s so simple that you’ll wonder why you never tried it before. Picture yourself pulling this out of the oven, the whole kitchen smelling incredible, and a crowd of friends cheering for an encore.
Let me walk you through every single step — by the end, you'll wonder how you ever made it any other way. The journey starts with a few simple ingredients, a bit of prep, and a willingness to embrace a little culinary risk. The next part? Pure magic. Stay with me here — this is worth it.
What Makes This Version Stand Out
- Flavor Balance: The sharpness of garlic is tempered by the sweet, briny crunch of dill pickles, creating a symphony of taste that feels both familiar and daring.
- Texture Contrast: A crisp, pre‑baked crust provides the ideal base, while the cheese melts into a silky blanket and the pickles remain crunchy, giving each bite a dynamic feel.
- Simplicity: No sauce, no heavy toppings, just a handful of high‑quality ingredients that shine individually and together.
- Ingredient Quality: Using fresh dill and good‑quality cheese elevates the dish from ordinary to extraordinary.
- Make‑Ahead Potential: Assemble the pizza the night before and bake it fresh in the morning—perfect for busy weekdays.
- Versatile Crowd‑Pleaser: It works as an appetizer, a light dinner, or a party platter that will have everyone asking for the recipe.
- Unique Twist: Most pizzas stick to tomato sauce; this one uses garlic‑oil as the base, a rare but delicious departure from convention.
Alright, let's break down exactly what goes into this masterpiece…
Inside the Ingredient List
The Flavor Base
The foundation of this pizza is a simple olive oil and garlic mixture that coats the crust like velvet. The olive oil not only adds richness but also helps the garlic release its full aroma without burning. If you skip the oil, the garlic will cling to the crust and risk burning, leaving a bitter taste. For an extra layer of flavor, consider adding a pinch of crushed red pepper flakes to the oil.
The Texture Crew
The cheese is the glue that holds everything together, but it’s also the star of the show. A blend of mozzarella and provolone gives a perfect balance of meltiness and flavor. If you prefer a sharper bite, swap in cheddar or even a smoked gouda. The cheese should be shredded or sliced thinly to ensure even melting.
The Unexpected Star
Dill pickles are the game‑changer that turns this pizza into something unforgettable. Their bright, vinegary crunch contrasts the creamy cheese and the buttery garlic. If you’re a fan of extra tang, use pickles with a higher brine content, but be sure to pat them dry to avoid sogginess. For a subtle twist, try adding a few slices of sweet corn or roasted red peppers.
The Final Flourish
Fresh dill is the finishing touch that brings a bright, herbal note to the dish. It’s added at the very end, just before the pizza comes out of the oven, so its aroma stays fresh. A handful of chopped dill is enough to elevate the entire flavor profile. If you don’t have fresh dill, a sprinkle of dried dill works, but the flavor will be less vibrant.
Everything's prepped? Good. Let's get into the real action…
The Method — Step by Step
- Preheat the oven. Set it to 475°F (245°C) and place a pizza stone or baking sheet in the middle rack. Let the stone heat for at least 30 minutes to ensure a crisp crust. The high heat will give the pizza that desirable, slightly charred edge. While the oven heats, gather your ingredients.
- Prepare the garlic‑oil base. In a small saucepan, heat the olive oil over medium heat until shimmering. Add the minced garlic and sauté until it turns a golden amber, about 2–3 minutes. The garlic should release a sweet fragrance, not a burnt one. Remove from heat to prevent overcooking.
- Brush the crust. Place the prepared pizza crust on a parchment paper sheet. Spread the garlic‑oil mixture evenly over the surface, leaving a small border for the crust. This coating locks in moisture and creates a flavorful base that carries the toppings.
- Add the cheese. Sprinkle the shredded or sliced cheese evenly over the garlic‑oil. Use a generous amount to ensure every bite has that gooey, melty quality. The cheese will also help the pickles stay in place.
- Distribute the pickles. Arrange the sliced dill pickles on top of the cheese. Make sure they’re evenly spaced so each slice of pizza gets a bite of crunch. The pickles should be thin to keep their crunch after baking.
- Season lightly. Sprinkle a pinch of salt and a few cracked peppercorns over the top. The seasoning will enhance the flavors without overpowering the dill’s freshness. This is the moment of truth—watch how the colors blend.
- Bake the pizza. Slide the parchment sheet onto the preheated stone or baking sheet. Bake for 10–12 minutes, or until the cheese is bubbly and the crust edges are golden brown. Keep an eye on the edges—they should start pulling away from the parchment as they crisp.
- Finish with dill. Remove the pizza from the oven and immediately sprinkle the fresh dill over the top. The heat will release the dill’s aroma, giving the pizza a fresh, herbal note. Let the pizza rest for 2 minutes before slicing so the cheese sets slightly.
- Serve and enjoy. Slice the pizza into wedges and serve hot. Pair it with a crisp salad or a chilled glass of white wine for a complete meal. The combination of garlic, dill pickles, and fresh dill will have your guests asking for a second slice.
That's it — you did it. But hold on, I've got a few more tricks that'll take this to another level…
Insider Tricks for Flawless Results
The Temperature Rule Nobody Follows
Many home bakers bake pizzas at 400°F, but that temperature often results in a soggy crust. Baking at 475°F ensures a blistered, crisp exterior while keeping the cheese perfectly melted. If you don’t have a pizza stone, place a baking sheet on the lowest rack for a similar effect. This small tweak can transform a good pizza into a great one.
Why Your Nose Knows Best
The first scent you detect when the pizza is baking is a sign of success. A sweet, buttery aroma indicates the garlic is just right, while a sharp, tangy smell from the pickles shows they’re fresh. If you notice a metallic or burnt scent, pull the pizza out immediately.
The 5-Minute Rest That Changes Everything
Letting the pizza rest for exactly five minutes after baking allows the cheese to set and the flavors to meld. During this brief pause, the steam inside the pizza condenses, giving the crust a slight moisture that keeps it from becoming overly dry. Skip this step and you’ll end up with a pizza that feels under‑cooked.
Slicing Technique for Even Bite
Use a pizza cutter or a sharp knife to slice the pizza into even wedges. This ensures each slice has a balanced mix of crust, cheese, pickles, and dill. A consistent slice size also makes it easier to share and reduces waste.
Cheese Selection Matters
Choosing the right cheese can make or break the pizza. A blend of mozzarella and provolone offers a creamy texture with a mild flavor that won’t overpower the dill. If you prefer a sharper taste, a sprinkle of aged cheddar adds depth. The key is to use a cheese that melts smoothly.
Using a Food Processor for Dill
If you’re short on time, pulse fresh dill in a food processor for a few seconds. The result is finely chopped, which distributes the flavor more evenly across the pizza. Just be careful not to over‑process; you want small flecks, not a puree.
Creative Twists and Variations
This recipe is a playground. Here are some of my favorite ways to switch things up:
Smoky BBQ Garlic Pizza
Swap the olive oil for a thin layer of smoky BBQ sauce before adding the garlic. The sauce adds a sweet, smoky undertone that complements the dill pickles. Finish with a sprinkle of smoked paprika for an extra kick.
Mediterranean Herb Delight
Replace the fresh dill with chopped fresh basil and oregano. Add a few capers for a briny burst. This version leans into Mediterranean flavors while keeping the garlic base intact.
Spicy Jalapeño Pickle Pizza
Add thinly sliced jalapeños along with the pickles for a fiery twist. The heat pairs well with the sharpness of the dill. A squeeze of lime after baking brightens the dish.
Vegan Version
Use a dairy‑free cheese blend and replace the garlic‑oil with a vegan butter‑olive oil mix. The pickles stay the same, and the fresh dill adds the same herbal punch. The result is a plant‑based pizza that still delivers on flavor.
Breakfast Pizza
Top the pizza with a fried egg after baking and sprinkle with chives. The runny yolk adds richness while the dill pickles keep the dish refreshing. Serve with a side of toast for a hearty breakfast.
Dessert Pizza
Swap the cheese for ricotta and drizzle honey over the top after baking. Add a handful of fresh berries and a sprinkle of cinnamon. The sweet and savory combo turns this into a dessert‑style pizza.
Storing and Bringing It Back to Life
Fridge Storage
Cool the pizza completely before wrapping it tightly in plastic wrap or aluminum foil. Store it in the refrigerator for up to 3 days. When you’re ready to eat, reheat in a pre‑heated oven at 350°F for 10 minutes to restore crispness.
Freezer Friendly
After cooling, wrap the pizza in foil and place it in a freezer bag. Freeze for up to 2 months. Thaw overnight in the fridge, then reheat in the oven at 375°F for 12 minutes. The crust stays crisp, and the pickles retain their bite.
Best Reheating Method
To reheat, preheat the oven to 375°F and place the pizza on a baking sheet. Add a splash of water to the bottom of the pan to create steam; this keeps the cheese from drying out. Bake for 10–12 minutes, or until the crust is golden and the cheese is bubbly.