I was staring at a ruined batch of brownies that had turned into a sticky, flat pancake the size of my living room floor. The oven had betrayed me, and the batter had been overmixed until the cocoa powder had surrendered to the flour like a defeated army. In the middle of the chaos, a friend dared me to create something that would make my taste buds sing louder than the kitchen alarm I’d just set off. I laughed, grabbed a handful of glutinous rice flour, and decided that this was the moment to rewrite brownie history. The kitchen smelled like a battlefield of chocolate and butter, but the anticipation was sweeter than the scent of fresh coffee. The moment the batter hit the pan, I knew I was about to embark on a culinary adventure that would leave me craving seconds, or perhaps dozens.
Picture this: a dark, glossy batter that clings to the sides of a pan like a midnight cloak, the faint hiss of butter melting into cocoa, and the faintest scent of vanilla that wafts up like a gentle promise. Your ears catch the subtle crackle as the edges start to brown, a sound that feels like the opening chord of a symphony. Your eyes track the transformation from a liquid swirl to a firm, almost jade-like slab, each inch thickening with the promise of gooey, chewy delight. Your hands, wrapped in a towel, feel the heat radiating from the pan, a comforting, almost tangible warmth that signals the brownies are on the brink of perfection. Your nose catches the caramelized sugar, the chocolate’s deep, almost metallic undertones, and the faint, sweet perfume of toasted rice flour. Finally, when you lift the pan, the aroma fills the room, a heady perfume that makes you want to inhale it like a lover’s kiss.
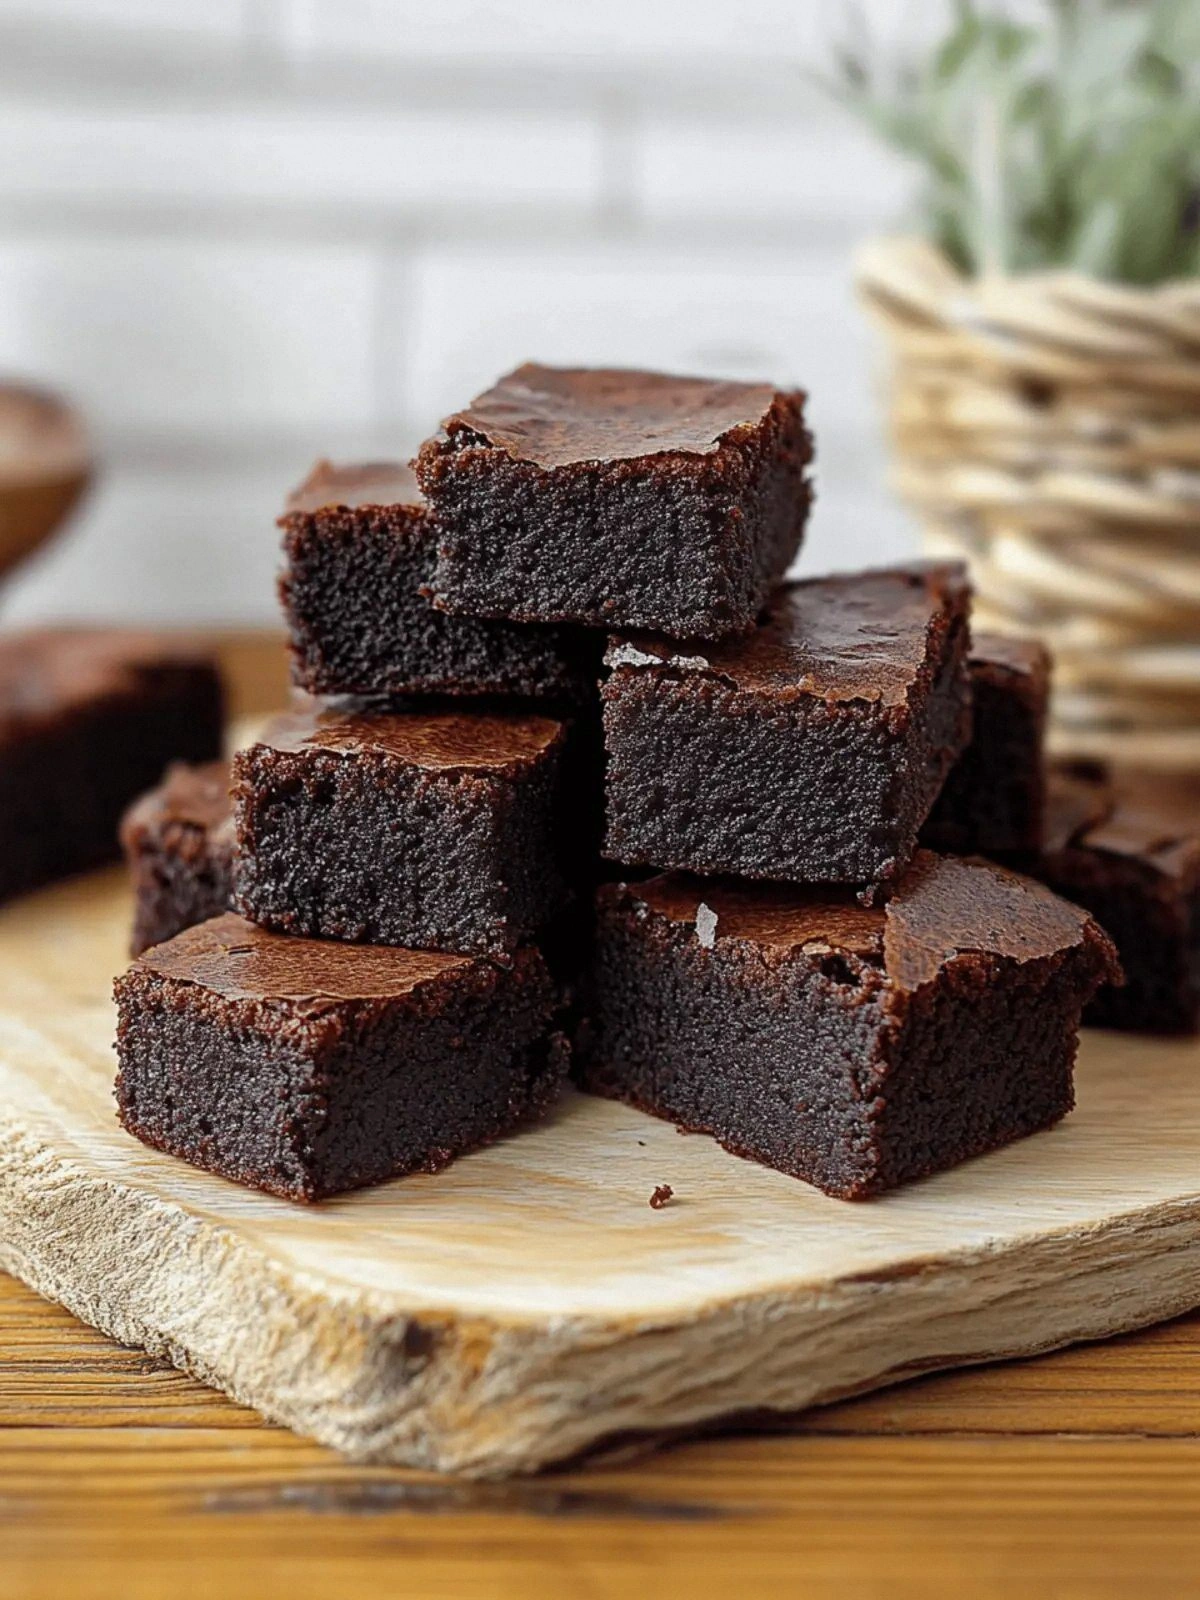
What makes this version stand out? It’s not just the glutinous rice flour that gives these brownies a unique, chewy texture, but the way the dark chocolate and cocoa powder are blended to create a depth of flavor that feels like a midnight stroll through a chocolate forest. The brownies are a marriage of crisp edges that shatter like thin ice and a center that melts in your mouth like a velvety dream. The recipe’s simplicity is deceptive; each ingredient is chosen to elevate the others, creating a symphony of taste that is both bold and balanced. The use of dark chocolate, rather than milk chocolate, gives the brownies a slightly bitter undertone that plays beautifully against the sweetness of the sugar. And the final touch—chocolate chunks that burst with molten richness—turns every bite into an explosion of textures and flavors. In short, this is hands down the best version of a brownie you’ll ever make at home, and I dare you to taste this and not go back for seconds.
I’m about to walk you through every single step, from the first whisk to the final dusting of cocoa. By the end, you’ll wonder how you ever made brownies any other way. This recipe isn’t just a set of instructions—it’s a journey that will transform your kitchen into a chocolate haven. The technique that will make all the difference is a simple, yet powerful, method of incorporating the glutinous rice flour. And trust me, the result is a chewy, moist interior that feels like a chocolate hug. So buckle up, because this next part? Pure magic.
What Makes This Version Stand Out
This isn’t your run‑of‑the‑mill brownie. It’s a game‑changer that redefines texture, flavor, and even the way you think about dessert. Below are the key reasons why this recipe will become your new obsession.
- Texture: The glutinous rice flour gives a chewy, almost gummy center that contrasts beautifully with a crisp, crackly edge. It’s the kind of mouthfeel that makes you reach for the next bite before you’ve even finished the first.
- Flavor Depth: Dark chocolate and cocoa powder work in tandem to deliver a rich, slightly bitter undertone that balances the sweetness of sugar. The result is a complex flavor profile that’s surprisingly sophisticated.
- Visual Appeal: The glossy sheen of the batter and the chocolate chunks that peek through the surface create a striking presentation that feels almost luxurious.
- Ease of Preparation: Despite its impressive texture and flavor, the recipe requires only basic kitchen tools and a straightforward method that even novice bakers can master.
- Crowd‑Pleaser: These brownies are a guaranteed hit at parties, potlucks, or a quiet night in. Their unique texture and decadent taste make them a conversation starter.
- Gluten‑Free Friendly: By using glutinous rice flour, you can enjoy these brownies without compromising on taste or texture, making them accessible to a wider audience.
Alright, let's break down exactly what goes into this masterpiece…
Inside the Ingredient List
Before we dive into the actual cooking, let’s dissect the ingredients that make these brownies so special. Understanding each component will help you appreciate why each is essential and how to tweak the recipe if you’re feeling adventurous.
The Flavor Base
Glutinous rice flour is the unsung hero of this recipe. It’s the glue that holds the batter together while giving the brownies that signature chew. Unlike regular all‑purpose flour, it contains higher levels of amylopectin, which creates a sticky, almost gummy texture that’s a delight in every bite. If you skip it, you’ll end up with a dry, crumbly brownie that lacks the signature chew. For those who love a slightly sweet twist, you can add a pinch of vanilla sugar to the flour mixture, but be careful not to overpower the chocolate.
Cocoa powder is the backbone of the chocolate flavor. It provides depth, a slightly bitter edge, and a rich dark hue that makes the batter look almost like a dark lake. Use a high‑quality, unsweetened cocoa powder for the best results; it’s worth investing in because it dramatically improves the overall taste. If you’re looking for a milder flavor, you can reduce the cocoa by a quarter cup, but this will make the brownies less chocolatey.
The Texture Crew
Unsalted butter melts into the batter, creating a silky smoothness that coats the chocolate. Butter also adds a subtle caramel note that enhances the overall flavor profile. If you’re trying to cut down on fat, you can replace half the butter with coconut oil, but the texture will shift slightly toward a denser, more coconut‑flavored brownie. Keep the butter at room temperature for easy mixing; if it’s too hard, it won’t incorporate smoothly.
Eggs are the binding agents that give structure to the brownies. The yolks add richness, while the whites help with aeration. If you’re vegan, you can substitute the eggs with flaxseed meal mixed with water or use a store‑bought egg replacer. However, the chewiness will be noticeably different, so this recipe is best enjoyed with real eggs.
The Unexpected Star
Dark chocolate is the star that brings depth and a slightly bitter edge to the brownies. It melts beautifully, creating a silky interior that contrasts with the chewy exterior. The 4 oz dark chocolate should be chopped finely to ensure even distribution throughout the batter. If you prefer a sweeter brownie, use a 70% cacao chocolate, but the bitterness will still be present.
Milk is the liquid that brings everything together. It helps to hydrate the glutinous rice flour, ensuring a smooth batter that doesn’t clump. If you’re lactose intolerant, you can use oat milk or almond milk, but the texture will shift slightly toward a softer, less chewy consistency.
The Final Flourish
Sugar is the sweetener that balances the bitterness of the dark chocolate and cocoa powder. It also contributes to the browning reaction that gives the brownies their golden crust. If you’re watching your sugar intake, you can reduce the amount by a quarter cup, but this may affect the browning and overall sweetness.
Baking powder and salt are the silent heroes that help the brownies rise and deepen the flavor. Baking powder ensures the batter doesn’t collapse, while salt enhances the chocolate’s richness. If you’re on a low‑sodium diet, you can reduce the salt by half, but the brownies will taste slightly flat.
Chocolate chunks are the final touch that adds pockets of molten chocolate throughout the brownies. They provide an explosive burst of flavor that makes each bite a surprise. If you’re a chocolate aficionado, feel free to double the amount, but be prepared for a more decadent, chocolate‑heavy experience.
Everything’s prepped? Good. Let’s get into the real action…
The Method — Step by Step
Now that you have all the ingredients measured and ready, it’s time to bring them together. Follow these steps carefully, and you’ll end up with brownies that are chewy, moist, and decadently chocolatey.
- Preheat your oven to 350°F (175°C) and line a 9x9 inch baking pan with parchment paper. The parchment ensures easy removal and prevents sticking. While the oven is heating, melt the butter in a small saucepan over low heat. Once the butter is fully melted, set it aside to cool slightly, but keep it warm so it doesn’t solidify. This step is crucial for a smooth batter.
- In a separate bowl, combine the glutinous rice flour and cocoa powder. Whisk them together until fully blended. This dry mixture is the foundation of the texture. If you notice any lumps, sift the flour again to ensure a silky consistency. This will help the brownies rise evenly.
- Melt the dark chocolate in a heat‑proof bowl over a pot of simmering water, stirring until smooth. The chocolate should be glossy and free of lumps. Once melted, let it cool for a minute before adding it to the batter. The chocolate’s temperature should be warm but not hot to avoid cooking the eggs prematurely.
- In a large mixing bowl, whisk the eggs and sugar together until the mixture is pale and slightly thick. This process incorporates air and helps create a lighter crumb. Add the vanilla extract, then pour in the melted butter and chocolate. Mix until everything is fully incorporated.
- Gradually fold in the dry flour mixture, alternating with the milk. Use a spatula to fold gently, ensuring no lumps remain. The batter should be thick but pourable. At this point, the batter’s color should be a deep, rich brown, hinting at the chocolate explosion to come.
- Stir in the baking powder and salt, then fold in the chocolate chunks. The chunks should be evenly distributed, giving every bite a chance to surprise you with molten chocolate. If you prefer a smoother texture, you can reduce the number of chunks.
- Pour the batter into the prepared pan, spreading it evenly with a spatula. Tap the pan lightly on the counter to release any air bubbles. This step is essential to avoid a lumpy texture. The batter should be smooth, with a glossy sheen that hints at the moist center.
- Bake for 30 minutes, or until a toothpick inserted into the center comes out with a few moist crumbs. The edges should start pulling away from the pan, indicating that they’re crisp. Once baked, remove the pan from the oven and allow it to cool on a wire rack for 10 minutes before slicing. This final cooling step helps the brownies set and makes them easier to cut.
That’s it — you did it. But hold on, I've got a few more tricks that'll take this to another level.
Insider Tricks for Flawless Results
Even if you follow the recipe to the letter, a few small adjustments can elevate your brownies from good to unforgettable. Below are the insider secrets that will help you master the perfect mochi brownie every time.
The Temperature Rule Nobody Follows
Temperature is everything when it comes to brownies. Keep the oven temperature steady at 350°F. Avoid opening the oven door during the first 20 minutes; the sudden drop in temperature can cause the brownies to collapse. If you’re using a convection oven, lower the temperature by 25°F to compensate for the extra airflow. This small tweak ensures even baking and a consistent chew.
Why Your Nose Knows Best
Your nose is your best judge of doneness. As the brownies bake, you’ll notice a strong, caramelized scent. When the aroma intensifies and the edges start to pull away from the pan, it’s a sign that the brownies are ready. Trust your nose over the clock for the best results.
The 5‑Minute Rest That Changes Everything
After removing the brownies from the oven, let them rest for exactly five minutes on the wire rack. This brief pause allows the interior to set, ensuring that the chewy center doesn’t become gummy when you cut into it. If you cut too soon, you’ll get a mess of chocolate and flour that’s hard to eat.
The Parchment Paper Trick
Line the pan with parchment paper before pouring the batter. The paper should extend beyond the edges of the pan. When you lift the brownies after baking, the parchment will lift them up as a whole, preventing them from sticking and breaking. It also makes cleanup a breeze.
The Final Dusting
Just before serving, dust the brownies with a light sprinkle of powdered sugar or cocoa powder. This adds a finishing touch that enhances the chocolate flavor and gives a professional look. For a more dramatic effect, drizzle a thin line of melted chocolate over the top.
Creative Twists and Variations
This recipe is a playground. Here are some of my favorite ways to switch things up:
Salted Caramel Swirl
Swirl in a handful of salted caramel sauce before baking. The caramel adds a sweet‑salty contrast that pairs beautifully with the dark chocolate. Make sure to use a low‑sugar caramel to keep the brownies from becoming too sweet.
Nutty Crunch
Add a cup of chopped pecans or walnuts. The nuts provide a delightful crunch and a nutty flavor that complements the chocolate. Toast the nuts lightly before adding them for an extra depth of flavor.
Minty Fresh
Incorporate a teaspoon of peppermint extract into the batter. The mint will give a refreshing aftertaste that cuts through the richness. This variation is perfect for holiday parties or a summer dessert.
Espresso Boost
Add a tablespoon of instant espresso powder to the dry mixture. The espresso intensifies the chocolate flavor without adding a coffee taste. This is a favorite of mine for a bold, sophisticated dessert.
Berry Burst
Fold in a cup of fresh or frozen blueberries. The berries will burst with juice as you bite into the brownie, adding a juicy contrast. Keep the berries in the batter to prevent them from sinking to the bottom.
Coconut Cream
Replace the milk with coconut milk and add a tablespoon of shredded coconut to the batter. The coconut will give a tropical flavor that pairs wonderfully with the chocolate. This version is perfect for a beach‑side dessert.
Storing and Bringing It Back to Life
You’ve made a batch of these amazing brownies, but what now? Whether you want to keep them fresh or bring them back to life, the following tips will keep them delicious.
Fridge Storage
Wrap each brownie tightly in plastic wrap and store them in an airtight container in the refrigerator for up to one week. The moisture will keep them soft and chewy, and the chocolate will remain rich. Avoid storing them in a cardboard box, as it can absorb moisture and cause the brownies to become soggy.
Freezer Friendly
For longer storage, place the brownies in a freezer‑safe bag, removing as much air as possible. Freeze for up to three months. When ready to eat, let them thaw at room temperature for 30 minutes before enjoying. This method preserves the chewy texture and chocolate flavor.
Best Reheating Method
Reheat the brownies in a preheated oven at 300°F for 5–7 minutes, or until warm. If you’re in a hurry, microwave them for 10–15 seconds, but be careful not to overheat. Add a tiny splash of water before reheating to create steam, which helps the brownies regain their moistness. This trick will make them taste like they just came out of the oven.