Picture this: the kitchen is a battlefield after a last‑night Thai dinner, pots clanging, a half‑eaten pad thai still steaming, and your phone buzzing with a friend’s dare: “If you can’t make Thai chicken better than that, I’ll buy you a meal.” I stared at the mess, the burnt garlic, the too‑sour coconut milk, and felt the familiar itch of culinary frustration. I was about to throw everything away when the idea hit me like a sudden, bright flash of basil – an Instant‑Pot version that could turn that disaster into a triumph in under an hour. I was going to turn that kitchen chaos into a masterpiece that would make your taste buds sing and your friends beg for seconds. That’s the moment that sparked this recipe, and I’m going to walk you through every single step so that, by the end, you’ll wonder how you ever made Thai chicken any other way.
Let me set the scene: the air is thick with the aroma of lemongrass and fresh ginger, the sound of the Instant‑Pot’s gentle hiss, and the sight of a vibrant mix of red curry paste swirling into coconut milk. The texture of the chicken is already tender, its skinless thighs marinating in a sweet‑savory broth that promises a mouthful of flavor. The heat is just right – not too hot, not too low – allowing the spices to bloom without burning. The first sizzle that hits the pan is absolute perfection, a sound that says the dish is about to begin. If you’ve ever felt like your Thai dish was missing that “wow” factor, you’re not alone – and I’ve got the fix. I dare you to taste this and not go back for seconds.
What makes this version stand out? First, the Instant‑Pot’s pressure cooking turns the chicken into a melt‑in‑your‑mouth texture in a fraction of the time, saving you from the dreaded “over‑cooked” mishap. Second, the balance of sweet, salty, and sour is achieved with a single, carefully measured brown sugar, fish sauce, and lime juice, so you never have to guess the right proportions. Third, the fresh basil and kaffir lime leaves are added at the very end, preserving their bright, herbal notes and preventing the sauce from becoming flat. Fourth, the use of lemongrass, which is often overlooked in quick recipes, adds a citrusy depth that makes the dish feel like it came straight from a Thai market. Fifth, the method is fool‑proof – even if you’re new to pressure cooking, you’ll see how each step builds on the last without any guesswork. And finally, this dish is crowd‑pleasing: it’s flavorful, aromatic, and can be served over rice, noodles, or even cauliflower rice for a low‑carb option. All that, in less than 45 minutes. This is hands down the best version you’ll ever make at home.
Okay, ready for the game‑changer? The trick lies in the way we layer flavors – starting with a quick sear, then a simmer of aromatics, followed by the pressure cook, and finishing with a splash of lime and basil that gives it that final, bright punch. That final flourish is what sets this apart from the generic curry recipes that just dump everything in a pot and hope for the best. I’m about to show you how to make each component work in harmony, so you’ll get a dish that’s as satisfying to make as it is to eat. Stay with me here – this is worth it.
What Makes This Version Stand Out
- Flavor Depth: The combination of lemongrass, kaffir lime, and fresh basil creates a layered citrus profile that is unmistakably Thai. Each herb adds a unique note that keeps the dish from feeling flat.
- Texture Perfection: Pressure cooking the chicken thighs keeps them moist and tender, while a brief sauté in the pot gives the edges a slightly caramelized finish that adds contrast.
- Time Efficiency: The entire process takes under 45 minutes from start to finish, making it ideal for weeknights or last‑minute dinner parties.
- Ingredient Quality: Using fresh, high‑quality ingredients—especially the coconut milk and red curry paste—ensures a sauce that is rich but not overpowering.
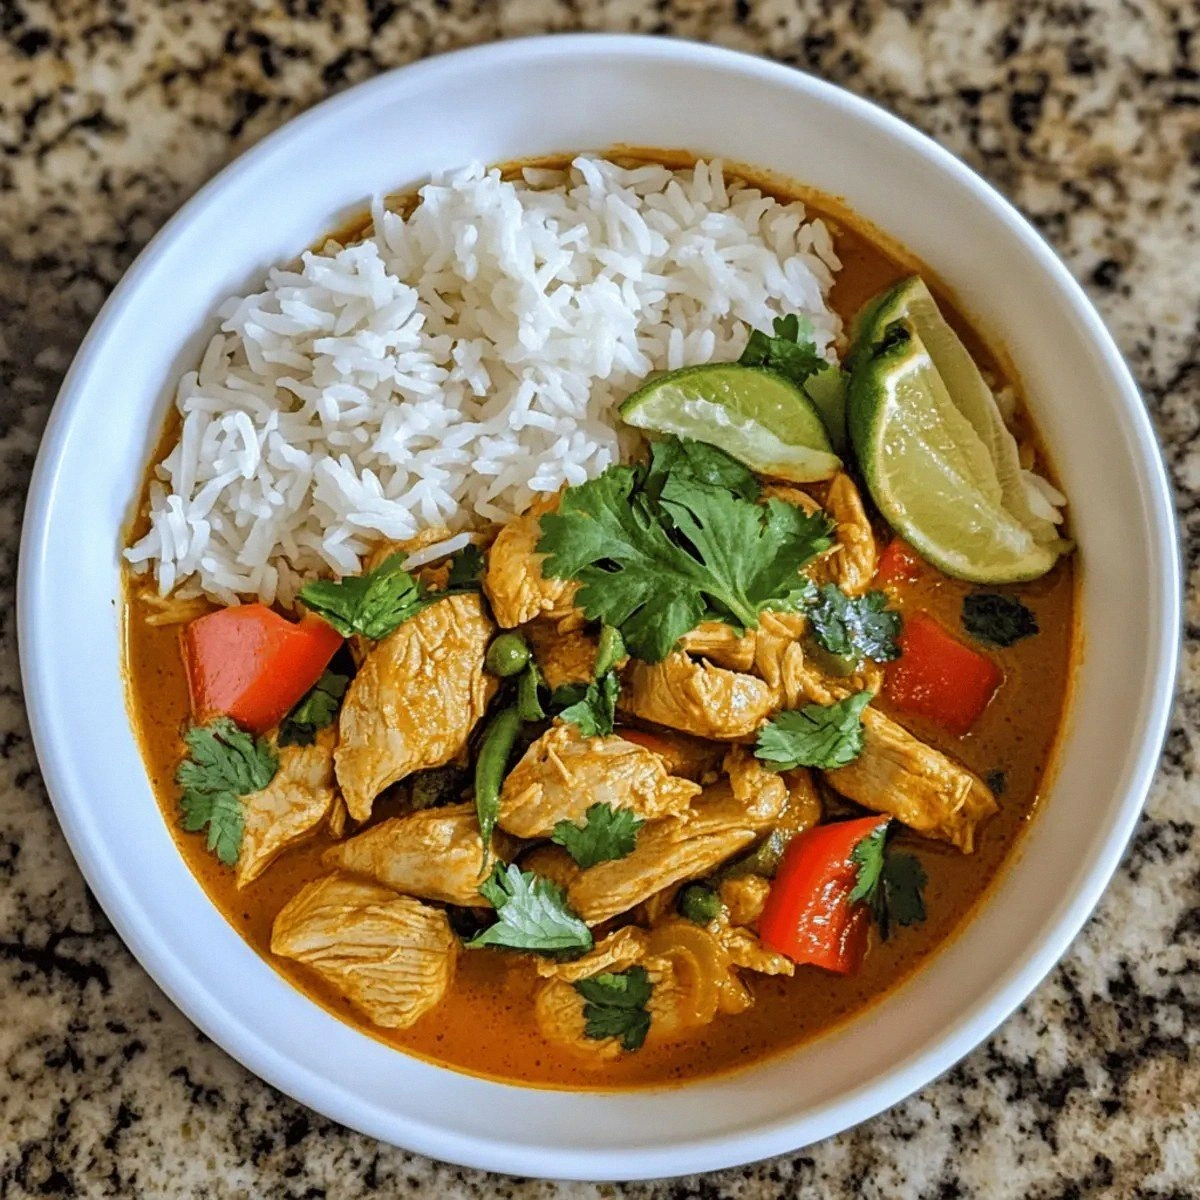
- Versatility: Serve it over jasmine rice, cauliflower rice, or even noodle cups. The sauce is thick enough to cling to any grain or pasta.
- Make‑ahead Friendly: The dish can be prepared ahead of time and reheated with a splash of water, making it perfect for meal prep or a potluck.
- Balanced Sweetness: A single tablespoon of brown sugar is enough to cut the heat without turning the dish into a dessert.
- Minimal Cleanup: One pot and the Instant‑Pot do the heavy lifting, so you’ll spend less time scrubbing and more time enjoying.
Alright, let's break down exactly what goes into this masterpiece...
Inside the Ingredient List
The Flavor Base
The coconut milk is the creamy backbone of this dish, providing a silky texture that carries the spices. Its natural sweetness balances the heat from the red curry paste, and if you skip it, the sauce will taste thin and underwhelming. For a richer flavor, choose a full‑fat brand and pour it in a steady stream to let it swirl before adding the paste.
Red curry paste is the star that gives the dish its signature color and depth. It’s a blend of chilies, galangal, and shrimp paste that can be overpowering if used in excess. Stick to the 2 tablespoons recommended; if you’re a heat lover, you can add a pinch of cayenne, but remember the sauce will thicken and the heat will intensify.
The Texture Crew
Chicken thighs are chosen for their fat content, which keeps the meat juicy and prevents drying out during pressure cooking. If you prefer a leaner cut, substitute with boneless chicken breasts, but be prepared for a slightly drier result. A quick sear before pressure cooking seals the juices and creates a subtle caramel crust.
Bell peppers add a crisp, sweet crunch that contrasts with the soft chicken. They also bring a pop of color that makes the dish visually appealing. Slice them into thin strips so they soften evenly without losing their bite.
The Unexpected Star
Kaffir lime leaves are a quintessential Thai ingredient that can be hard to find. They provide a citrusy aroma that is unmistakable. If you can’t find fresh leaves, use dried ones, but remember they are more potent—use half the amount and taste as you go.
The Final Flourish
Fresh Thai basil is added at the end to preserve its bright, peppery flavor. It’s what gives the dish its signature herbal finish that lingers on the palate. If you can’t find Thai basil, a mix of sweet basil and a pinch of oregano will work, but the flavor will shift slightly.
Fresh lime juice is the finishing touch that brightens the entire dish. It cuts through the richness of the coconut milk and adds a zing that lingers. A tablespoon is enough, but adjust to taste if you prefer a more tart finish.
Everything’s prepped? Good. Let’s get into the real action...
The Method — Step by Step
- Prep the aromatics. Trim the lemongrass stalks, cut off the woody ends, and slice the tender part into 2‑inch pieces. Mince the garlic and grate the ginger. Dice the onion and slice the bell peppers into thin strips. This step sets the foundation for the flavor; do it now so you’re not scrambling while the pot is heating.
- Sear the chicken. Turn the Instant‑Pot to “Sauté” mode, add a splash of oil, and wait until it shimmers. Add the chicken thighs, skin‑side down if they still have skin, and brown them for about 3 minutes per side. This caramelization locks in moisture and adds a savory depth that a pressure cook alone can’t achieve.
- Add aromatics. Toss in the minced garlic, grated ginger, sliced lemongrass, and diced onion. Stir for 2 minutes until the mixture becomes fragrant, almost to the point where you can taste the raw spices. The aroma should feel like a tropical breeze; if not, keep cooking a little longer.
- Introduce the curry paste. Stir the red curry paste into the pot, coating the aromatics and chicken. Cook for 1 minute to let the paste release its oils. The pot should start to emit a warm, spicy scent that signals the flavors are blooming.
- Pour in liquids. Add the can of coconut milk, the cup of chicken broth, and the tablespoon of brown sugar. Stir to combine, ensuring the paste dissolves into the liquid and the sugar is fully incorporated. The mixture should look silky and slightly thickened.
- Seal and cook. Cancel the “Sauté” mode, place the lid on, and set the valve to “Sealing.” Select the “Manual” or “Pressure Cook” setting at high pressure for 10 minutes. The Instant‑Pot will build pressure and cook the chicken to perfect tenderness while infusing the sauce with all the aromatic flavors.
- Quick release. When the cooking cycle ends, perform a quick release by carefully turning the valve to “Venting.” This prevents the sauce from becoming too thick and preserves the bright, fresh taste of the herbs.
- Finish with fresh herbs. Open the pot, stir in the sliced bell peppers, three kaffir lime leaves, the cup of fresh Thai basil, and the two tablespoons of fresh lime juice. The heat from the pot will wilt the basil slightly, releasing its essential oils. Taste the sauce; adjust with an extra splash of fish sauce or lime juice if you desire more saltiness or acidity.
That’s it — you did it. But hold on, I've got a few more tricks that'll take this to another level. The next section will reveal insider tips that will elevate the dish from great to unforgettable.
Insider Tricks for Flawless Results
The Temperature Rule Nobody Follows
Many cooks think the Instant‑Pot is a black box, but controlling the temperature before sealing is crucial. Start the “Sauté” mode at a medium‑high setting, not high, to allow the aromatics to release their oils without burning. When the pot reaches the “Sauté” temperature, the surface will be hot enough to sear the chicken but cool enough to keep the sauce from scorching.
Why Your Nose Knows Best
The aroma is your most reliable gauge for flavor balance. If the dish smells overwhelmingly spicy, add a bit more coconut milk or a splash of water to dilute. If it feels flat, a touch more fish sauce or a pinch of sugar can bring depth. Trust your nose; it’s a seasoned chef in its own right.
The 5‑Minute Rest That Changes Everything
After the quick release, let the pot sit for five minutes before opening. This brief rest allows the pressure to dissipate slowly, letting the flavors settle and the sauce thicken slightly. It also gives the chicken a chance to reabsorb some of the juices, resulting in an even more succulent bite.
The Secret of Freshness
Add the fresh basil and lime juice at the very end, just before serving. If you add them too early, they’ll wilt and lose their bright, peppery aroma. By adding them last, you preserve the herbaceous punch that makes Thai cuisine so irresistible.
The “One‑Pot” Philosophy
Using the Instant‑Pot for everything—from sautéing to pressure cooking—minimizes cleanup and reduces the risk of uneven cooking. It also keeps the flavors in a closed environment, allowing them to mingle and develop a richer profile. This method is especially handy when cooking for a crowd or when you’re short on time.
Creative Twists and Variations
This recipe is a playground. Here are some of my favorite ways to switch things up:
Spicy Peanut Fusion
Swap the red curry paste for a tablespoon of peanut butter and a pinch of chili flakes. Add a splash of coconut milk and a handful of roasted peanuts. The result is a creamy, nutty sauce with a subtle kick that pairs wonderfully with jasmine rice.
Mango Madness
Add diced ripe mango just before serving. The sweet fruit balances the heat and adds a tropical twist that feels like a beach vacation in a bowl.
Crispy Coconut Crunch
Top the finished dish with toasted coconut flakes and a handful of crushed cashews. The crunch contrasts the silky sauce and introduces a new textural element.
Vegetarian Victory
Replace the chicken with firm tofu cubes, seared until golden before pressure cooking. Use vegetable broth instead of chicken broth. The tofu absorbs the sauce beautifully, making a hearty, plant‑based option.
Breakfast Bounty
Serve the curry over a bowl of fluffy scrambled eggs and a sprinkle of fresh cilantro. The eggs soak up the sauce, creating a savory, protein‑packed breakfast that will keep you energized all day.
Low‑Carb Delight
Swap jasmine rice for cauliflower rice or shirataki noodles. The low‑carb base still holds the sauce well, making this a great option for those watching their carb intake.
Storing and Bringing It Back to Life
Fridge Storage
Cool the curry to room temperature before refrigerating. Store in an airtight container for up to 3 days. The flavors deepen overnight, so consider letting it sit for a few hours before reheating.
Freezer Friendly
Divide the curry into single‑serving portions and freeze for up to 2 months. When you’re ready to enjoy, thaw in the refrigerator overnight. The texture remains silky, and the sauce retains its vibrant flavor.
Best Reheating Method
Reheat on the stove over low heat, adding a splash of water or broth to restore moisture. Stir until heated through, and finish with a squeeze of lime for freshness. This method prevents the sauce from drying out and keeps the dish tasting like new.