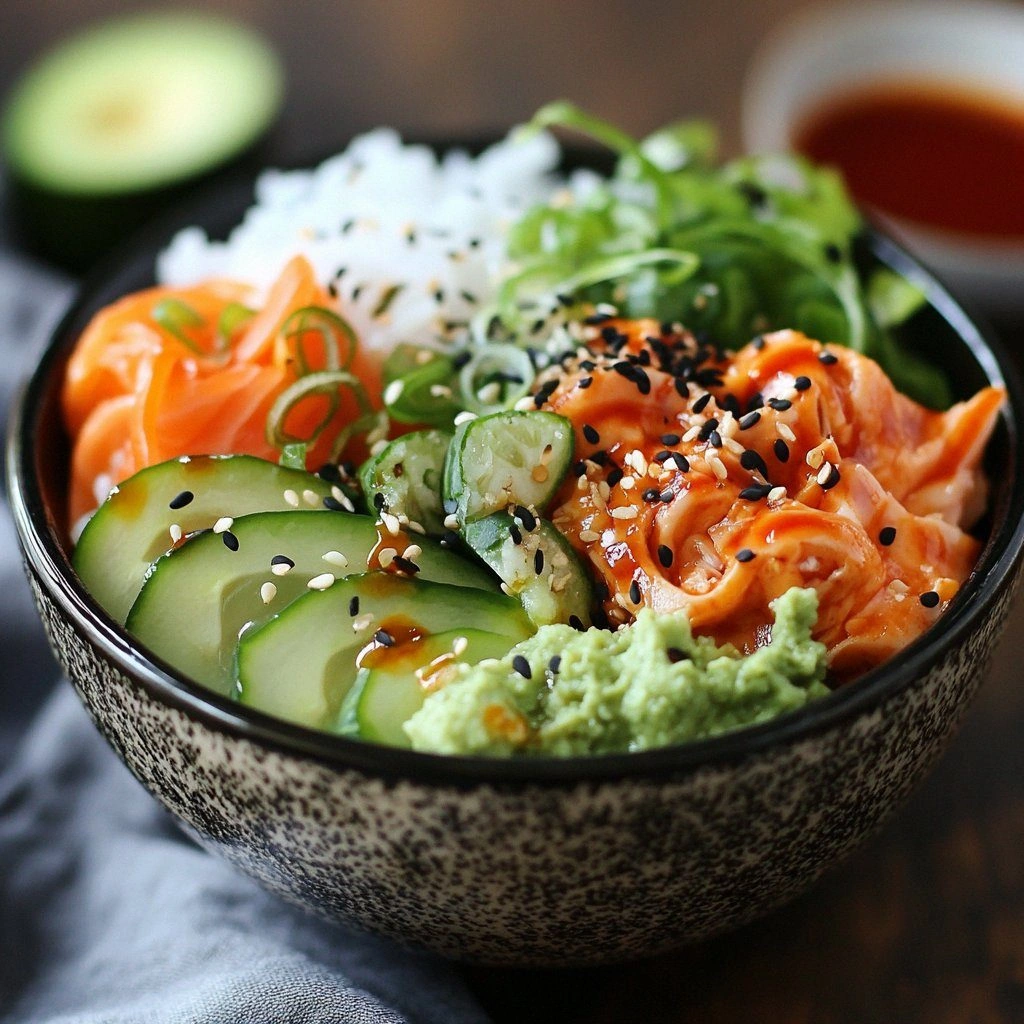
I had a kitchen catastrophe last week that still haunts me, but it also sparked a culinary revelation. I was trying to make a quick dinner for a surprise visit, and the oven was on fire, the stove was on the fritz, and my chicken breasts were turning into a soggy mess. I almost called the fire department, but then I remembered the Instant Pot that had been gathering dust in my cupboard. That moment of panic turned into a eureka moment when I realized the pressure cooker could rescue the chicken and give it a crisp exterior. From that day on, I’ve been obsessed with turning ordinary chicken into bite‑size, crunchy delights that taste like a fancy takeout.
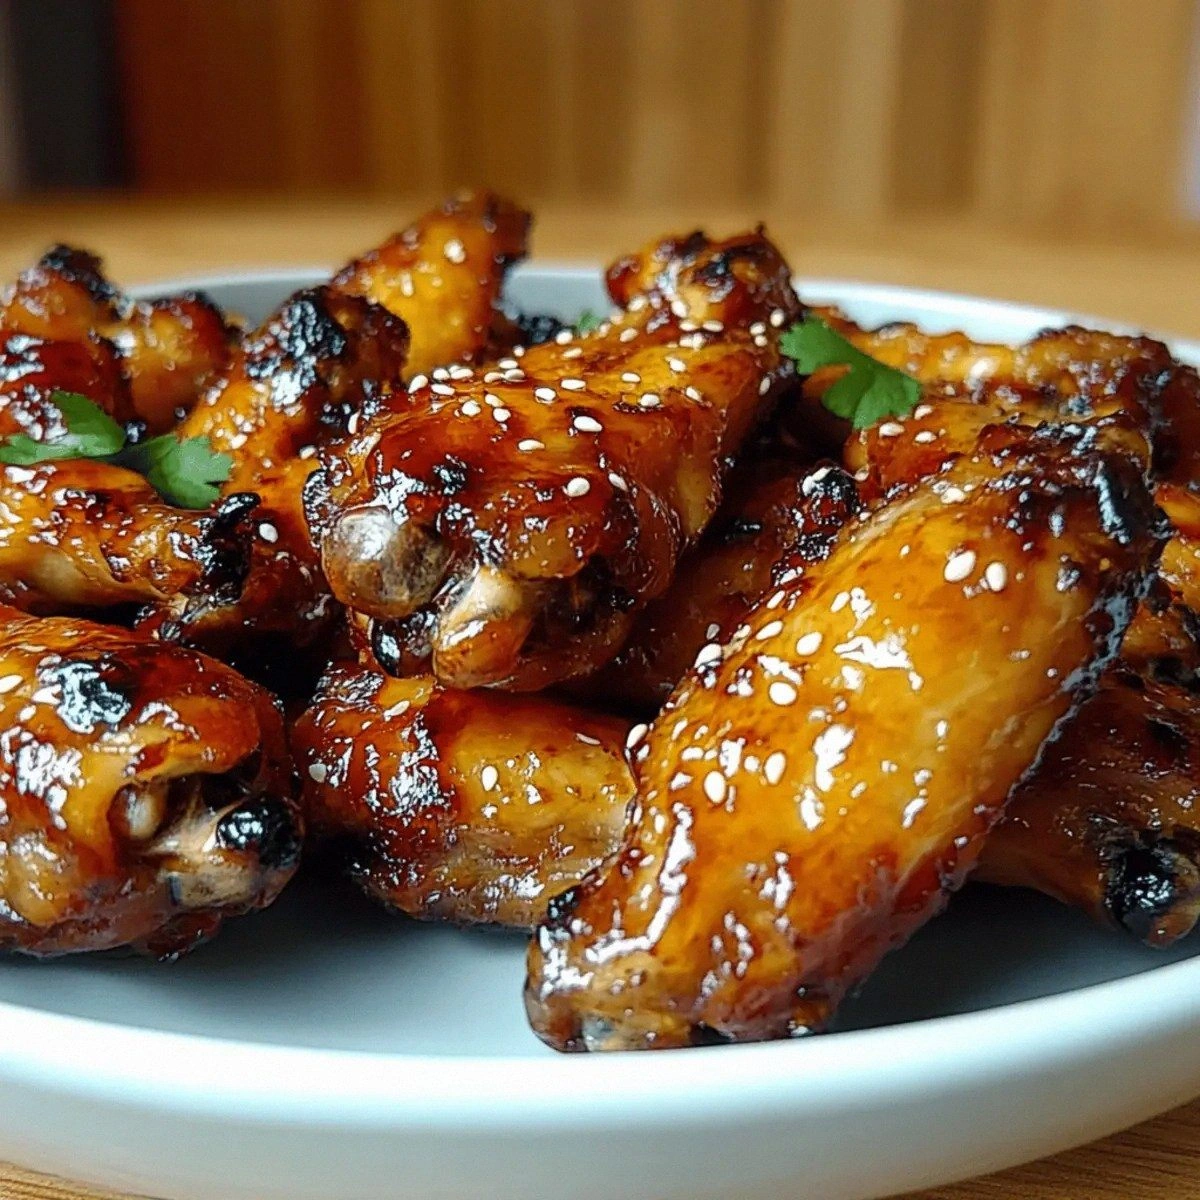
Picture the aroma of paprika and garlic powder swirling through the kitchen, mingling with the sweet scent of toasted panko. The sizzle as the pan heats up sends a crackling sound that feels like a promise of crunch. The texture is a glorious contrast: a golden, buttery crust that shatters like thin ice, revealing a juicy interior that practically melts. Every bite is a burst of smoky paprika, a whisper of onion, and a satisfying snap that echoes in your mouth. It’s a symphony of flavors that makes your taste buds dance and your senses celebrate.
What sets this recipe apart is the marriage of Instant Pot pressure cooking and a quick pan sear that locks in moisture while creating a crispy shell. Unlike other recipes that leave the chicken dry or the coating soggy, this version delivers a consistently crisp exterior every single time. The secret lies in the cornstarch coating, which creates a barrier that turns into a light, airy crunch when fried. And the use of panko instead of regular breadcrumbs gives a lighter, fluffier bite that doesn’t weigh down the flavor. The result is a dish that feels indulgent but is actually health‑friendly, with a low fat profile thanks to the minimal oil used.
I dare you to taste this and not go back for seconds, because once you try it, you’ll never settle for the ordinary. There’s a little trick I discovered: a splash of water in the Instant Pot before sealing the lid that keeps the coating from sticking. That small addition turns a good dish into a crowd‑pleaser that everyone will ask for the recipe. And if you’re wondering how to get that extra crunch, I’ve got a game‑changing tip that will blow your mind. Let me walk you through every single step — by the end, you’ll wonder how you ever made it any other way.
What Makes This Version Stand Out
- Taste: The bold paprika and garlic powder give a smoky kick that pairs perfectly with the mild chicken. The subtle heat from the spices creates a layered flavor profile that satisfies both casual diners and spice lovers alike. Each bite delivers a balanced contrast of savory and aromatic notes that linger on the palate.
- Texture: The cornstarch and panko combo creates a crisp shell that cracks like thin ice, while the interior stays moist and tender. The coating’s lightness ensures that it doesn’t become heavy or doughy, giving a satisfying crunch that’s hard to resist. The texture remains consistent even after reheating, making it ideal for meal prep.
- Simplicity: No fancy sauces or long prep times—just coat, cook, sear. The recipe requires only eight ingredients, most of which you probably already have in your pantry. The streamlined process saves time and reduces kitchen clutter.
- Time: Total cook time is 45 minutes, with 30 minutes in the Instant Pot, making it a quick weeknight win. The pressure cooking step eliminates the need for pre‑heating a conventional oven or simmering a sauce for hours. The final sear takes only a few minutes, ensuring you’re not stuck in the kitchen all evening.
- Crowd‑pleaser: These bites are the kind of dish that makes a gathering feel like a party, even if you’re just cooking for yourself. The golden exterior and juicy interior make them ideal for game nights, potlucks, or a simple family dinner. The universal appeal guarantees that no one will leave the table hungry.
- Ingredient quality: Using fresh chicken breasts and real paprika ensures a clean, natural flavor profile. The choice of panko over traditional breadcrumbs adds a textural dimension that elevates the dish. The minimal use of oil keeps the dish light and approachable.
- Make‑ahead potential: You can prepare the coated chicken ahead of time, refrigerate, and finish cooking when guests arrive. The coating holds up well in the fridge, maintaining its crispness after a quick pan sear. This flexibility makes the recipe perfect for busy schedules.
- Unique technique: The splash of water before sealing the pot prevents the coating from sticking, a trick that most recipes overlook. This simple adjustment ensures a smooth, even cooking surface and preserves the coating’s integrity. The result is a flawless finish that showcases the recipe’s ingenuity.
Inside the Ingredient List
The Flavor Base
Chicken breasts are the heart of this dish, offering a lean protein that takes on the surrounding flavors with ease. When you cut them into bite‑sized pieces, you create a canvas for the spices to paint a vibrant profile. Paprika adds a smoky undertone that elevates the overall taste, bringing warmth without overpowering the natural chicken flavor. Garlic powder lends a subtle depth that echoes in every bite, while onion powder provides a mellow sweetness that balances the heat. Together, these seasonings create a harmonious blend that is both comforting and exciting, ensuring that each bite is packed with savory goodness.
The combination of paprika, garlic, and onion powders is a classic trio that has stood the test of time in countless recipes. Their powdered forms allow for even distribution across the chicken, preventing uneven seasoning. This ensures that every morsel delivers a consistent flavor profile, making the dish reliable and satisfying. The spices also contribute to the golden color of the final coating, giving the chicken a visually appealing appearance that enhances the overall dining experience.
The Coating Crew
Cornstarch is the unsung hero that gives the coating its crispness. It forms a protective layer around the chicken, preventing moisture from seeping out during pressure cooking. When heated, the cornstarch gelatinizes, creating a light, airy crunch that feels almost like a delicate pastry shell. Its neutral taste allows the spices to shine without interference, ensuring that the paprika and garlic flavors remain front and center. Using cornstarch instead of flour keeps the coating gluten‑free and reduces the overall calorie count.
Panko breadcrumbs add a unique texture that sets this recipe apart. Unlike regular breadcrumbs, panko is light and airy, which translates into a crunch that is both satisfying and less dense. The larger crumbs also provide a better surface area for the spices to adhere to, creating a flavorful crust that holds together during the cooking process. Panko’s ability to absorb minimal oil makes it an excellent choice for a healthier version of crispy chicken.
Salt and black pepper are essential for balancing the flavors and enhancing the overall taste. Salt brings out the natural sweetness of the chicken, while pepper adds a subtle heat that complements the paprika. Their combined presence ensures that every bite is well-seasoned, preventing the dish from feeling flat or bland. Even a small pinch of each can make a significant difference in the final flavor profile.
The Texture Enhancer
Oil is the final ingredient that brings everything together, creating a golden exterior that is both crispy and flavorful. A high smoke point oil, such as canola or peanut, ensures that the coating browns evenly without burning. The oil also helps to conduct heat, allowing the cornstarch and panko to crisp up quickly during the final sear. Using just enough oil keeps the dish light, preventing it from becoming greasy or heavy.
A splash of water added before sealing the Instant Pot lid is a subtle but powerful trick. The water creates steam that lifts the coating slightly, preventing it from sticking to the pot’s interior. This ensures a smooth pressure cooking process and preserves the integrity of the crispy shell. The result is a perfectly cooked chicken that retains its crunch and flavor profile.
When you finish the dish in a hot skillet, the residual oil and the heat from the pan create a final caramelized finish. This step is crucial for achieving the signature crunch that makes the dish so addictive. The brief sear also adds a subtle nutty aroma that enhances the overall sensory experience. By paying attention to this final step, you guarantee that every bite delivers a satisfying crunch.
Everything's prepped? Good. Let's get into the real action…
The Method — Step by Step
- Prepare the Chicken: Start by cutting the chicken breasts into bite‑size cubes, ensuring each piece is roughly the same size for even cooking. Pat the pieces dry with paper towels; removing excess moisture is key to achieving a crisp coating. This step also helps the spices adhere better to the surface. Once the chicken is dry, set it aside on a clean cutting board.
- Mix the Dry Coating: In a large mixing bowl, combine the cornstarch, paprika, garlic powder, onion powder, salt, and black pepper. Whisk the mixture until all the spices are evenly distributed, creating a uniform coating. The cornstarch will act as a binder, while the spices provide depth and flavor. Make sure the mixture is fine enough that it can cling to the chicken without clumping.
- Coat the Chicken: Toss the chicken cubes in the dry coating mixture, ensuring each piece is fully coated. Shake off any excess flour so that the coating remains light and airy. The coated chicken should look like tiny, golden nuggets waiting to be cooked. This step is where the magic begins, as the coating will develop into a crispy shell.
- Preheat the Instant Pot: Add a tablespoon of oil to the Instant Pot and turn it to the sauté setting. Allow the oil to heat until it shimmers but isn’t smoking. This preheating step ensures a quick sear that locks in flavor and creates a golden crust on the chicken. Once the oil is hot, add the coated chicken in a single layer.
- Pressure Cook: Add a splash of water—about 1/4 cup—to the pot before sealing the lid. This tiny amount of liquid creates steam, preventing the coating from sticking and ensuring even pressure distribution. Seal the lid, set the valve to sealing, and cook on high pressure for 10 minutes. The steam will keep the chicken moist while the cornstarch and panko work their crispy magic.
- Quick Release: After the cooking cycle completes, perform a quick release by carefully turning the valve to venting. This prevents the chicken from overcooking and maintains its tender interior. Once the pressure has fully released, open the lid and check that the chicken is cooked through, with an internal temperature of at least 165°F.
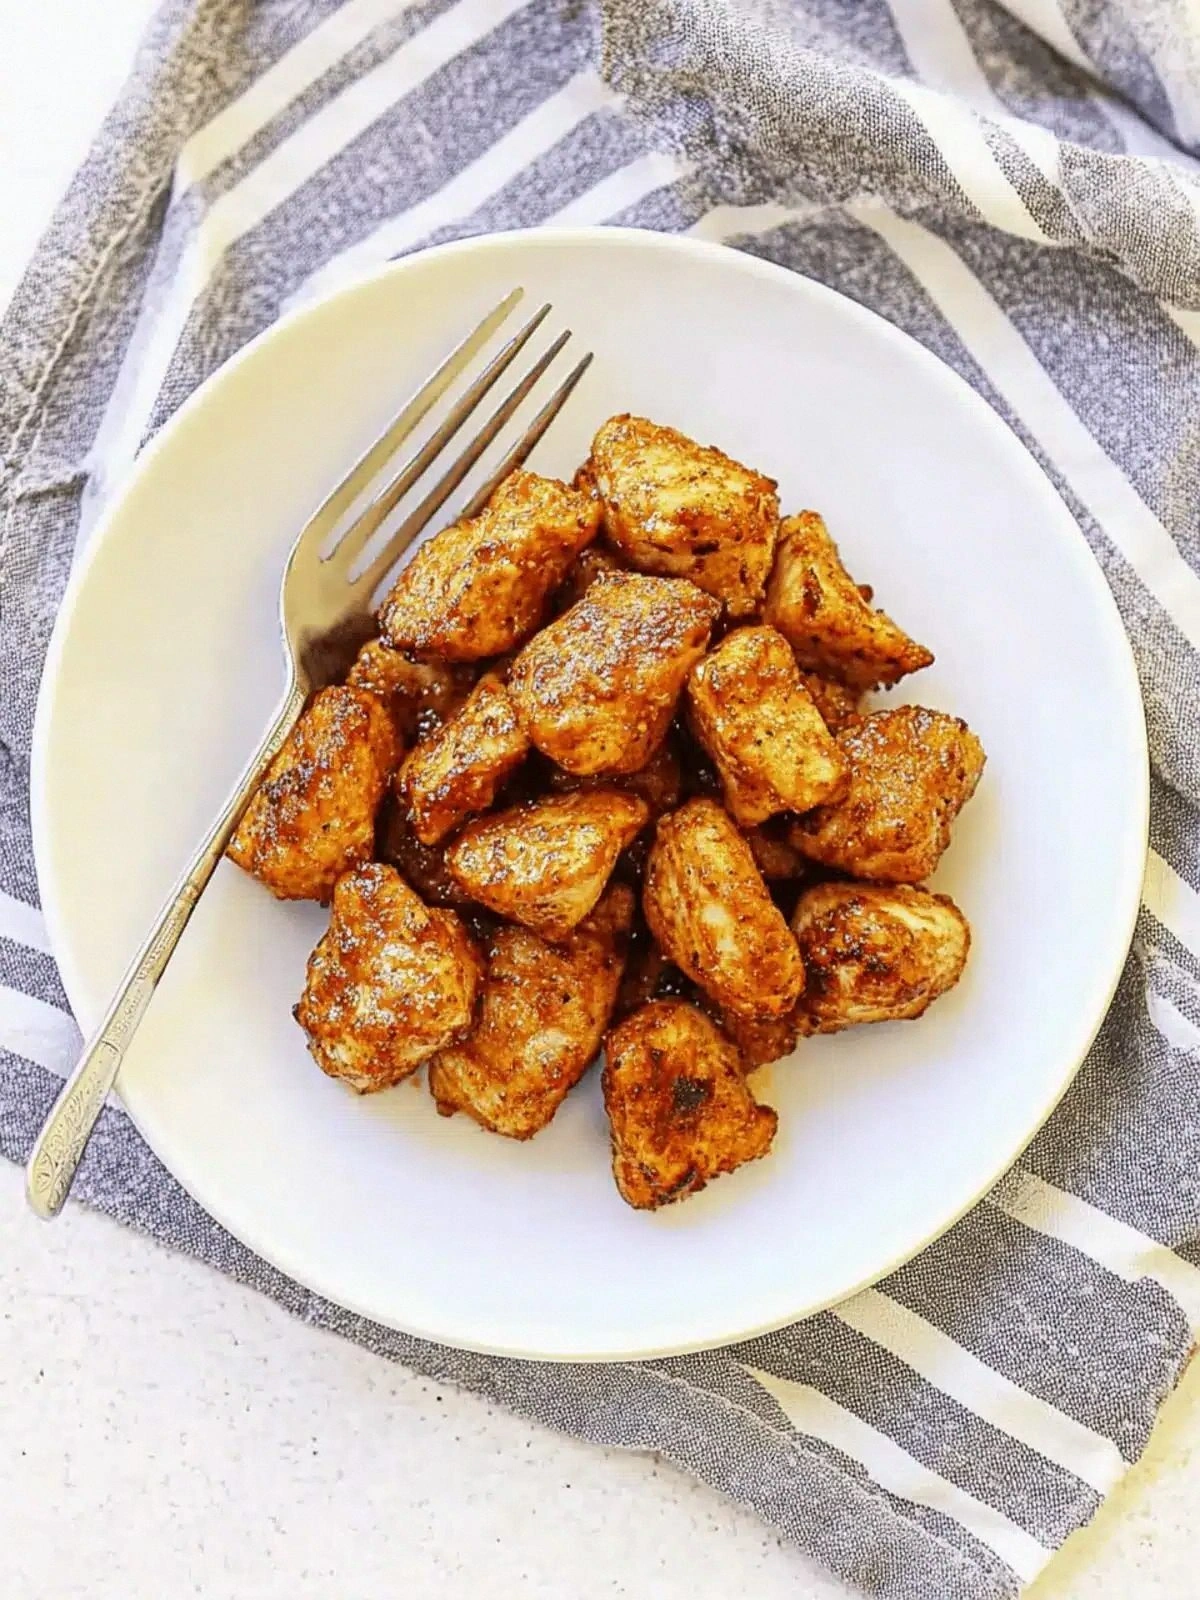
- Finish with a Sear: Transfer the cooked chicken to a hot skillet with a little more oil. Sear each side for 2–3 minutes until the coating turns a deep golden brown and the edges crackle. This final sear adds an extra layer of crunch that the Instant Pot alone can’t achieve. Keep the heat medium-high to avoid burning the coating while ensuring a crisp finish.
- Rest and Plate: Let the chicken rest on a wire rack for 5 minutes; this allows the juices to redistribute and prevents the coating from becoming soggy. While resting, the coating will firm up, making it easier to handle and serve. Once rested, transfer the chicken to a serving platter and garnish with a sprinkle of fresh parsley if desired.
- Serve: Present the crispy chicken bites hot, accompanied by your favorite dipping sauce—ranch, honey mustard, or a spicy sriracha mayo will all complement the dish. The bright, golden exterior will catch the eye, while the savory interior will satisfy the palate. Enjoy the moment of pure culinary bliss as the first bite delivers that satisfying crackle.
Insider Tricks for Flawless Results
The Temperature Rule Nobody Follows
Many cooks assume that a higher heat is always better for crisping, but the truth is that a controlled medium‑high heat produces a more even crust. By maintaining a steady temperature, you prevent the coating from burning on the outside while the inside remains undercooked. Use a thermometer to keep the skillet around 375°F, which is hot enough to caramelize the sugars in the panko without scorching.
When you’re searing the chicken, keep the skillet moving gently; this ensures that each piece receives the same amount of heat. A static piece will develop a dark spot, ruining the uniform appearance. The trick is to let the heat do the work, not the pan’s motion.
For those who love a deeper crunch, a quick burst of high heat at the end of the sear can give a caramelized finish. Just be sure to watch the pieces closely to avoid burning. The key is balance—too much heat, and you’ll lose the juicy interior.
By mastering this temperature rule, you’ll consistently achieve a golden, crisp exterior that pairs perfectly with the tender interior. This simple adjustment can transform an ordinary dish into a restaurant‑quality experience.
Why Your Nose Knows Best
The aroma of the chicken as it cooks is a reliable indicator that the coating is on the brink of perfection. When the panko starts to brown, you’ll notice a nutty, toasted scent that signals the ideal moment to flip the pieces. Trusting your nose ensures that you don’t overcook or undercook the chicken, preserving both flavor and texture.
As the coating turns golden, the aroma intensifies, giving you a natural cue to reduce the heat slightly. This subtle shift prevents the exterior from becoming too dark while maintaining a crisp finish. Your sense of smell is a powerful ally in achieving culinary precision.
In a noisy kitchen, the scent of sizzling chicken can also serve as a call to action, reminding you to keep an eye on the pan. The aroma is a non‑visual cue that keeps you engaged in the cooking process, preventing distractions and ensuring consistency.
Ultimately, letting your nose lead the way helps you avoid common pitfalls and guarantees a satisfying crunch every time.
The 5‑Minute Rest That Changes Everything
After pressure cooking, let the chicken rest for exactly five minutes before searing. This pause allows the juices to redistribute, preventing them from escaping during the final sear. The rest period also gives the coating time to firm up, making it easier to handle and less likely to crumble.
During this brief rest, the internal temperature of the chicken will rise a few degrees, ensuring that it reaches the safe 165°F mark. This passive cooking step is often overlooked, but it’s crucial for both safety and texture.
Some chefs add a quick drizzle of lemon or a sprinkle of herbs during the rest; this adds a fresh burst of flavor that brightens the dish. The rest period is a perfect window to enhance the final presentation.
By incorporating this five‑minute rest, you’ll elevate the dish from good to unforgettable.
Keep It Crisp with Oil Temperature
Oil temperature is the unsung hero of crispiness. If the oil is too cool, the coating will absorb excess fat and become soggy. Aim for an oil temperature of around 350°F before adding the chicken; this ensures a quick, even sear.
Use a thermometer or the “water droplet test” to gauge the heat—if a drop of water sizzles and evaporates instantly, the oil is ready. This simple test saves you from guesswork and guarantees consistent results.
Once the oil reaches the desired temperature, add the coated chicken in a single layer. Overcrowding the pan will lower the oil’s temperature, causing uneven cooking and a greasy finish.
Maintaining the right oil temperature throughout the sear keeps the coating light, airy, and irresistibly crunchy.
Use a Silicone Mat to Prevent Sticking
When pressure cooking, the coating can sometimes cling to the inner walls of the Instant Pot. A silicone mat placed on the trivet acts as a barrier, allowing the coating to lift cleanly once the cooking cycle finishes.
The mat also distributes heat more evenly, preventing hot spots that could burn the coating. This simple addition saves you from a messy cleanup and preserves the dish’s appearance.
After cooking, the mat can be rinsed and reused, making it a cost‑effective kitchen accessory. The mat’s flexibility also ensures that it doesn’t interfere with the pressure seal.
By incorporating a silicone mat, you’ll enjoy a smoother cooking process and a cleaner presentation.
Finish with a Splash of Lemon
Just before serving, squeeze a wedge of fresh lemon over the chicken bites. The acidity cuts through the richness and adds a bright, zesty finish that lifts the overall flavor profile.
Lemon also helps to brighten the golden color, making the dish look even more appetizing. The citrus aroma adds a final sensory layer that elevates the dining experience.
For an extra pop, sprinkle a pinch of chili flakes along with the lemon; this adds a subtle heat that balances the savory coating.
Completing the dish with a splash of lemon transforms it from a simple appetizer to a gourmet delight.
Creative Twists and Variations
This recipe is a playground. Here are some of my favorite ways to switch things up:
Spicy Sriracha Kick
Swap the paprika for a blend of smoked paprika and a tablespoon of sriracha sauce in the coating mixture. The heat from the sriracha adds a fiery punch that pairs well with the savory chicken. Serve with a cool cucumber yogurt dip to balance the spice. This variation is perfect for those who love a bold, spicy flavor profile.
Mediterranean Herb Blend
Replace the garlic and onion powders with dried oregano, thyme, and a pinch of rosemary. The herbs give the chicken a fragrant, earthy aroma reminiscent of a sunny Mediterranean kitchen. Pair with a side of tzatziki or a light Greek salad for a complete meal. This twist is ideal for a summer gathering or a light dinner.
Sweet Honey Glaze
After the final sear, drizzle a mixture of honey and a splash of soy sauce over the chicken. The glaze caramelizes into a glossy, sweet coating that contrasts beautifully with the crispness. Garnish with toasted sesame seeds for added texture. This version is a crowd‑pleaser for holiday parties or dessert‑style appetizers.
Smoky Chipotle Flavor
Add a teaspoon of chipotle powder to the coating and a splash of adobo sauce for depth. The smoky undertone elevates the dish, making it ideal for a Tex‑Mex themed dinner. Serve with a side of fresh pico de gallo or guacamole to complete the flavor profile. This variation brings a bold, smoky edge to the classic recipe.
Asian Sesame Crunch
Mix toasted sesame seeds into the panko coating and sprinkle a teaspoon of toasted sesame oil before searing. The nutty aroma enhances the crunch, giving the dish an Asian flair. Pair with a soy‑ginger dipping sauce for an authentic experience. This variation is great for a quick, flavorful lunch or appetizer.
Classic Buffalo Sauce
Coat the chicken in a mixture of melted butter and buffalo sauce after the final sear. The spicy, tangy sauce turns the dish into a party favorite that’s perfect for game nights. Serve with blue cheese dressing and celery sticks for a classic combination. This version delivers the ultimate comfort food experience.
Storing and Bringing It Back to Life
Fridge Storage
Store the cooled chicken bites in an airtight container or a zip‑top bag for up to three days. Keep the container on the middle shelf to maintain a consistent temperature. The coating will retain its crispness if you avoid stacking the pieces. When ready to serve, reheat in a skillet to restore the crunch.
Freezer Friendly
For longer storage, freeze the chicken in a single layer on a parchment‑lined tray before transferring to a freezer bag. This prevents the pieces from sticking together. Freeze for up to two months for the best quality. When you’re ready to enjoy, thaw overnight in the refrigerator before reheating.
Best Reheating Method
Reheat the frozen or refrigerated chicken in a preheated oven at 400°F for 10 minutes, turning halfway through. This method restores the crisp exterior without drying out the interior. Alternatively, use a skillet over medium heat, adding a splash of water to keep the coating from becoming too dry. Finish with a quick sear to bring back that signature crunch.