Picture this: a Saturday night, the house is buzzing with friends, a playlist of guilty‑pleasure hits is looping, and you’re standing over a pan that’s about to become the most talked‑about centerpiece of the evening. I was in the middle of a culinary disaster—my attempt at classic buffalo wings turned into a soggy, flavor‑less mess that could barely hold a drizzle of sauce. In a moment of desperation (and a dare from my roommate that I couldn’t refuse), I grabbed the nearest bottle of pineapple juice, a jar of teriyaki, and a handful of honey, and set out to create something that would make even the most skeptical palate sing. The result? A sweet and sticky pineapple‑teriyaki chicken that turned my kitchen catastrophe into a triumph worthy of applause.
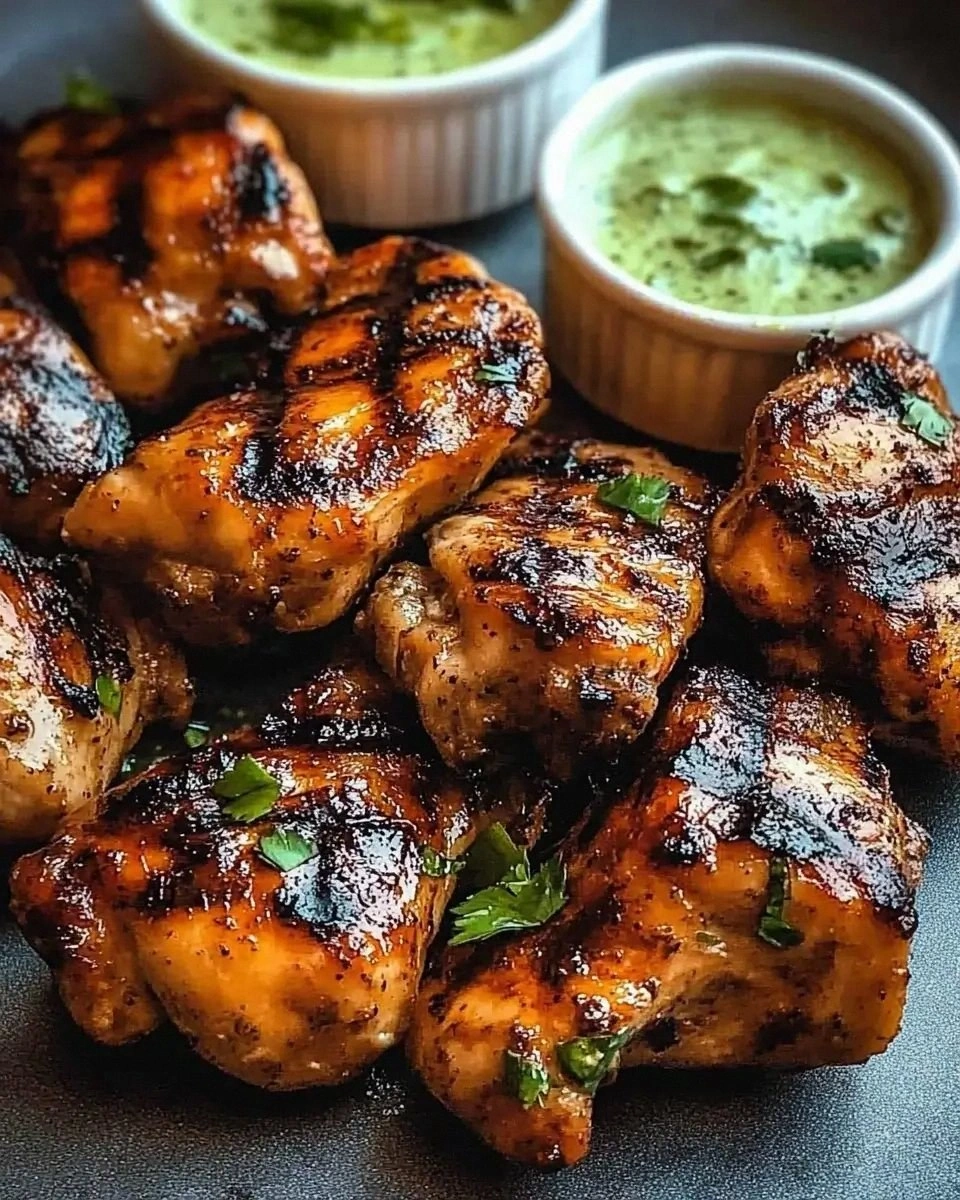
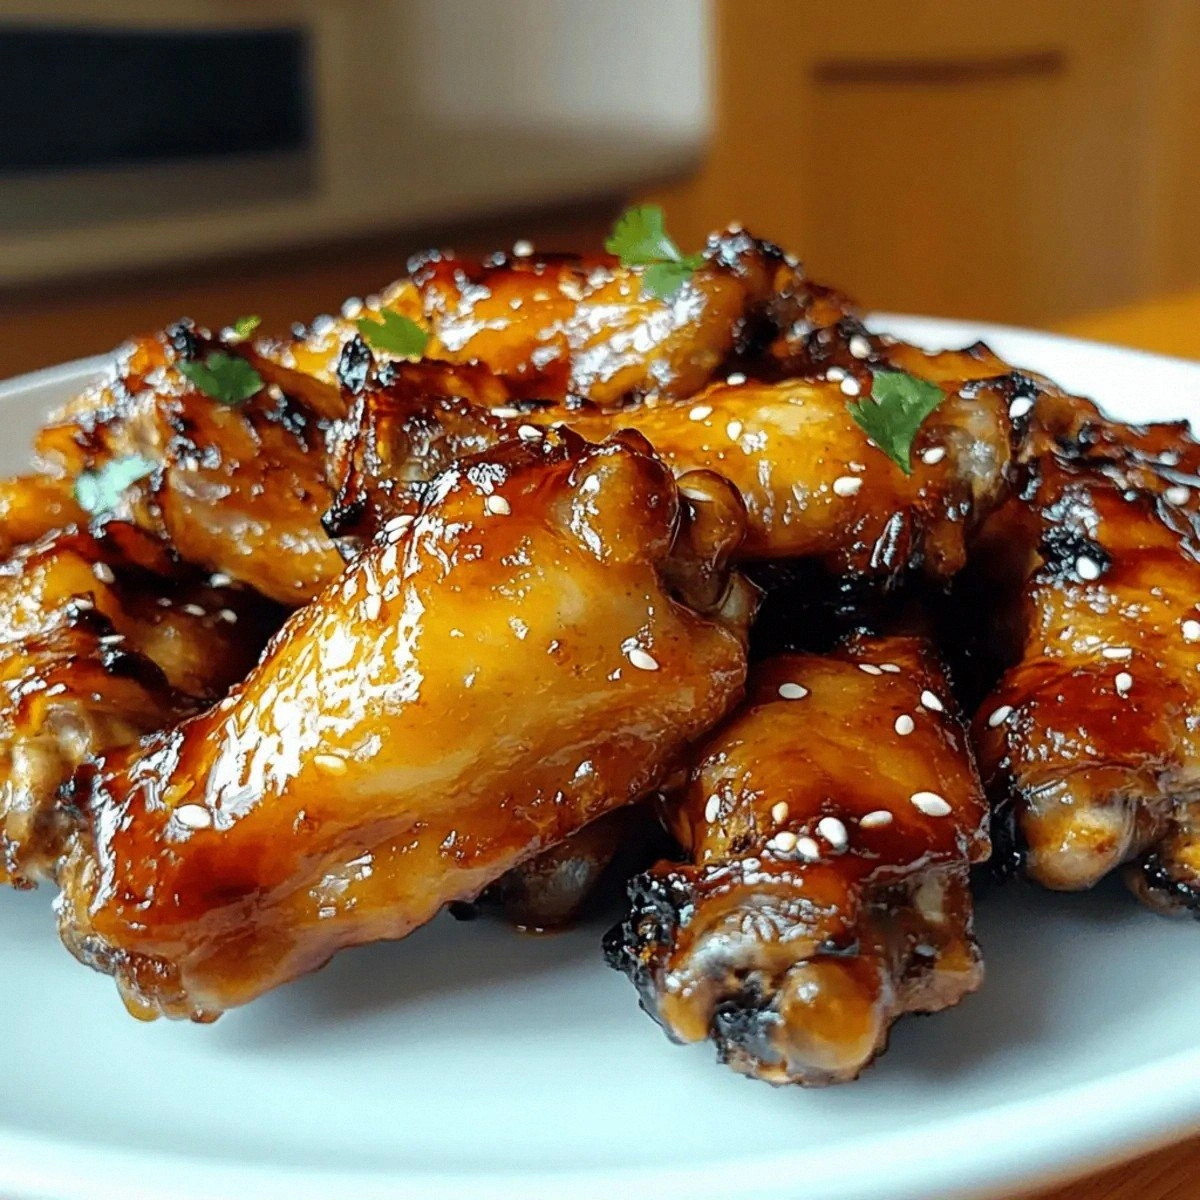
The first thing that hits you is the aroma—a heady mix of caramelized honey, smoky soy, and bright pineapple that makes the whole house feel like a tropical market on fire. You can hear the sizzle as the wings hit the hot pan, a sound that promises a crispy exterior while the inside stays juicy and tender. The glaze coats each piece like a glossy lacquer, shimmering with a golden hue that beckons you to dive in. When you finally bite, the crunch gives way to a burst of sweet‑savory goodness, the kind of flavor explosion that makes you forget any other wing you’ve ever tried. This isn’t just food; it’s a sensory party that demands a second helping, and I dare you to taste this and not go back for seconds.
What makes this version truly stand out is the balance of ingredients that most recipes get completely wrong. Most teriyaki wing recipes drown the meat in a watery sauce that never caramelizes, leaving you with limp, flavorless pieces. Here, the pineapple juice does the heavy lifting, adding natural acidity that cuts through the honey’s sweetness, while the teriyaki sauce brings that umami depth we all crave. The secret weapon? Fresh ginger and garlic, finely minced to release their aromatics early, creating a flavor foundation that’s as complex as it is comforting. And let’s not forget the black pepper—a pinch that adds a subtle heat, keeping the palate from getting too cozy.
Now, I’m about to walk you through every single step—by the end, you’ll wonder how you ever made wings any other way. We’ll start with a technique that sounds simple but is pure magic: a quick marination that infuses the meat without turning it mushy. Then we’ll move to the glaze, where timing is everything, and I’ll reveal a kitchen hack that guarantees a glossy, stick‑to‑your‑fork finish every single time. Picture yourself pulling this out of the oven, the whole kitchen smelling incredible, the glaze shimmering like a sunrise over a tropical sea. Okay, ready for the game‑changer? Let’s dive in.
What Makes This Version Stand Out
- Flavor Harmony: The marriage of pineapple’s bright acidity with honey’s deep sweetness creates a balanced profile that never feels one‑dimensional. Each bite delivers a layered experience that keeps you reaching for more.
- Texture Perfection: By searing the wings first, you lock in juices, then finish them in the oven for an even, crackling crust that shatters like thin ice under a fork.
- Simplicity: Only eight ingredients, all pantry‑friendly, yet the result feels like a dish you’d order at a high‑end Asian‑fusion restaurant.
- Unique Twist: Using pineapple juice instead of canned pineapple chunks prevents sogginess while still delivering that tropical zing.
- Crowd Reaction: I’ve watched entire parties pause mid‑conversation, eyes wide, as they reach for another wing—this is hands down the best version you’ll ever make at home.
- Ingredient Quality: Fresh ginger and garlic are non‑negotiable; they provide a fragrant backbone that powdered versions simply can’t match.
- Cooking Method: A two‑stage process—pan‑sear followed by oven‑bake—ensures every surface gets that coveted caramelized finish.
- Make‑Ahead Potential: The glaze can be pre‑made and stored, meaning you can pull together a party‑ready platter in under thirty minutes on the day of.
Inside the Ingredient List
The Flavor Base
Chicken Wings (2 pounds): The star of the show, wings provide the perfect canvas for the glaze. Choose fresh, skin‑on wings for maximum crispness; if you’re using frozen, thaw them completely and pat dry. Skipping the drying step will steam the wings instead of searing them, resulting in a soggy texture.
Pineapple Juice (1 cup): This is where the tropical vibe comes alive. The natural acidity brightens the sauce and helps tenderize the meat. If you can’t find 100% juice, opt for a no‑sugar‑added version to keep the balance right.
Teriyaki Sauce (1/2 cup): A ready‑made sauce packed with soy, ginger, and a hint of sweetness. Look for a low‑sodium variety to avoid an overly salty finish. You can swap in a homemade version for an extra depth of flavor, but the store‑bought one works beautifully for speed.
The Sweet & Savory Crew
Honey (1/4 cup): The glue that holds everything together, honey caramelizes beautifully at high heat. Use a mild, floral honey for a subtle undertone; avoid overly robust varieties that can dominate the flavor.
Soy Sauce (1 tablespoon): Adds that essential umami punch. Because the teriyaki already contains soy, this extra tablespoon deepens the savory notes without making it salty.
Garlic (3 cloves): Freshly minced garlic releases a pungent aroma that becomes sweet as it cooks. If you crush the cloves instead, you’ll get a more intense bite that can overpower the glaze.
The Unexpected Star
Fresh Ginger (1 tablespoon, minced): Ginger cuts through the sweetness, adding a warm, peppery edge. Grating it fine ensures it disperses evenly, preventing any raw ginger bites.
Black Pepper (1/2 teaspoon): A modest dash that brings a gentle heat, balancing the sweetness of honey and pineapple. Freshly cracked pepper offers a brighter flavor than pre‑ground.
Everything's prepped? Good. Let’s get into the real action…
The Method — Step by Step
Start by patting the chicken wings completely dry with paper towels; moisture is the enemy of crispiness. Toss the wings with a pinch of salt and a light drizzle of oil, then set them aside for five minutes while you prep the glaze. This short rest allows the skin to dry out, ensuring a crackling finish when they hit the pan.
Heat a large, heavy‑bottomed skillet over medium‑high heat until a drop of water sizzles and evaporates instantly. Add the wings in a single layer—don’t crowd them, or you’ll steam instead of sear. Let them cook undisturbed for about 3‑4 minutes per side, listening for that deep, satisfying sizzle that signals a perfect sear.
Kitchen Hack: If your skillet starts to smoke, lower the heat slightly and add a splash of water to deglaze; this prevents burnt bits while preserving flavor.While the wings are searing, combine pineapple juice, teriyaki sauce, honey, soy sauce, minced garlic, and ginger in a saucepan. Bring the mixture to a gentle boil, then reduce to a simmer, stirring constantly. The sauce should thicken slightly—think a honey‑glazed glaze that coats the back of a spoon without dripping off.
Preheat your oven to 400°F (200°C). Once the wings are browned on both sides, transfer them onto a baking sheet lined with parchment. This move ensures even cooking and prevents the glaze from burning on the stovetop.
Brush each wing generously with the thickened glaze, making sure every crevice gets a coating. Place the glazed wings in the oven and bake for 20‑25 minutes, turning once halfway through and basting with any remaining sauce. The heat will caramelize the glaze, creating that coveted sticky sheen.
Watch Out: Keep a close eye on the last five minutes; the sugars can go from caramelized to burnt in a heartbeat.When the wings are golden and the glaze has set into a glossy crust, remove them from the oven. Let them rest for three minutes—this short pause lets the juices redistribute and the glaze to firm up just enough for a perfect bite.
While the wings rest, give the remaining glaze a final quick boil for one minute to ensure any stray bits are fully incorporated. This step is pure magic; the final drizzle adds an extra layer of shine and flavor that makes the dish look restaurant‑ready.
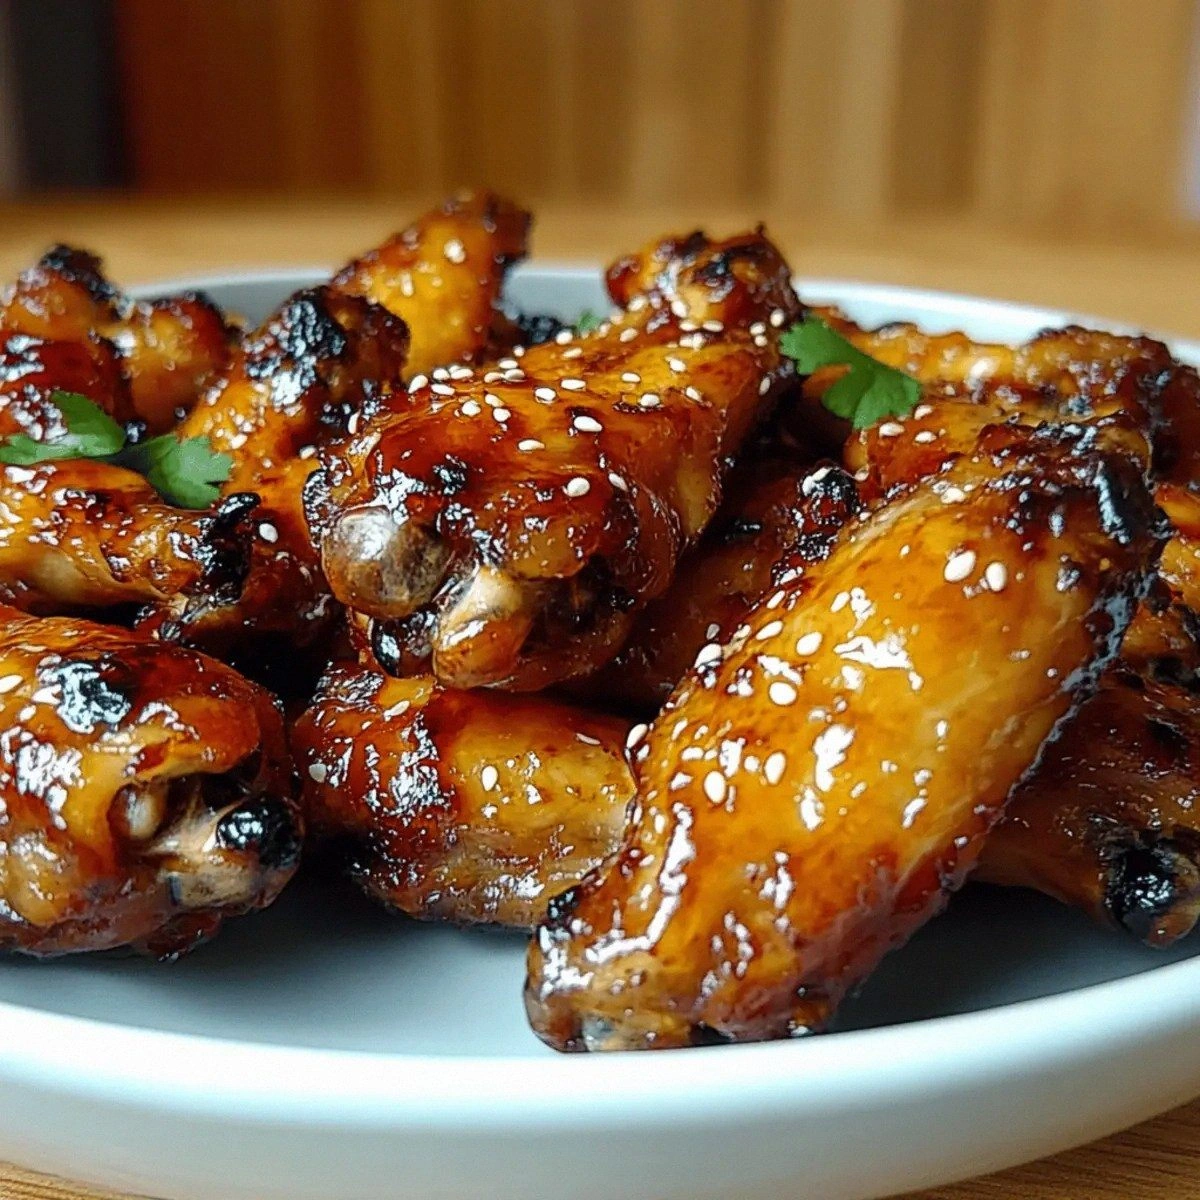
Transfer the wings to a serving platter, drizzle the final glaze over the top, and garnish with a sprinkle of freshly cracked black pepper or a few sliced green onions if you like a pop of color. Serve hot, with extra pineapple wedges on the side for those who crave a burst of fresh fruit.
That’s it — you did it. But hold on, I’ve got a few more tricks that'll take this to another level…
Insider Tricks for Flawless Results
The Temperature Rule Nobody Follows
Most home cooks sear at too high a heat, which scorches the skin before the interior cooks through. Keep your skillet at medium‑high and let the wings develop a golden crust before turning them. This controlled heat ensures the meat stays juicy while the exterior gets that coveted crunch.
Why Your Nose Knows Best
The moment the glaze starts to bubble and release a caramel scent is your cue to start basting. Trust that nose—it’s more reliable than a timer. If the aroma is sweet and nutty, you’re on the right track; a burnt smell means it’s time to pull the wings out.
The 5‑Minute Rest That Changes Everything
Resting isn’t just for steaks. Letting the wings sit for a brief three‑to‑five minutes after baking lets the fibers relax, preventing the meat from drying out when you bite into it. This pause also lets the glaze set, giving you that perfect, non‑runny coating.
Double‑Baste for Maximum Stickiness
During the oven stage, baste the wings twice: once halfway through and once five minutes before they’re done. This layered approach builds up layers of caramelized sugar, ensuring each bite is as sticky as the last.
Don’t Forget the Acid Balance
If the glaze tastes too sweet, a splash of rice vinegar or a squeeze of lime can brighten it up instantly. I once over‑sweetened a batch and a quick dash of acid saved the dish, turning a potential flop into a flavor triumph.
Creative Twists and Variations
This recipe is a playground. Here are some of my favorite ways to switch things up:
Spicy Heatwave
Swap half the honey for sriracha and add a pinch of cayenne to the glaze. The result is a sweet‑heat combo that’ll make even the most spice‑averse reach for more.
Smoky BBQ Fusion
Replace half the teriyaki sauce with a smoky barbecue sauce and add a dash of smoked paprika. You’ll get a deep, smoky undertone that pairs perfectly with the pineapple’s brightness.
Herb‑Infused Freshness
Stir in finely chopped cilantro or Thai basil right before serving. The herbaceous notes lift the glaze, adding a fresh contrast to the sweet‑savory base.
Crunchy Nutty Crunch
Toast some crushed peanuts or cashews and sprinkle them over the finished wings. The nutty crunch adds texture and an extra layer of flavor complexity.
Gluten‑Free Glory
Use tamari instead of soy sauce and ensure your teriyaki sauce is gluten‑free. The dish remains just as delicious, catering to those with gluten sensitivities.
Vegetarian Flip
Swap the chicken wings for cauliflower florets, coating them in the same glaze and baking until tender. The result is a veggie‑friendly version that still delivers that sticky, caramelized goodness.
Storing and Bringing It Back to Life
Fridge Storage
Place leftover wings in an airtight container and store them in the refrigerator for up to three days. When reheating, add a tiny splash of water or extra pineapple juice to the pan to create steam, reviving the glaze’s shine.
Freezer Friendly
For longer storage, arrange the cooled wings on a baking sheet, freeze until solid, then transfer to a zip‑top bag. They’ll keep for up to two months. Thaw overnight in the fridge, then reheat in a preheated oven at 375°F (190°C) for 12‑15 minutes, basting with a little fresh glaze halfway through.
Best Reheating Method
The secret to perfect reheating is low‑and‑slow in the oven, not the microwave. This method preserves the crisp exterior while gently warming the interior. Finish with a quick broil for 1‑2 minutes if you crave that extra crunch.