Picture this: a quiet Saturday evening, the fridge humming, the smell of fresh cod drifting through the kitchen, and you realizing that the only thing that’s missing is the magic touch that turns an ordinary fish fillet into a headline dish. I was in that exact spot last week, scrolling through a sea of bland cod recipes, when a friend dared me to “sizzle up” a cod fillet with garlic butter and a splash of stock, and to make it so irresistible that even the most skeptical palate would beg for seconds. I laughed, grabbed my ingredients, and set to work, knowing that the outcome would either be a culinary triumph or a spectacular flop. Spoiler: it was the former.
The first thing that hits you is the sizzle. That moment when the butter hits the hot pan, crackles like a tiny firework, and the garlic releases its warm, aromatic steam—pure, unfiltered bliss. The sound is almost as important as the scent, a subtle cue that the fish is about to transform from plain to extraordinary. My senses were already dancing: the glistening olive oil, the gentle hiss of butter, the faint whisper of garlic powder. I could almost taste the buttery coating that will cling to the cod, the hint of citrus from the stock, and the fresh parsley that will finish the dish like a green flourish on a canvas.
What makes this version stand out is not just the ingredients but the way they interact. The flour creates a light, crisp crust that locks in the juices, while the butter and stock combine to form a silky sauce that coats the fish like velvet. I dare you to taste this and not go back for seconds. The dish balances richness and brightness, a harmony that most cod recipes miss. It’s hands down the best version you’ll ever make at home, and I’m about to show you how to recreate it with precision.
And here’s the kicker: the secret sauce is not just butter and stock; it’s the precise timing of each element. By adding the garlic powder at the very end, you preserve its bright, peppery punch without letting it burn. The result is a sauce that sings, not a sauce that stinks. Picture yourself pulling this out of the pan, the whole kitchen smelling incredible, and the plate looking like a masterpiece. Ready? Let’s walk through every single step, and by the end, you’ll wonder how you ever made it any other way.
What Makes This Version Stand Out
- Crunch: The flour coating gives a satisfying, almost popcorn-like crunch that snaps when you bite, creating a delightful contrast to the tender fish inside. It’s the kind of texture that makes the dish memorable.
- Richness: Four tablespoons of butter melt into a glossy, buttery sauce that envelops every inch of the cod, delivering a mouthful of decadence that feels like a reward.
- Balance: The splash of vegetable stock adds a subtle acidity that cuts through the richness, preventing the dish from feeling heavy and ensuring a clean finish.
- Speed: With a prep time of just 15 minutes and cooking under 30, this recipe proves that gourmet flavor doesn’t have to wait for a weekend.
- Versatility: Whether you’re feeding a family, impressing guests, or prepping a meal for the week, the method scales up or down without losing flavor.
- Freshness: The final sprinkle of parsley brings a burst of color and a hint of citrus that brightens the plate, making it look as good as it tastes.
- Ease: No special equipment required—just a skillet and a whisk. Even kitchen novices can master this technique with minimal fuss.
Alright, let's break down exactly what goes into this masterpiece…
Inside the Ingredient List
The Flour Coating
Plain flour is the unsung hero that transforms a plain cod fillet into a crispy delight. It absorbs excess moisture, creating a barrier that keeps the fish juicy while forming a light, golden crust. If you skip it, the cod will steam in its own juices, resulting in a soggy texture that’s hard to recover from. For those who prefer a gluten‑free version, a fine almond flour will work, though it will give a slightly nutty undertone. The key is to lightly dust the fillets, ensuring an even coating that doesn’t clump.
The Seasoning Mix
Salt and black pepper are the backbone of flavor. Salt draws out the fish’s natural sweetness, while pepper adds a subtle heat that’s not overpowering. Together, they elevate every other ingredient. If you’re watching sodium, reduce the salt by half, but keep the pepper; it still provides depth. A pinch of smoked paprika can add a smoky nuance, especially if you’re aiming for a grill‑like flavor.
The Butter and Oil Duo
Unsalted butter is the star of the sauce, providing richness and a silky mouthfeel. Olive oil, on the other hand, raises the smoke point, allowing the butter to melt without burning. Together, they create a balanced base that supports the garlic and stock. If you’re looking for a lighter version, replace half the butter with extra virgin olive oil, but be prepared for a slightly less decadent sauce.
The Garlic Explosion
Fresh garlic cloves bring a punch of aroma that dances through the kitchen. The garlic powder, added at the end, offers a clean, peppery finish without the risk of scorching. If you’re allergic to garlic, try a splash of onion powder for a milder, yet still savory, alternative. The combination ensures that the garlic’s bright flavor remains prominent throughout the cooking process.
The Stock Splash
Vegetable stock provides the liquid base for the sauce, adding depth and a subtle vegetal note that complements the fish. It also helps to keep the cod moist during the final simmer. If you prefer a richer, more umami‑heavy sauce, swap the vegetable stock for fish stock or even a light chicken broth. A dash of lemon juice right before serving can brighten the dish, cutting through the buttery richness.
The Parsley Finish
Fresh parsley isn’t just a garnish; it’s a finishing touch that adds a pop of color and a hint of citrusy freshness. The chlorophyll gives the dish a vibrant green that makes it look as appetizing as it tastes. If you’re out of parsley, a small handful of chopped chives or dill will provide a different but equally pleasing flavor profile.
Everything's prepped? Good. Let's get into the real action…
The Method — Step by Step
- Prep the fillets. Pat each cod fillet dry with paper towels, ensuring no moisture remains on the surface. This step is crucial because excess water will prevent the flour from adhering properly. Season both sides generously with salt and pepper, letting the flavors penetrate the flesh for about a minute. Then, lightly dredge each fillet in plain flour, shaking off any excess. The coating should feel like a fine dusting, not a thick crust.
- Heat the pan. Place a large skillet over medium‑high heat and add the olive oil. Once the oil shimmers, drop in the butter. The butter should start to foam and turn a pale golden color, indicating it’s ready. Keep the heat steady; if it goes too hot, the butter will burn and give a bitter taste to the dish.
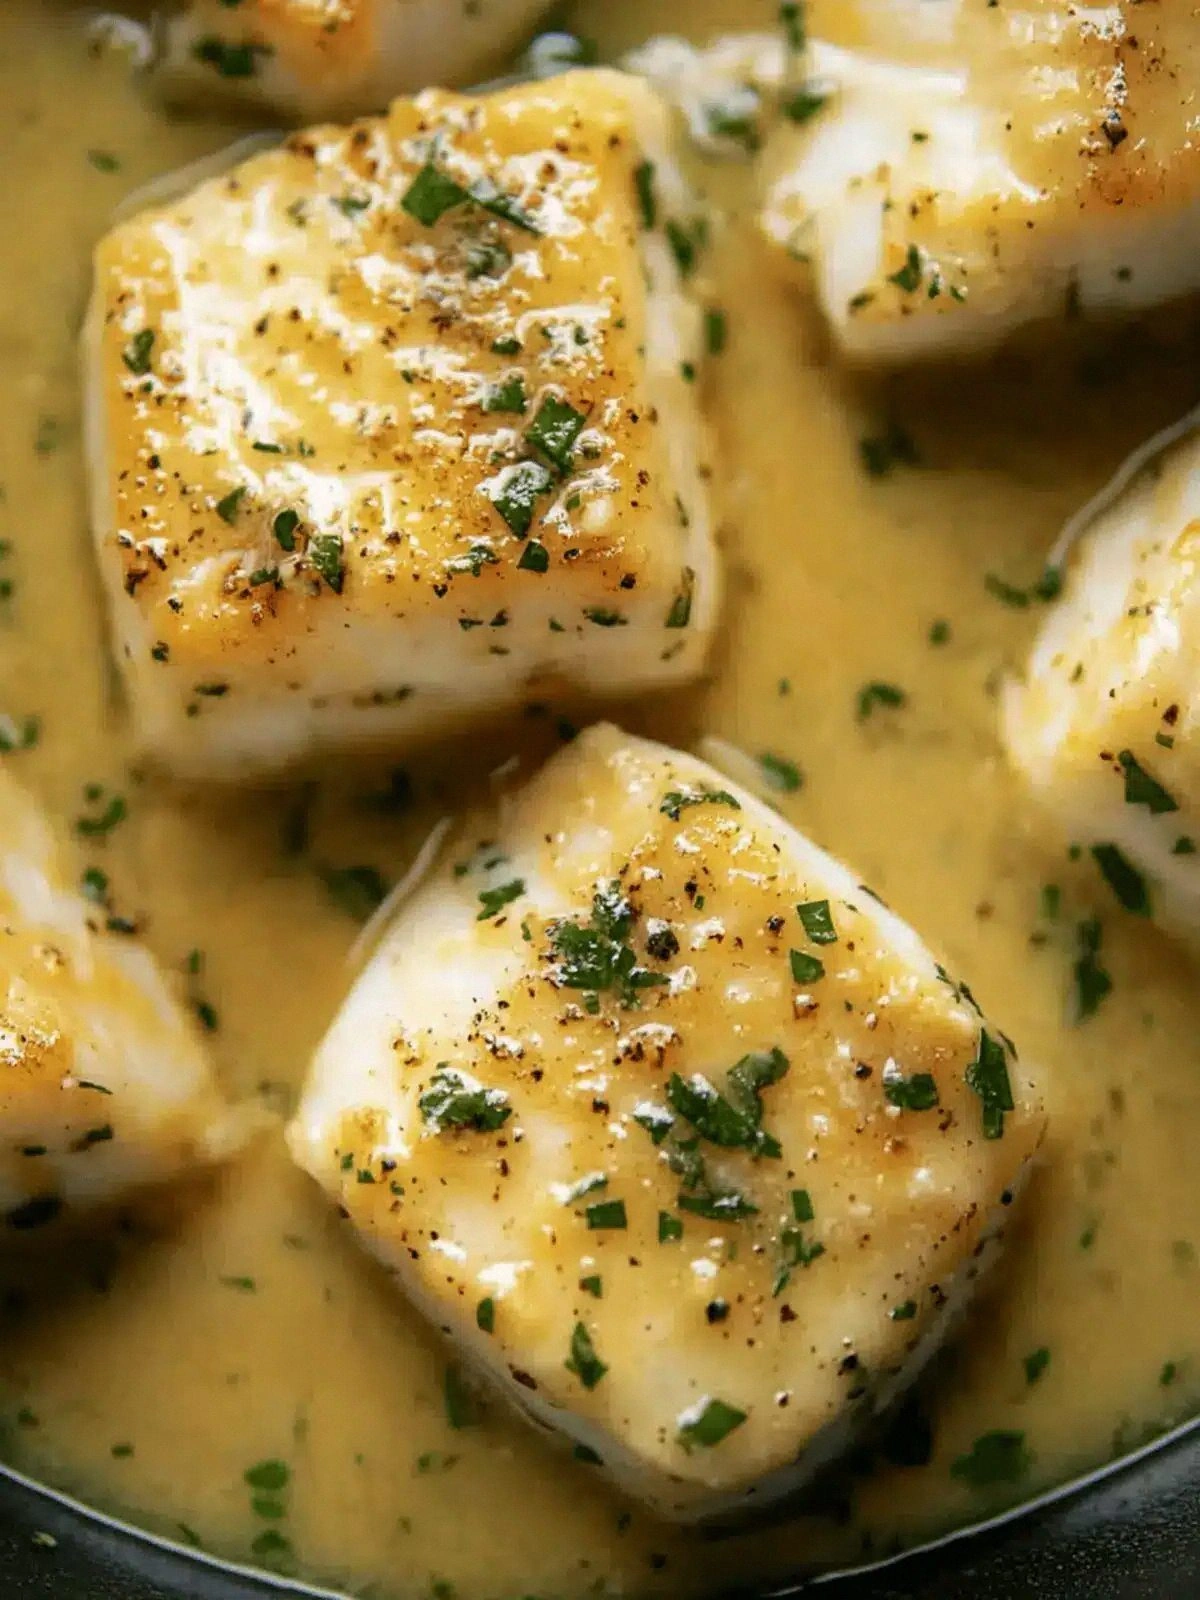
- Sear the fish. Gently lay the coated fillets into the pan, skin side down if the skin is still attached. Press them lightly with a spatula to ensure full contact with the pan. The first side should sizzle, producing a crisp, golden crust in about 3 to 4 minutes. Watch for the edges to start pulling away from the pan—this is your cue that it’s time to flip. Flip once; the second side will only need 2 to 3 minutes.
- Add the garlic. While the fish cooks, mince the garlic cloves finely. Once the fillets are almost done, scatter the minced garlic across the pan. The garlic will sizzle almost immediately, releasing a fragrant aroma that fills the kitchen. Be careful not to let it burn; a quick stir will prevent it from sticking to the bottom.
- Deglaze with stock. Pour the vegetable stock into the pan, swirling to lift the browned bits from the bottom. These bits are flavor gold—don’t discard them. The stock should bubble gently, creating steam that envelops the fish. Let it simmer for 1 to 2 minutes, allowing the sauce to thicken slightly and the flavors to meld.
- Finish with butter. Add the remaining butter to the pan, allowing it to melt into the sauce. This step creates a glossy, silky coating that clings to the fish. As the butter melts, swirl the pan to distribute the sauce evenly. The sauce should look like a light, buttery glaze that coats the fillets without being too thick.
- Season the sauce. Sprinkle the garlic powder over the fillets, then stir to combine. The powder will dissolve into the sauce, adding a clean, peppery note. Taste the sauce; if it needs more salt, add a pinch, but be cautious—over‑salting can overpower the delicate cod.
- Garnish and serve. Transfer the fillets to a serving platter. Sprinkle fresh parsley over the top, allowing the green to contrast with the golden crust. Serve immediately, perhaps with a side of roasted vegetables or a light salad. The dish is at its peak when the fish is still steaming and the sauce is glossy.
That’s it— you did it. But hold on, I've got a few more tricks that'll take this to another level. You’re about to discover how to elevate the sauce, perfect the crust, and add a final flourish that will have your guests asking for the recipe. Let’s dive into the insider tricks that will make you feel like a culinary wizard.
Insider Tricks for Flawless Results
The Temperature Rule Nobody Follows
Many chefs think that high heat is the key to a perfect crust, but the truth is that a moderate temperature gives you more control. Set your skillet to medium‑high and let it heat up gradually; this ensures the flour browns evenly without burning. If you find the pan too hot, lower the heat and let the fish cook slower—this prevents the butter from scorching and keeps the sauce from developing a bitter edge.
Why Your Nose Knows Best
Trust your nose when you’re cooking. A subtle, sweet aroma of butter and garlic indicates the sauce is developing correctly. If you smell a sharp, burnt scent, the butter is likely over‑cooked. In that case, reduce the heat and add a splash of water to loosen the sauce, then finish with a quick swirl of fresh parsley to restore brightness.
The 5‑Minute Rest That Changes Everything
After you remove the fillets from the pan, let them rest on a warm plate for about five minutes. This allows the juices to redistribute, ensuring each bite is moist and flavorful. A friend once skipped this step, and the fish came out dry and unappetizing. The rest period is a simple, often overlooked step that makes a huge difference.
The Garlic Powder Trick
Adding garlic powder at the end preserves its bright, peppery flavor. If you add it too early, the heat will degrade the aroma, leaving the dish flat. A pinch of fresh crushed garlic after the fish is done adds a punchy kick that elevates the sauce. This small adjustment can turn a good dish into an unforgettable experience.
The Parsley Finish
Fresh parsley not only adds color but also a subtle citrusy brightness that cuts through the richness. Sprinkle it just before serving to keep the leaves crisp and the flavor vivid. If you prefer a different herb, dill or tarragon will give the dish a distinct, aromatic profile that pairs wonderfully with fish.
Creative Twists and Variations
This recipe is a playground. Here are some of my favorite ways to switch things up:
Crispy Lemon‑Zest Cod
Add zest from one lemon to the flour coating. The bright citrus flavor pairs beautifully with the buttery sauce, giving the dish a fresh, zesty kick. Serve over a bed of sautéed spinach for a light, balanced meal.
Herb‑Infused Cod
Replace the parsley with a mix of thyme, oregano, and basil. The aromatic herbs infuse the sauce with depth, creating a Mediterranean vibe. Finish with a drizzle of extra virgin olive oil for a silky finish.
Spicy Cajun Cod
Incorporate a tablespoon of Cajun seasoning into the flour mix. The smoky heat adds a bold contrast to the mild cod, making it a crowd‑pleaser for spice lovers. Pair with a cool cucumber salad to balance the heat.
Miso‑Glazed Cod
Swapping the garlic powder for a tablespoon of white miso paste creates an umami‑rich glaze. The miso adds a savory depth that complements the fish’s delicate flavor. Serve with steamed rice and a drizzle of sesame oil for an Asian twist.
Smoky Chipotle Cod
Add a teaspoon of chipotle powder to the sauce for a subtle smoky heat. The chipotle pairs well with the buttery sauce, creating a complex flavor profile. Garnish with avocado slices for a creamy contrast.
Storing and Bringing It Back to Life
Fridge Storage
Cool the cooked fillets to room temperature, then cover tightly with plastic wrap or place in an airtight container. Store in the refrigerator for up to 2 days. When reheating, use a microwave on low power for 30 seconds, then finish in a skillet with a splash of water to keep the sauce moist.
Freezer Friendly
For longer storage, wrap each fillet individually in parchment paper, then place in a freezer bag. Freeze for up to 3 months. Thaw overnight in the refrigerator, then reheat gently in a pan with a splash of water to re‑hydrate the sauce.
Best Reheating Method
The secret to reheating cod without drying it out is to keep the sauce moist. Add a tiny splash of water or broth to the pan, cover, and heat over low heat until warmed through. A quick stir will help the sauce re‑coat the fillets, restoring the silky finish.