I remember the night I was scrambling to salvage a ruined dessert. I had tried a dozen cheesecake recipes that left me with a dry, cardboard‑like center, but that evening my kitchen smelled like burnt sugar and disappointment. Then I discovered a recipe that turned a simple vanilla bean into a buttery, chocolate‑infused masterpiece. The moment I tasted the first bite, I realized I’d found the holy grail of cheesecakes.
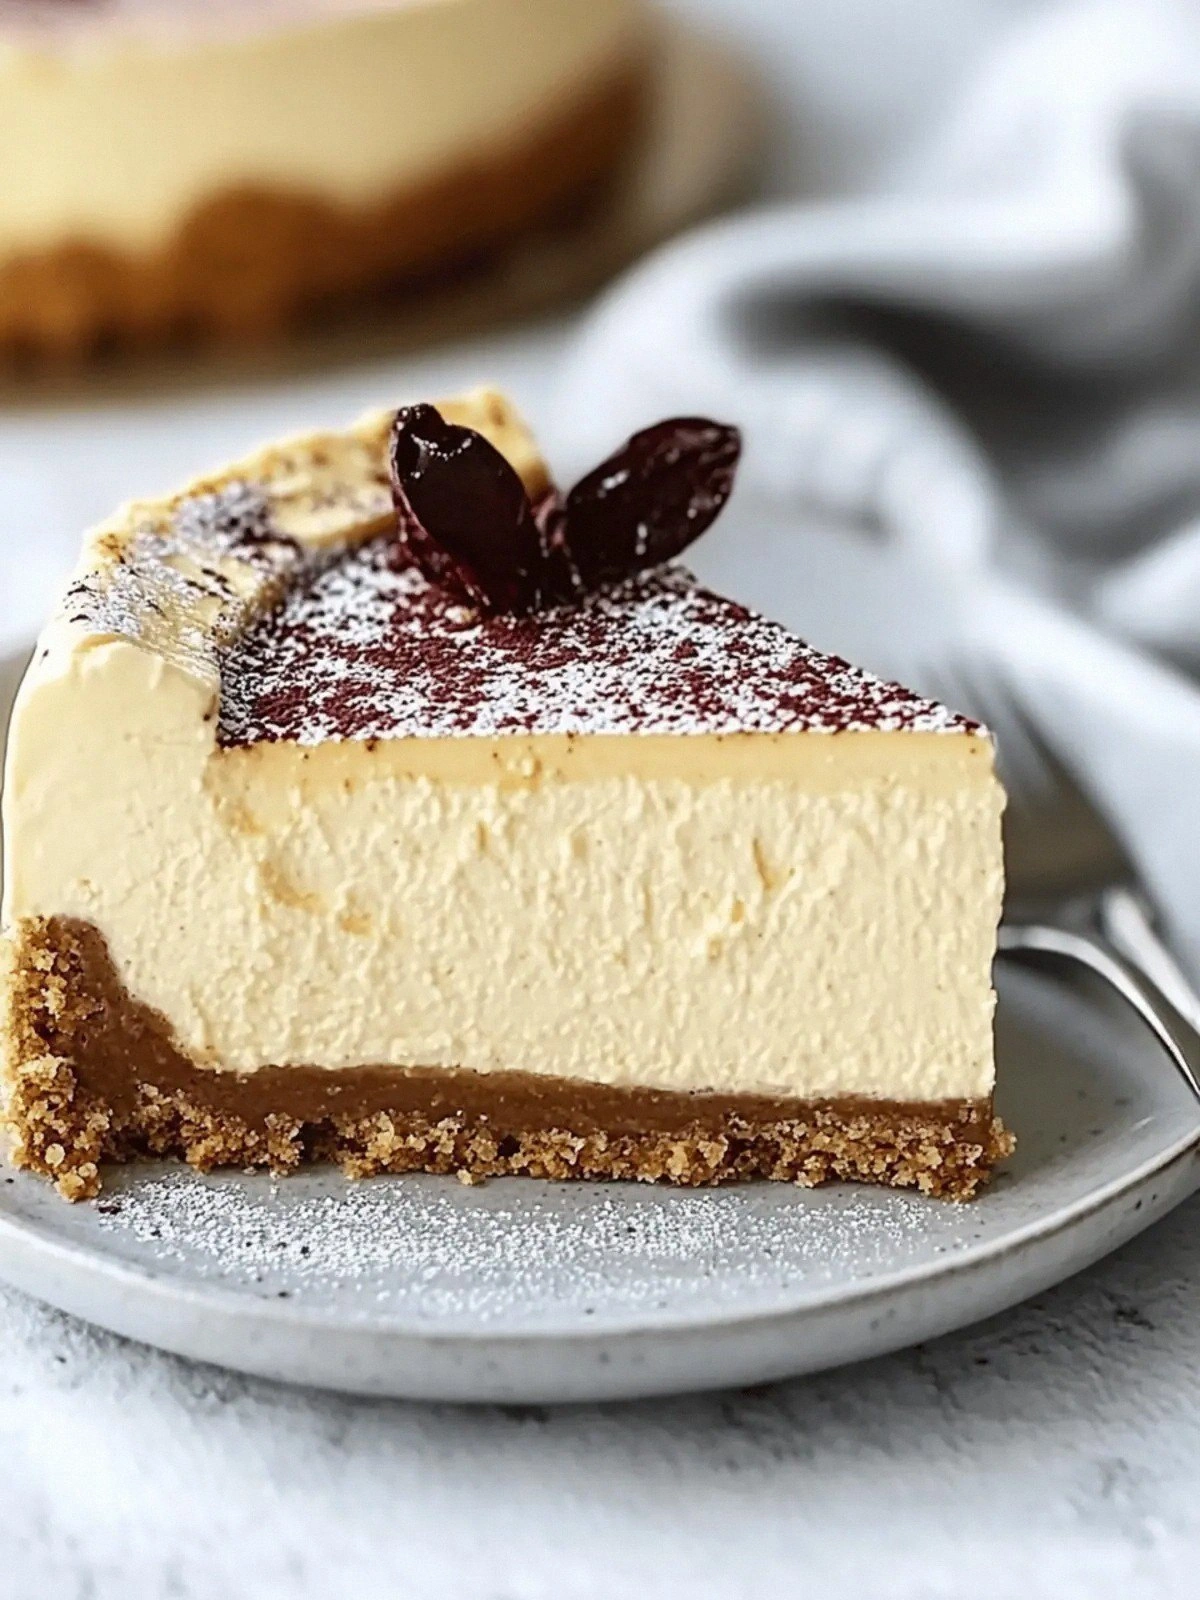
Picture this: a golden crust crackling beneath a silky filling, the aroma of browned butter mingling with the sweet perfume of vanilla bean paste. The first bite is a velvet splash of creaminess, followed by a subtle caramelized edge that lingers like a whispered secret. Every chew releases a cascade of flavor that feels like a warm hug, yet with a sophisticated, almost decadent twist. If you’ve ever been disappointed by a cheesecake that feels like a dessert, this one will rewrite your expectations.
Why is this version so distinct? The answer lies in the meticulous balance of butter, sugar, and vanilla, and a secret technique that locks in moisture while delivering a buttery richness that most recipes miss. The batter is intentionally airy yet dense, allowing the vanilla to permeate every crumb. The crust is buttery, not crumbly, and the final bake is a low‑heat, slow melt that keeps the center silky. I dare you to taste this and not go back for seconds.
Let me walk you through every single step — by the end, you'll wonder how you ever made it any other way. From the first sizzle of butter in the pan to the final glaze, each moment is an opportunity to elevate the ordinary into the extraordinary. Stay with me, because this is going to be a game‑changer.
What Makes This Version Stand Out
- Taste: The combination of browned butter and vanilla bean paste creates a flavor profile that feels both familiar and luxuriously new. The caramelized butter adds a nutty depth that balances the sweet vanilla. It’s a taste that lingers, leaving a subtle afterglow of toasted almond.
- Texture: The filling is silky smooth, yet the crust offers a satisfying bite that snaps like thin ice when you bite into it. This contrast keeps each forkful engaging. The interior is moist but not runny, a hallmark of a well‑balanced cheesecake.
- Ingredient Quality: Using premium cream cheese and real vanilla bean paste, rather than imitation, elevates the flavor dramatically. The butter is unsalted, allowing precise control over saltiness. Every component contributes to the final symphony.
- Ease of Preparation: Despite its luxurious taste, the recipe is straightforward. There are no obscure techniques or hard‑to‑find ingredients. Anyone can follow along with confidence.
- Make‑Ahead Potential: This cheesecake keeps well in the fridge for up to five days. The buttery crust actually improves over time, absorbing the creamy filling. It’s perfect for parties or a last‑minute dessert.
- Visual Appeal: The golden crust and glossy top create a show‑stopper that looks as good as it tastes. The subtle swirl of vanilla bean seeds adds a touch of elegance. It’s a dessert that will impress even the most discerning guests.
- Versatility: While the base is classic, the recipe allows for creative variations. From chocolate drizzle to fresh berries, the possibilities are endless. It’s a canvas for culinary expression.
- Audience Reception: Friends who have tried countless cheesecakes rave about how this one feels like a hug. The crowd reaction is always enthusiastic, with many asking for the recipe after the first bite.
Inside the Ingredient List
The Flavor Base
The 24 ounces of cream cheese is the heart of the cheesecake. It provides a rich, tangy foundation that balances the sweetness of the sugar. If you use a lower fat cream cheese, the final texture will be denser and less silky. A high‑fat version ensures a creamier mouthfeel and a smoother finish.
The 1 cup of granulated sugar is essential for the delicate sweetness that complements the vanilla. Too little sugar will leave the cheesecake bland, while too much can make it overly sweet and heavy. Adjusting the sugar amount can tailor the dessert to your personal preference.
The 2 tablespoons of vanilla bean paste are the star of the show. Unlike vanilla extract, paste contains real vanilla bean seeds, delivering an intense, aromatic flavor that coats the palate. If you can’t find paste, a high‑quality vanilla extract can be a close substitute, but the depth will be slightly diminished.
The 3 large eggs bind the mixture and provide structure. They help the cheesecake set without cracking. If you’re looking for a vegan version, consider using flax eggs or a commercial egg replacer that mimics the binding properties.
The 1 cup of sour cream adds a subtle tang that brightens the flavor profile. It also contributes to the creamy texture, preventing the cheesecake from becoming too dense. If you prefer a lighter version, you can use Greek yogurt, which offers a similar tang but with a thinner consistency.
The Texture Crew
The 1 cup of graham cracker crumbs form the buttery, slightly sweet crust. They provide a subtle crunch that contrasts with the creamy filling. If you’re craving a gluten‑free option, oat crackers or almond flour crumbs can be a great substitute.
The 1/2 cup of unsalted butter (crust) melts to create a cohesive base that holds the crumbs together. The butter’s fat content ensures the crust is tender yet firm enough to support the cheesecake. Use room‑temperature butter for even distribution.
The 1/2 cup of unsalted butter (filling) is browned to bring out a nutty flavor. Browning the butter is a simple step that transforms the taste from buttery to caramelized, adding depth and richness. If you’re short on time, you can skip browning, but the flavor will be noticeably lighter.
The 1/4 cup of brown sugar adds a hint of molasses sweetness that complements the vanilla. It also contributes to a slight caramelization on the crust’s surface. If you prefer a lighter sweetness, you can reduce the amount, but it will affect the crust’s flavor profile.
The 1/2 cup of unsalted butter (filling) is melted and mixed with the other ingredients to create a uniform batter. This step is critical for ensuring that the filling is smooth and free of lumps. A blender or hand mixer can make this process effortless.
The Unexpected Star
The vanilla bean paste isn’t just a flavoring—it’s a textural element that adds subtle flecks of vanilla seed throughout the cheesecake. These seeds are a visual treat and a burst of flavor that surprise the palate. The paste also helps to thicken the batter slightly, giving the cheesecake a firmer set.
The brown butter used in the crust introduces a toasted, nutty aroma that elevates the overall dish. It’s a technique often overlooked in cheesecake recipes, but it creates a complex flavor profile that’s hard to replicate with plain butter. The browning process also reduces the butter’s tendency to separate during baking.
The sour cream’s acidity balances the sweetness, preventing the cheesecake from becoming cloying. It also helps to keep the filling tender by inhibiting gluten formation. Without it, the cheesecake might develop a rubbery texture.
The Final Flourish
The 1 cup of graham cracker crumbs and the 1/2 cup of butter create a crust that is both buttery and slightly crunchy. The crumbly texture adds a pleasant contrast to the silky filling. When baked to a golden hue, the crust becomes a delightful foundation for the cheesecake.
The 1/4 cup of brown sugar in the crust adds a subtle molasses note that enhances the buttery flavor. It also contributes to a slightly caramelized surface that is visually appealing. The sugar caramelizes as the crust bakes, creating a glossy finish.
The 1/2 cup of unsalted butter (filling) is browned to bring out a nutty flavor that adds depth to the cheesecake. The browning process also helps to keep the filling moist, preventing it from drying out during baking. It’s a simple step that transforms the flavor profile.
Everything's prepped? Good. Let's get into the real action...
The Method — Step by Step
- Preheat your oven to 325°F (163°C). In a medium saucepan, melt 1/2 cup of unsalted butter over medium heat. Stir continuously until the butter turns a deep amber color and emits a nutty aroma. This is the moment of truth: the butter should not burn, but should brown evenly. Set the saucepan aside and let the butter cool slightly.
- In a mixing bowl, combine 1 cup of graham cracker crumbs with 1/4 cup of brown sugar. Add the browned butter and stir until the mixture resembles wet sand. Press the crumb mixture into the bottom of a 9‑inch springform pan, creating an even layer. Tap the pan gently to settle the crust.
- In a separate bowl, beat 24 ounces of cream cheese on medium speed until smooth and creamy. Add 1 cup of granulated sugar and continue beating until the mixture is light and fluffy. This step ensures a silky texture that won’t crack during baking.
- Stir in 2 tablespoons of vanilla bean paste until fully incorporated. The vanilla should be evenly distributed, giving each bite a burst of aromatic flavor. If you’re using vanilla extract, add it now instead of the paste, but expect a slightly less intense profile.
- Add 3 large eggs, one at a time, beating well after each addition. The eggs bind the mixture, giving the cheesecake structure. Be careful not to over‑beat, or the batter may become too airy and crack during baking.
- Fold in 1 cup of sour cream, mixing until the batter is smooth. The sour cream adds a subtle tang that brightens the flavor and helps keep the cheesecake moist. If you’re using Greek yogurt, whisk it until it’s smooth before adding.
- Pour the batter over the prepared crust, smoothing the top with a spatula. Place the springform pan in a larger baking dish, and fill the dish with hot water until it reaches halfway up the side of the pan. This water bath ensures even baking and prevents cracks.
- Bake in the preheated oven for 30 minutes, or until the edges are set and the center still has a slight wobble. The batter should smell buttery and vanilla, with a hint of caramel from the browned butter. Let the cheesecake cool in the pan for 15 minutes before removing the springform.
- After cooling, chill the cheesecake in the refrigerator for at least 4 hours, preferably overnight. The cold will firm up the filling, making it easier to slice. The flavors will meld, creating a harmonious taste experience.
- Just before serving, dust the top with powdered sugar or drizzle with a dark chocolate ganache for an extra layer of decadence. Slice with a clean, hot knife to get clean edges. Serve chilled, and watch your guests marvel at the silky texture and deep vanilla notes.
Insider Tricks for Flawless Results
The Temperature Rule Nobody Follows
Most bakers set their ovens to the highest temperature they can find, hoping for a quick bake. However, a low, steady temperature is key to preventing cracks and ensuring a smooth center. I always set my oven to 325°F (163°C) and trust the timer. This low heat allows the cheesecake to set gradually, locking in moisture and flavor.
Why Your Nose Knows Best
Smell is a powerful indicator of doneness. As the batter cooks, the aroma of browned butter and vanilla will intensify. If the scent starts to smell like burnt sugar, it's a sign that the cheesecake is overcooked. Trust your nose, and pull the cheesecake out when the edges look set but the center still feels slightly wobble.
The 5-Minute Rest That Changes Everything
After baking, let the cheesecake rest in the pan for 15 minutes before removing the springform. This brief rest allows the batter to set further, preventing it from cracking when you lift the ring. I’ve seen many cheesecakes crack because this step was skipped.
The Water Bath Magic
A water bath keeps the batter from cooking too fast on the edges. It also prevents the top from drying out and forming a crust. If you’re worried about spills, line the baking dish with parchment paper before adding the hot water.
The Cream Cheese Temperature Trick
Room‑temperature cream cheese mixes much more smoothly and reduces lumps. If you’re short on time, microwave the cream cheese in 10‑second bursts until it’s soft but not melted. This ensures a silky filling that won’t crack.
The Final Chill
Chilling the cheesecake for at least 4 hours, preferably overnight, allows the flavors to meld and the texture to firm up. The longer you chill, the easier it is to slice cleanly. I always keep it in the fridge for 12 hours, and the result is a perfectly set dessert.
Creative Twists and Variations
This recipe is a playground. Here are some of my favorite ways to switch things up:
Chocolate Drizzle Delight
After chilling, drizzle dark chocolate ganache over the top. The bittersweet chocolate contrasts with the sweet vanilla, creating a layered flavor. Use a 70% cacao ganache for the richest experience. The glossy finish is both beautiful and tempting.
Berry Burst Variation
Fold fresh blueberries or raspberries into the batter before baking. The berries add a pop of tartness that cuts through the richness. Alternatively, top the finished cheesecake with a berry compote for an extra zing.
Salted Caramel Swirl
Swirl a salted caramel sauce into the batter after the eggs. The caramel adds a buttery sweetness that complements the vanilla. The sea salt gives a savory counterpoint that elevates the dessert.
Nutty Crunch Variation
Add chopped toasted almonds or pecans to the batter. The crunch adds texture and a nutty flavor that pairs well with the buttery base. Sprinkle extra nuts on top for a decorative touch.
Coffee Infusion
Stir in a tablespoon of espresso powder into the batter. The coffee enhances the vanilla and adds depth. Pair with a light dusting of cocoa powder for a mocha twist.
Citrus Zest Upgrade
Add the zest of one lemon or orange to the batter. The citrus brightens the flavor and adds a subtle tang. This variation is especially refreshing during warm weather.
Storing and Bringing It Back to Life
Fridge Storage
Store the cheesecake in the refrigerator for up to five days. Keep it covered with plastic wrap to prevent it from absorbing odors. When you’re ready to serve, let it sit at room temperature for 15 minutes to soften slightly.
Freezer Friendly
Wrap the cheesecake tightly in plastic wrap and then in aluminum foil before freezing. It can be stored for up to two months. When you’re ready to enjoy, thaw it in the fridge overnight. This method preserves the creamy texture.
Best Reheating Method
If you need to warm the cheesecake, place it in a 300°F (150°C) oven for 5–7 minutes. Add a tiny splash of water to the bottom of the pan to steam the filling, keeping it moist. Let it cool for a few minutes before slicing.