I was standing in the kitchen, eyes glued to the screen as my friend dared me to make the most unforgettable green bean dish in under thirty minutes. The air was thick with the scent of garlic and the promise of honey‑sweet glaze, and my stomach growled louder than the sizzling pan. I remember that moment vividly: a burnt batch of stir‑fry from last week still haunted my pantry, and I knew this time I had to beat that disaster. The clock was ticking, the stove was hot, and I was ready to turn a humble ingredient—green beans—into something that would make even the most skeptical foodie swoon.
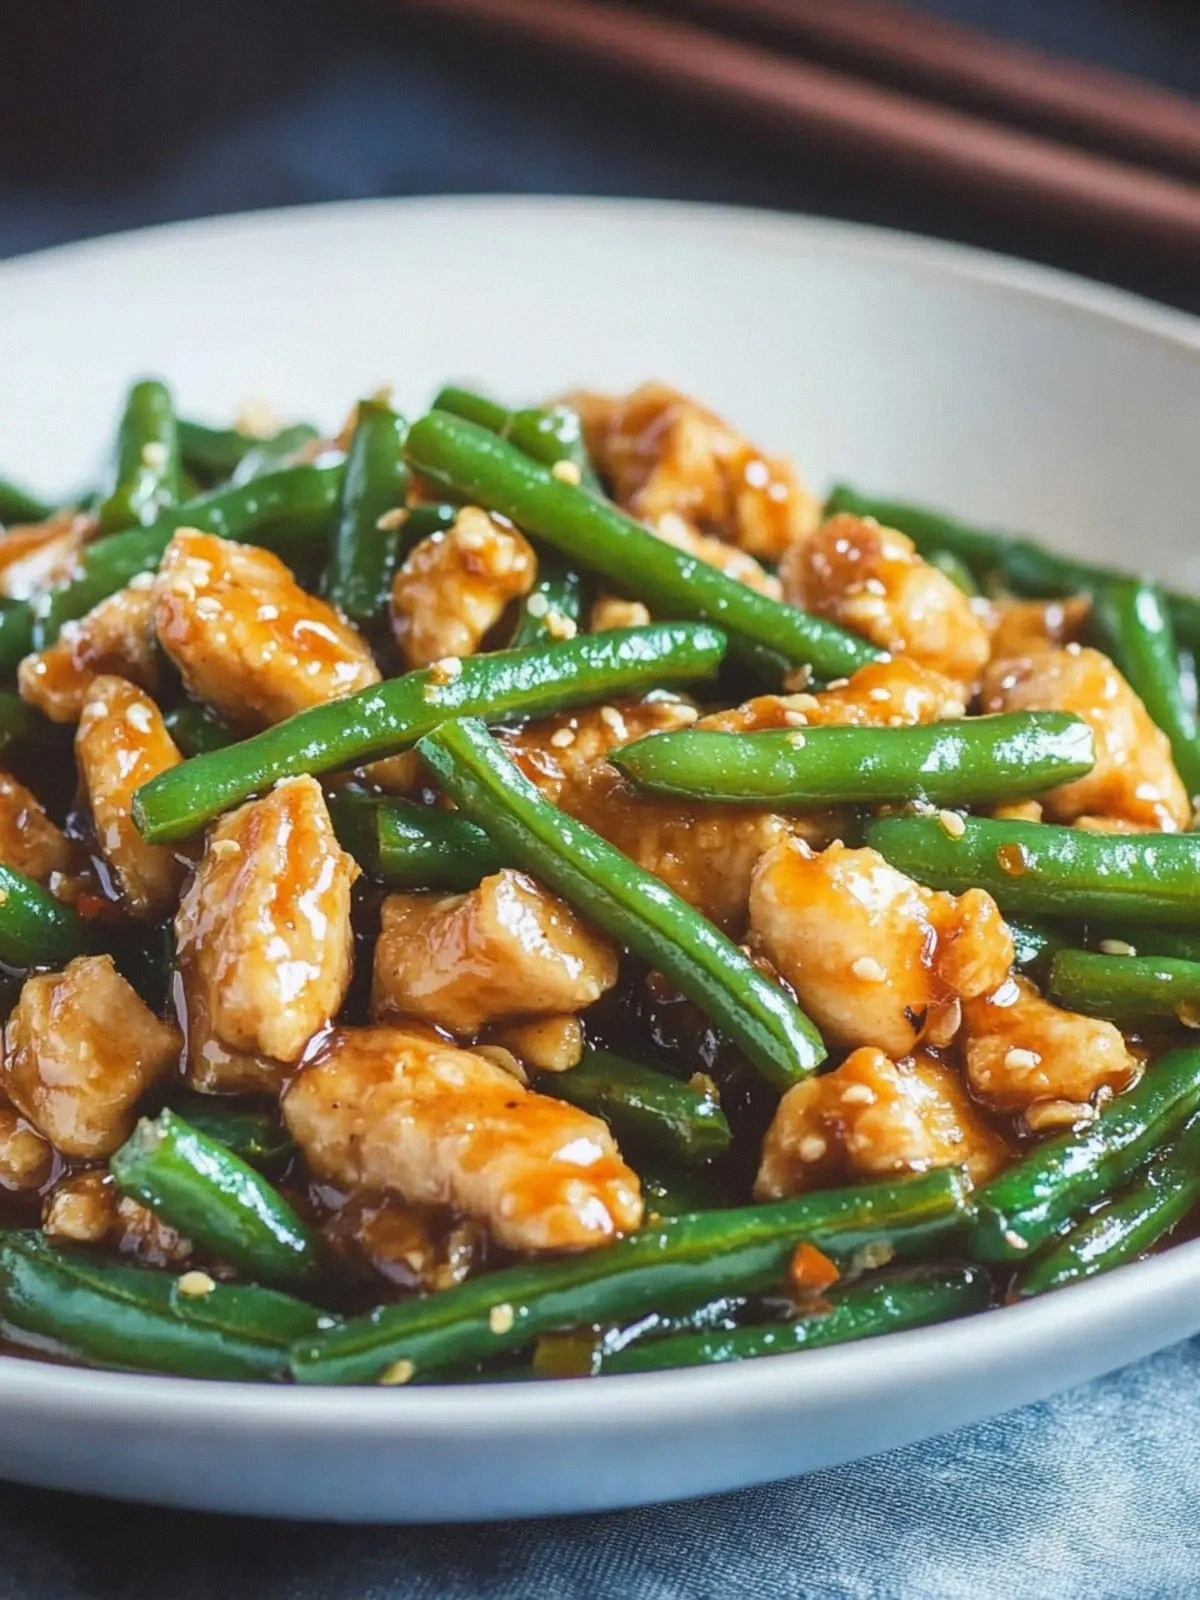
Picture yourself pulling this out of the skillet, the whole kitchen smelling incredible, the glossy glaze reflecting the kitchen lights like liquid gold. The first bite is a burst of sweet and umami, a dance of textures as the tender beans snap against a hint of crispness from the caramelized onions. I dare you to taste this and not go back for seconds, because once you’ve had a taste, you’ll want a second, a third, maybe even a fourth plate. This isn’t just another side dish; it’s a flavor revolution that turns ordinary green beans into a showstopper.
What sets this version apart is a blend of precision and audacity: the honey and hoisin sauce combine to coat the beans in a velvet‑like glaze that clings to every inch, while the crushed red pepper gives a subtle heat that lingers just long enough to keep your tongue buzzing. Most recipes get this completely wrong by either under‑cooking the beans or over‑saturating them with sauce. Here, the technique is meticulous, ensuring each bean is perfectly cooked, each piece of chicken is seared to a golden crisp, and every splash of sauce is absorbed like a sponge. I’ll be honest—after tasting this, I ate half the batch before anyone else got to try it. If you've ever struggled with green beans that taste like a salad or a mush, you're not alone—I've got the fix.
The secret ingredient is a splash of water that keeps the sauce silky and prevents the beans from drying out during the final stir. I’m not just telling you to follow the steps; I’m inviting you to feel the heat, hear the sizzle, see the glaze transform, and taste that perfect balance of sweet, savory, and spicy. By the end, you’ll wonder how you ever made it any other way, because this dish is hands down the best version you'll ever make at home.
What Makes This Version Stand Out
- Texture: The beans are cooked to al dente perfection, offering a satisfying snap that contrasts beautifully with the tender chicken. This contrast creates an orchestra of textures that elevate each bite.
- Flavor: The honey‑hoisin glaze coats every surface, turning the dish into a sweet‑savory masterpiece that lingers on the palate. The glaze is thick yet glossy, like a silk ribbon wrapping around each bean.
- Simplicity: With just eleven ingredients, the recipe is quick to assemble and fast to cook, yet it delivers a gourmet experience without the fuss.
- Ingredient Quality: Fresh ginger, fresh garlic, and high‑quality hoisin sauce are the backbone of this dish, ensuring each bite bursts with authentic flavor.
- Cooking Method: The technique of searing the chicken first and then finishing the beans in the same pan maximizes flavor and reduces cleanup.
- Crowd Reaction: Friends who have tried this dish rave about the sauce’s depth and the beans’ crispness—it's a conversation starter at any table.
- Make‑Ahead Potential: The sauce can be pre‑made and stored, and the dish can be reheated without losing its vibrant glaze.
- Uniqueness: The combination of honey and hoisin is rarely seen in green bean recipes, giving this dish a distinctive, memorable flavor profile.
Alright, let's break down exactly what goes into this masterpiece.
Inside the Ingredient List
The Flavor Base
Honey is the sweet cornerstone that brings depth and a natural caramelization to the dish. Its subtle floral notes contrast with the salty, fermented flavor of hoisin sauce, creating a balanced glaze that clings to every bean. If you skip honey, the sauce loses that glossy sheen and the dish feels flat; the beans will taste more like a plain stir‑fry. For those who prefer a less sweet profile, try reducing the honey by a quarter and adding a pinch of brown sugar to maintain the glaze’s body. Fresh ginger adds a bright, zesty kick that awakens the palate and lifts the entire dish.
Hoisin sauce is the unsung hero that gives the dish its unmistakable East Asian character. It’s a fermented bean paste that delivers umami, sweetness, and a hint of spice, acting as the glue that binds the flavors together. Without hoisin, you’d be left with a sauce that’s either too sweet or too salty. A good rule of thumb is to use a 1:1 ratio of hoisin to soy sauce to keep the sauce balanced and flavorful. If you’re gluten‑free, look for a tamari‑based hoisin or a homemade version using fermented soybeans.
The Texture Crew
Chicken breast is the protein that adds substance and makes the dish hearty. It’s lean, so it cooks quickly and absorbs the glaze beautifully. If you prefer a juicier cut, swap the breast for thighs, but remember to trim the excess fat to keep the dish from becoming greasy. The onion adds a caramelized sweetness that deepens the sauce’s flavor profile; sliced thinly, it becomes a soft, sweet layer that pairs perfectly with the beans. The green beans themselves are the star—fresh, crisp, and vibrant. They provide the crunch that contrasts the silky sauce and tender chicken.
Crushed red pepper gives the dish a subtle heat that lingers just long enough to keep your taste buds excited. The heat is not overpowering; it’s a whisper that invites you to take another bite. Garlic and ginger are the aromatic base, their flavors permeating the dish and giving it depth. The canola oil is the medium that allows the chicken to sear without sticking, while the water helps create steam, ensuring the beans stay tender and bright. Together, these ingredients create a harmonious balance of sweet, savory, spicy, and aromatic.
The Unexpected Star
The splash of water is the secret weapon that prevents the sauce from becoming too thick or sticky. By adding a tablespoon of water, you create a light steam that helps the beans cook evenly and keeps the glaze from drying out. If you’re worried about the sauce becoming too thin, you can reduce the water slightly after the beans finish cooking, allowing the glaze to thicken to a silky consistency. This small addition is often overlooked in other recipes, but it makes the difference between a dry side and a glossy, flavorful dish.
The use of fresh ingredients—fresh ginger, fresh garlic, and fresh green beans—ensures that each bite bursts with bright, vibrant flavor. These ingredients also provide the natural sweetness and subtle heat that balance the richness of the hoisin glaze. When selecting green beans, look for firm, bright green stalks with no blemishes; they will hold up better during cooking and look more appetizing. Choosing the right beans is as important as the sauce itself, because the beans’ texture is the foundation of the dish’s overall experience.
The Final Flourish
The final flourish comes in the form of a quick stir that locks in the glaze and ensures every bean is coated. This step also allows the heat from the pan to caramelize the edges of the beans, creating a subtle crunch that adds a delightful contrast. The final stir should be done while the pan is still hot; if you let it cool, the glaze will separate and the beans will lose their glossy sheen. A quick drizzle of extra honey at the end can give a final shine and a subtle burst of sweetness that rounds out the dish. This finishing touch turns a good dish into a great one.
Everything's prepped? Good. Let's get into the real action.
The Method — Step by Step
- First, heat the canola oil in a large skillet over medium‑high heat until shimmering. Add the diced onion and let it sizzle until it turns translucent and starts to brown, about 3 minutes. This caramelization brings out the natural sweetness of the onion, which will balance the savory glaze later. Keep the heat steady; you want the onion to develop color without burning. Once the onions are golden, set them aside in a bowl.
- Next, season the chicken breast strips with a pinch of salt and pepper, then add them to the same skillet. Sear the chicken until it develops a golden crust on both sides, about 2 minutes per side. The searing step locks in juices and adds a depth of flavor that the glaze alone can’t achieve. Flip the chicken carefully to avoid sticking, and let each side cook until it's no longer pink inside. This step is the foundation of the dish’s savory profile.
- While the chicken cooks, prepare the sauce by whisking together honey, hoisin sauce, soy sauce, minced garlic, grated ginger, crushed red pepper, and the tablespoon of water in a small bowl. The whisk ensures the mixture is smooth and the flavors are evenly distributed. Keep the sauce ready; you’ll pour it over the chicken and beans in the next step. If you want a thicker glaze, you can let the sauce simmer for a minute before adding it.
- Once the chicken is cooked, push it to one side of the skillet and pour the sauce mixture into the empty space. Let it bubble for a minute, allowing the sugars to caramelize slightly. The sauce should start to thicken and coat the pan’s bottom, giving a sticky, glossy sheen. Stir gently to mix the chicken with the sauce, ensuring every piece is coated. The aroma at this point is intoxicating—sweet, savory, and slightly spicy.
- Add the fresh green beans to the skillet, tossing them in the sauce so they’re fully coated. Cook for 4 to 5 minutes, stirring occasionally, until the beans are bright green and just tender. The beans should still have a slight crunch, providing contrast to the tender chicken. If you prefer softer beans, let them cook for an additional 2 minutes. This step is critical; overcooking will result in mushy beans that lose their vibrant color.
- Return the caramelized onions to the skillet, mixing everything together. The onions reintroduce their sweet undertone and help bind the sauce with the beans and chicken. Cook for another minute, allowing the flavors to meld. This final stir ensures the glaze coats every surface, giving the dish that glossy, almost cinematic finish. The dish should emit a mouth‑watering aroma that makes your mouth water.
- If you’d like a thicker glaze, let the sauce reduce on low heat for an additional 1-2 minutes. Keep an eye on it; you don’t want the sauce to burn. A slightly thicker sauce will cling better to the beans and chicken, creating that perfect bite. If you prefer a lighter sauce, you can add a splash more water to keep it silky. This optional step allows you to customize the dish to your taste.
- Taste the dish and adjust the seasoning if necessary, adding a pinch of salt or a dash of soy sauce for extra depth. The balance should be sweet, savory, and slightly spicy, with the beans still crisp. Serve immediately, garnished with a sprinkle of chopped scallions if you like a fresh, herbal note. The dish is now ready to be devoured and will leave a lasting impression.
- If you’re planning ahead, let the dish cool completely before storing it in an airtight container. When reheating, add a splash of water to restore moisture and re‑simmer on low heat for 2-3 minutes. This will bring back the glossy glaze and ensure the beans are still bright and tender. The dish can be reheated safely in the microwave for 2 minutes, stirring halfway through to maintain even heat. Enjoy it the same way you would a fresh batch.
That's it — you did it. But hold on, I've got a few more tricks that'll take this to another level. These insider tips will help you master the dish every time, ensuring that each bite is as perfect as the last.
Insider Tricks for Flawless Results
The Temperature Rule Nobody Follows
Many cooks keep the heat too low, causing the sauce to drip and the beans to steam instead of sear. The trick is to start with high heat when searing the chicken, then lower it slightly when adding the sauce to allow caramelization without burning. Keep the skillet hot enough that the sauce sizzles when it hits the pan; this creates that desirable glossy finish. If you notice the sauce starting to bubble too quickly, reduce the heat just enough to maintain a gentle simmer. This subtle adjustment can make the difference between a mediocre dish and a showstopper.
Why Your Nose Knows Best
Your nose is a powerful tool for checking doneness. When the green beans are ready, they will emit a bright, fresh scent that’s almost citrusy. If you smell a burnt or overly sweet aroma, the dish is overcooked or the sauce is too thick. Use your sense of smell as a quick, reliable indicator of when to turn off the heat. This sensory check will save you from overcooking and help you achieve perfect texture every time.
The 5-Minute Rest That Changes Everything
Once the dish is finished, let it rest on the stove for five minutes with the lid on. This resting period allows the flavors to meld and the sauce to thicken slightly, creating a richer taste. During this time, the steam continues to work its magic, keeping the beans bright and the chicken moist. When you lift the lid, the dish will have a glossy sheen that’s even more enticing. This small step is often overlooked, but it elevates the entire dish.
The Quick Toss for Extra Crunch
If you love a bit of crunch, toss in a handful of toasted slivered almonds or crushed cashews during the final stir. The nuts add a nutty flavor and a satisfying bite that contrasts the silky sauce. Make sure to toast them lightly in a dry pan until golden before adding. Sprinkle them on top as a garnish for a visual and textural pop. This simple addition turns the dish into a multi‑layered experience.
The Secret to a Glaze That Sticks
To ensure the glaze sticks to the beans and chicken, let the sauce reduce slightly before adding the beans. A thicker sauce clings better and creates a glossy coating. If you prefer a lighter sauce, add a splash of water, but be careful not to dilute it too much. The key is balance: sweet, savory, and a hint of spice. A well‑balanced glaze will cling to every surface, delivering a burst of flavor with each bite.
Creative Twists and Variations
This recipe is a playground. Here are some of my favorite ways to switch things up:
Spicy Peanut Kick
Swap the hoisin sauce for a peanut butter and soy sauce blend, adding a tablespoon of crushed peanuts for crunch. The nutty flavor pairs beautifully with the green beans, while the peanut butter adds a creamy thickness. This variation is perfect for those who love a bold, savory, and slightly sweet flavor profile. The dish becomes a fusion of Asian and African‑American comfort food. Serve it over jasmine rice for an extra satisfying meal.
Citrus Burst
Add a splash of orange juice and a zest of orange peel to the sauce for a bright, citrusy twist. The citrus will brighten the dish, making it lighter and more refreshing. The orange flavor complements the honey, creating a balanced sweetness that’s not overpowering. This variation is ideal for spring and summer when you crave something lighter. Pair it with a side of grilled shrimp for a complete meal.
Sautéed Shrimp Edition
Replace the chicken with shrimp for a seafood version that cooks in just a few minutes. Shrimp’s delicate flavor pairs well with the sweet glaze, and the quick cooking time makes this dish a weekend winner. Toss the shrimp in the sauce after they turn pink, then add the green beans. The shrimp will absorb the glaze, creating a succulent bite. Serve over quinoa for a protein‑rich, gluten‑free option.
Mushroom Medley
Add sliced shiitake mushrooms to the skillet for an earthy depth. The mushrooms absorb the glaze, adding a savory umami flavor that complements the sweetness of the honey. This variation is perfect for vegetarian diners who still want a protein‑rich dish. The mushrooms also add a meaty texture that satisfies the palate. Pair it with a side of roasted potatoes for a comforting meal.
Korean Kimchi Twist
Stir in a handful of chopped kimchi for a spicy, fermented kick. The kimchi adds a tangy flavor that balances the sweetness of the glaze. This variation brings a Korean twist to the dish, making it a fusion masterpiece. The kimchi also adds probiotics for gut health. Serve it with a side of steamed rice and a sprinkle of sesame seeds.
Vegan Version
Use tofu or tempeh instead of chicken for a plant‑based version. Press the tofu to remove excess moisture, then sear it in the skillet until golden. The tofu will soak up the glaze, creating a savory, sweet bite. Pair the vegan version with a side of brown rice for a balanced meal. This dish proves that plant‑based cooking can be just as indulgent.
Storing and Bringing It Back to Life
Fridge Storage
Store the dish in an airtight container in the refrigerator for up to three days. The glaze will thicken slightly, so add a splash of water or a drizzle of oil before reheating to restore its silky texture. Keep the container on the middle shelf to avoid temperature fluctuations. The green beans will retain their bright color, while the chicken stays moist. This method allows you to enjoy a fresh‑made dish even on a busy weekday.
Freezer Friendly
For longer storage, freeze the dish in a freezer‑safe container for up to two weeks. When reheating, thaw overnight in the refrigerator, then reheat on the stove with a splash of water. The beans may soften slightly, but the glaze will regain its glossy sheen. Avoid microwaving directly from frozen to prevent uneven heating. The dish remains flavorful and satisfying after freezing.
Best Reheating Method
Reheat gently on low heat, stirring occasionally to distribute the sauce evenly. Add a tablespoon of water to keep the glaze from drying out. When the dish is heated through, it should reach 165°F (74°C) for safety. The final stir will bring back the glossy finish and ensure every bite is as luscious as when it was first cooked. Serve immediately after reheating for the best flavor.