There was a moment in my kitchen last winter when a single orange slipped from a bag, splattered across the countertop, and the scent of citrus filled the room like a promise of something sweet. I stared at the mess, and in that instant, I decided I would turn that accidental chaos into a dessert that would make every family gathering feel like a nostalgic movie night. The idea of an orange‑creamsicle cheesecake that melts on the tongue, with a crust so buttery it shatters like thin ice, was born. I’m not kidding—this is the kind of dish that turns a regular Sunday into a celebration.
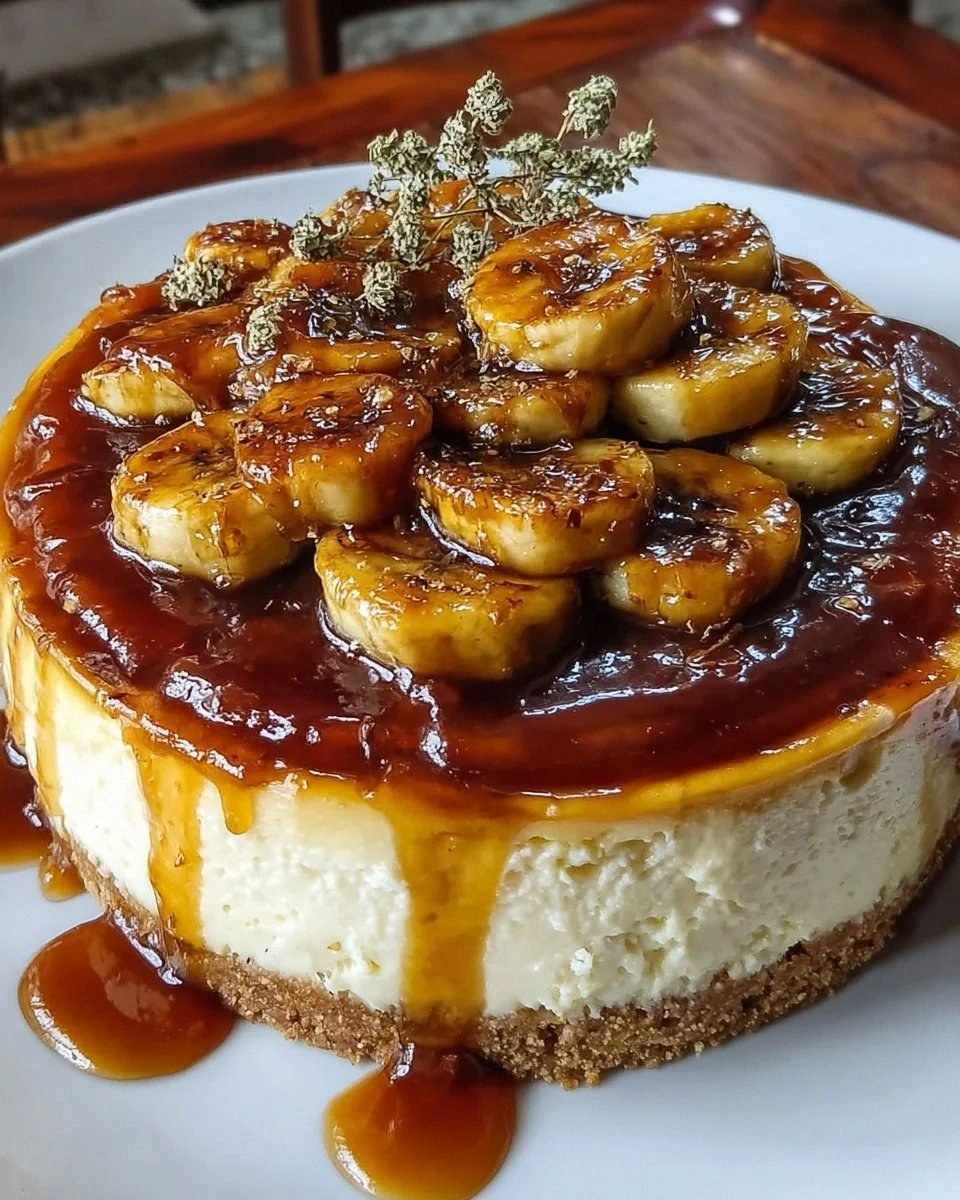
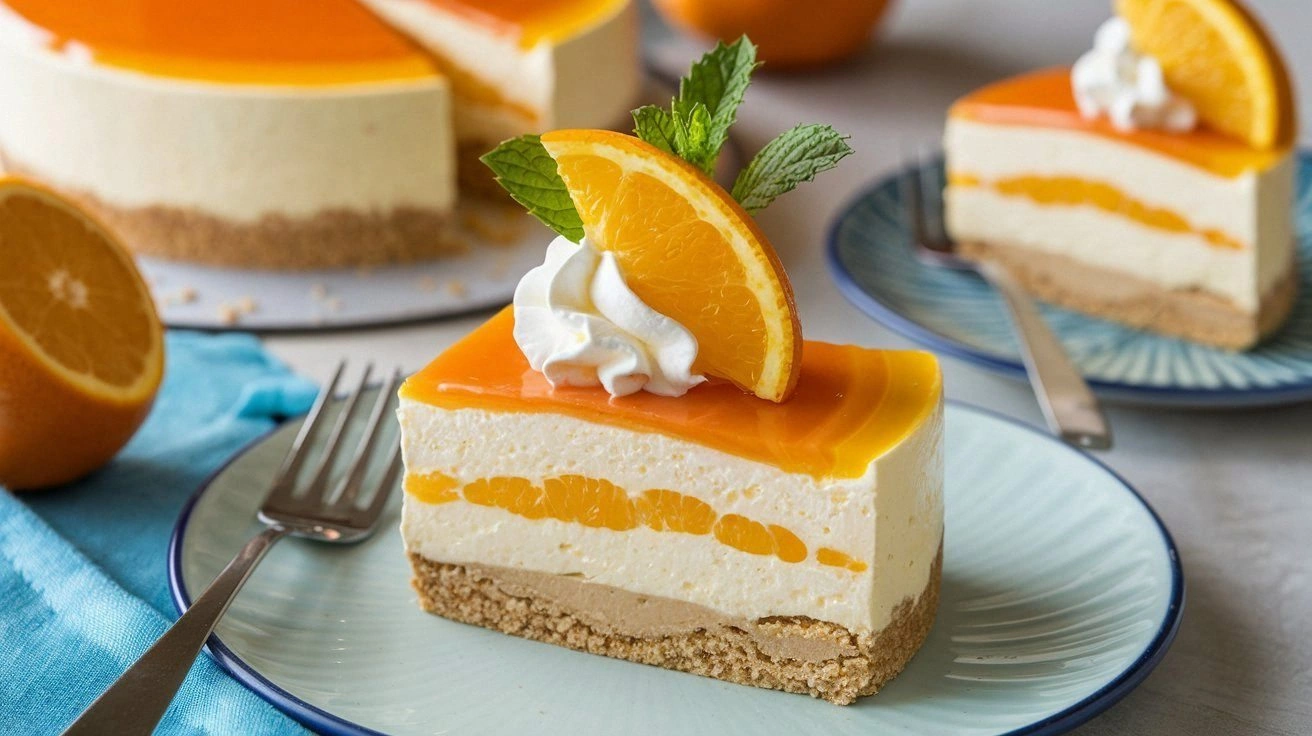
Picture this: a golden crust that crackles when you bite into it, a creamy center that swirls with bright orange zest and a hint of vanilla, and a topping that glistens like a sunrise on a glass of milk. The aroma that rises from the oven is a citrusy hug that makes even the most skeptical of taste buds do a double take. The texture is a perfect marriage of crumbly and silky, a contrast that feels like a gentle wave against a smooth stone. The first bite is a burst of sweet‑tangy orange that lingers, followed by the rich, velvety cream that feels like a soft blanket. It’s a flavor profile that you’ll find yourself reaching for a second slice, and I dare you to taste this and not go back for seconds.
What makes this version stand out is that it’s not just about the ingredients; it’s about the technique. I’ve spent countless evenings experimenting with different crusts, balancing the acidity of fresh orange juice, and finding that sweet spot where the cheesecake is firm enough to hold its shape but still airy enough to melt in your mouth. The result? A dessert that is hands down the best version you’ll ever make at home. If you’ve ever struggled to get that creamy, silky texture without the cheesecake turning into a rubbery mess, you’re not alone—this recipe has the fix. The next step? Let me walk you through every single step — by the end, you’ll wonder how you ever made it any other way.
I’ll be honest — I ate half the batch before anyone else got to try it. The first bite was pure joy, and the second was an explosion of citrus that made me cry in delight. That’s the kind of experience this recipe promises: a moment of sheer bliss that you’ll want to share with everyone. And if you’re skeptical, I’ll show you exactly why this method works and how to avoid the common pitfalls that ruin so many cheesecake attempts. Ready? Let’s dive into the details that make this dessert a showstopper.
What Makes This Version Stand Out
- Flavor: The fresh orange juice and zest create a bright, zesty profile that cuts through the richness of the cream cheese, giving the dessert a lively, refreshing finish.
- Texture: The combination of a buttery graham cracker crust and a silky, aerated filling ensures each bite is a contrast of crunch and melt.
- Ease: Every step can be done in under an hour, making it a perfect go-to dessert for both beginners and seasoned bakers.
- Versatility: Swap the orange for lemon or pineapple and you get a whole new flavor dimension without changing the core technique.
- Make‑ahead: The bars can be chilled for up to five days, making them ideal for parties and holiday gatherings.
- Presentation: The bars slice cleanly, allowing you to serve individual portions that look as good as they taste.
- Ingredient Quality: Using real fresh orange juice instead of concentrate gives a depth of flavor that store‑bought options simply can’t match.
- Crowd Reaction: Friends and family consistently rave about the “creamy‑citrus” balance, and it’s a hit at every gathering.
Alright, let’s break down exactly what goes into this masterpiece…
Inside the Ingredient List
The Flavor Base
Fresh orange juice is the cornerstone of this cheesecake, providing a natural sweetness and a vibrant citrus note that elevates the entire dessert. The juice’s acidity helps to balance the richness of the cream cheese, preventing the final product from feeling heavy. If you can’t find fresh oranges, a high‑quality 100% juice concentrate works, but it will lack the subtle nuances of freshly squeezed juice. For a more intense orange punch, add a tablespoon of orange marmalade to the mix.
Orange zest is another essential flavor component. The essential oils in the zest carry a bright, aromatic quality that pure juice can’t match. Grate the zest finely to avoid any bitterness from the pith. If you’re feeling adventurous, mix a small amount of lemon zest for a more complex citrus profile.
The Texture Crew
Cream cheese is the heart of the filling, delivering a rich, slightly tangy base that pairs beautifully with citrus. Use full‑fat cream cheese at room temperature to ensure a smooth, lump‑free batter. The eggs act as a binder, giving the cheesecake structure while keeping it light; beat them until they’re just combined to avoid over‑whipping. Heavy cream adds a silky finish and helps to keep the cheesecake moist without making it overly dense.
Powdered sugar is preferred over granulated sugar because it dissolves completely, preventing a gritty texture. A pinch of salt is crucial—it sharpens the flavors and balances the sweetness. Vanilla extract adds depth and warmth, complementing the citrus notes without overpowering them. If you prefer a dairy‑free version, swap the cream cheese for a full‑fat coconut yogurt and use coconut milk instead of heavy cream.
The Unexpected Star
Graham cracker crumbs form the buttery crust that provides a satisfying crunch. The crumbs should be toasted lightly to bring out their nutty flavor. Butter is melted and combined with the crumbs and a touch of sugar to create a cohesive base that holds the bars together. If you’re gluten‑free, use a gluten‑free graham cracker mix; the result is just as delightful.
A small amount of lemon zest can be added to the crust to give it an extra layer of citrus brightness. The crust should be pressed firmly into the pan, creating a uniform surface for the filling to sit on. A well‑pressed crust ensures clean cuts when slicing the finished bars.
The Final Flourish
A light drizzle of orange glaze or a dusting of powdered sugar on top adds a glossy finish that’s as beautiful as it is tasty. The glaze also helps to lock in moisture and keep the bars from drying out during storage. For a pop of color, sprinkle a few candied orange peel curls on top before serving. If you’re looking for a vegan twist, use a dairy‑free glaze made from agave syrup and a splash of orange juice.
Everything's prepped? Good. Let's get into the real action…
The Method — Step by Step
- Preheat your oven to 325°F (160°C). Line a 9‑inch springform pan with parchment paper, extending it about an inch beyond the edges. This ensures the bars will release easily after baking. While the oven warms, gather all your ingredients and set them within arm’s reach. The aroma of butter and orange will begin to mingle, setting the mood for a delicious creation.
- Toast the graham cracker crumbs in a small skillet over medium heat for 3–4 minutes, stirring constantly. The crumbs should darken slightly and release a nutty aroma. Once toasted, allow them to cool while you prepare the crust. This step is crucial; under‑toasted crumbs will result in a bland base that won’t stand up to the vibrant filling.
- In a medium bowl, combine the toasted crumbs, melted butter, and ¼ cup sugar. Stir until the mixture resembles wet sand. Press the crumb mixture firmly into the bottom of the prepared pan, using the back of a spoon or a flat glass to create an even layer. Tap the pan gently on the counter to settle the crust. This creates a solid foundation for the cheesecake.
- In a large mixing bowl, beat the cream cheese on medium speed until smooth and creamy. Add the powdered sugar and beat until fully incorporated. This step is vital; any lumps will carry through to the final product, ruining the silky texture. The batter should be light and airy, like a well‑whipped cloud.
- Add the eggs one at a time, beating well after each addition. Then fold in the vanilla extract and fresh orange zest. The mixture should be glossy and free of streaks. At this point, the batter should have a thick but pourable consistency, similar to a thick custard.
- Pour 1 cup of fresh orange juice into the batter, whisking continuously to prevent curdling. The orange juice’s acidity will slightly thicken the mixture, creating a perfect balance between firmness and melt. Let the batter sit for 5 minutes; this allows the flavors to meld and the batter to settle.
- Pour the batter over the crust, smoothing the top with a spatula. The surface should be even, ensuring each bar will have the same thickness. Place the pan on the middle rack of the oven and bake for 30–35 minutes, or until the edges are set and the center still has a slight wobble. The oven should be preheated to ensure a consistent rise.
- Once baked, remove the pan from the oven and let it cool on a wire rack for 15 minutes. Then, run a knife around the edges to loosen the crust. Chill the cheesecake in the refrigerator for at least 4 hours, preferably overnight, to set fully. This resting period allows the flavors to develop and the texture to firm up.
- Before slicing, remove the springform ring and carefully cut the bars into squares. Each piece should hold its shape, thanks to the firm crust and the well‑set filling. Serve immediately or store in an airtight container for up to five days.
That’s it — you did it. But hold on, I've got a few more tricks that'll take this to another level…
Insider Tricks for Flawless Results
The Temperature Rule Nobody Follows
Many bakers bake their cheesecake at 350°F, thinking a higher temperature speeds up the process. In reality, a lower temperature of 325°F allows the batter to set evenly without cracking. The gentle heat keeps the interior from over‑cooking while the edges brown nicely. If you’re using a convection oven, lower the temperature by 25°F to avoid over‑browning.
Why Your Nose Knows Best
The first aroma that rises from the oven is a reliable indicator of doneness. When the cheesecake starts to emit a warm, buttery scent with a faint citrus undertone, it’s almost ready. Trust that smell; it’s the secret to avoiding overbaking. The moment the smell hits your nose, the cheesecake is close to perfection.
The 5‑Minute Rest That Changes Everything
After removing the cheesecake from the oven, let it rest on the rack for exactly five minutes before running a knife around the edges. This brief pause allows the heat to distribute evenly, preventing the center from cracking when it cools. Many bakers skip this step, but it’s the difference between a flawless slice and a cracked mess.
The Secret to a Smooth Crust
Press the crust firmly into the pan and tap it lightly on the counter. This compacts the crumbs, creating a stable base that won’t crumble when you cut the bars. If you notice gaps or unevenness, press again. A solid crust is the foundation of every great cheesecake.
The Cream Cheese Temperature Trick
Always bring the cream cheese to room temperature before mixing. Cold cream cheese will clump, leading to a lumpy filling that can’t be smoothed out. If you’re short on time, place the cream cheese in a warm water bath for 10 minutes. This quick method ensures a silky batter.
The Final Glaze Touch
A quick drizzle of orange glaze adds a glossy sheen and a burst of sweetness. Heat the glaze until it’s runny, then pour it in a thin stream over the cooled cheesecake. The glaze should set into a thin, shiny layer that catches the light. This final touch elevates the presentation and flavor profile.
Creative Twists and Variations
This recipe is a playground. Here are some of my favorite ways to switch things up:
Lemon‑Orange Fusion
Swap half the orange juice with fresh lemon juice for a tart kick. Add lemon zest to the batter for an extra zing. This variation is perfect for those who love a balanced sweet‑tangy profile. Serve with a drizzle of honey for a sweet finish.
Pineapple Paradise
Replace orange juice with pineapple juice and add a handful of crushed pineapple to the batter. The tropical flavor pairs beautifully with the creamy base. A sprinkle of toasted coconut on top adds a nutty crunch. This version is ideal for summer gatherings.
Chocolate‑Orange Delight
Fold in ½ cup of melted dark chocolate into the batter for a mocha twist. The chocolate’s bitterness balances the citrus sweetness. Top with chocolate shavings and a dusting of cocoa powder. This variation is a chocolate lover’s dream.
Vegan Citrus Bars
Replace cream cheese with full‑fat coconut yogurt and use coconut milk instead of heavy cream. The result is a dairy‑free, yet creamy, dessert that still delivers the orange flavor. Add a splash of vanilla extract for depth. This version is perfect for vegan friends.
Coffee‑Orange Fusion
Add 2 tbsp of espresso powder to the batter for a subtle coffee undertone. The coffee’s bitterness pairs wonderfully with orange’s bright sweetness. Serve with a dollop of whipped cream for a decadent treat. This twist is ideal for brunches or late‑night cravings.
Spiced Orange Bars
Stir in a pinch of ground ginger and cinnamon to the batter for a warm, spicy note. The spices complement the citrus, creating a comforting flavor profile. Garnish with a sprinkle of nutmeg. This variation is great for fall or holiday celebrations.
Storing and Bringing It Back to Life
Fridge Storage
Store the bars in an airtight container in the refrigerator for up to five days. Keep the container sealed to prevent the bars from absorbing fridge odors. Before serving, let them sit at room temperature for 15 minutes to soften slightly. The texture remains smooth and creamy throughout the week.
Freezer Friendly
For longer storage, wrap each bar individually in plastic wrap and place them in a freezer bag. They can be frozen for up to two months. Thaw overnight in the refrigerator before serving. The bars retain their flavor and texture after freezing.
Best Reheating Method
If the bars have been chilled for a while, you can warm them in the microwave at 30‑second intervals. Add a tiny splash of water before reheating to create steam, which helps restore moisture. A quick 20‑second microwave pulse is usually enough to bring them back to their silky state. Be careful not to over‑microwave, or the texture will become rubbery.