I still remember the night I almost turned my kitchen into a disaster zone, the kind of chaos that would have made even the most seasoned chef raise an eyebrow. I had just tried to make a simple beef stew, but the meat kept sticking to the pot, the onions turned to a bitter brown, and the broth was a dull, lifeless gray. My friend, a culinary connoisseur with a penchant for daring experiments, dared me to turn that flop into something spectacular. I laughed, but as I tossed in a handful of fresh herbs and a splash of tomato paste, the aroma started to dance and the colors began to sing. That moment, the sizzle of garlic hitting hot oil, the gentle pop of onions caramelizing, the deep, earthy scent of beef broth mingling with thyme, was the spark that ignited this recipe. If you’ve ever been stuck in a culinary rut, this is the recipe that will break the pattern and bring a burst of confidence back into your cooking.
Picture yourself pulling this pot off the stove, the steam curling in lazy spirals that carry the scent of beef, tomato, and fresh herbs to every corner of the kitchen. The first spoonful is a warm, comforting hug that tastes like home and adventure in one. The texture is a harmonious blend of tender meat, silky macaroni, and a subtle, velvety sauce that coats each noodle like a velvet blanket. I dare you to taste this and not go back for seconds; it’s that addictive. The flavor profile is so rich that it will have your guests asking for the recipe, and the best part is you can tweak it to fit any dietary preference. By the end of this guide, you’ll wonder how you ever made a soup any other way.
What makes this version stand out isn’t just the ingredients; it’s the method, the timing, the little touches that elevate a humble bowl into a culinary masterpiece. I’m not here to give you a run‑of‑the‑mill recipe; I’m here to give you a blueprint for a soup that will have you shouting, “This is hands down the best version you’ll ever make at home!” The technique of browning the beef in stages, the use of tomato paste for depth, the final splash of milk for creaminess, and the slow simmer that melds flavors—each step is crafted to bring out the best in every component. The result is a soup that feels like a hug on a plate, with a comforting heartiness that satisfies even the most ravenous of appetites. And if you’re worried about complexity, let me assure you: it’s simpler than it looks, with fewer steps than most recipes promise. The real secret? The balance of seasoning and the timing of each addition.
Most recipes get this completely wrong. They either overcook the pasta, underseason the broth, or forget the subtle sweetness that comes from caramelizing the onions. Here’s what actually works: a steady, medium heat, a touch of patience, and a handful of bold, fresh ingredients. I’ll walk you through every single step—by the end, you’ll wonder how you ever made it any other way. Let’s dive in and turn a simple pot of soup into a culinary triumph.
What Makes This Version Stand Out
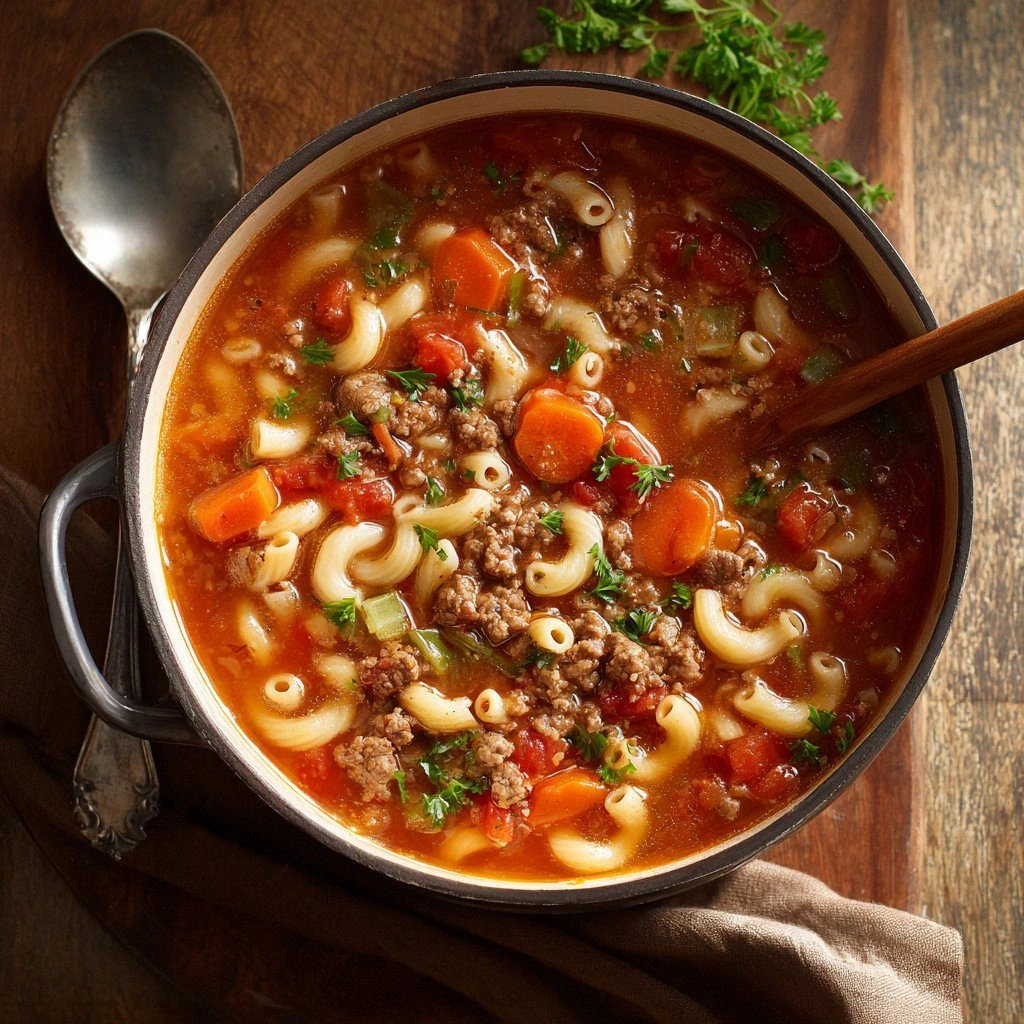
- Flavor: The deep umami of browned beef combined with the sweet caramelization of onions creates a flavor profile that feels both comforting and sophisticated. The addition of tomato paste and a splash of Worcestershire sauce adds a subtle, savory sweetness that lifts the entire dish.
- Texture: The elbow macaroni is cooked al dente, providing a pleasant bite that contrasts beautifully with the tender beef and soft vegetables. The broth thickens just enough to coat the noodles without turning it into a stew.
- Balance: The soup strikes a perfect balance between savory, sweet, and acidic notes, thanks to the careful use of tomatoes, broth, and a hint of milk. This harmony ensures every spoonful is satisfying.
- Ease: Despite its depth of flavor, the recipe requires minimal hands‑on time. Most of the work is in the initial browning, after which the soup can simmer while you attend to other tasks.
- Versatility: The base can be adapted for gluten‑free, low‑fat, or vegetarian diets without sacrificing flavor. Swap the beef for ground turkey or a plant‑based alternative, and the soup remains delicious.
- Make‑Ahead Potential: The soup keeps well in the refrigerator for up to five days and freezes beautifully, making it ideal for busy weeknights or meal prep.
- Crowd‑Pleaser: Whether you’re feeding a family of four or a group of friends, this soup is hearty enough to satisfy a crowd while still feeling personal.
- Ingredient Quality: Using fresh, high‑quality ingredients—especially the beef and tomatoes—ensures that the final product is rich and flavorful.
Alright, let's break down exactly what goes into this masterpiece. Below is a kitchen hack that will streamline your prep and save you time.
Inside the Ingredient List
The Flavor Base
Ground beef is the heart of this soup, providing a robust, meaty foundation that carries the other flavors. Choose a lean-to-fat ratio of 80/20 for maximum flavor and juiciness; the fat renders into the broth, giving it a silky mouthfeel. If you prefer a leaner version, use 90/10, but be prepared to add a splash of olive oil to compensate for the reduced fat content. Skipping the beef entirely will leave the soup feeling light and less satisfying, so keep it in.
The Vegetable Crew
Onion, carrot, and celery form the classic mirepoix that underpins the soup’s aromatic base. These vegetables release natural sugars when caramelized, creating a subtle sweetness that balances the savory beef. If you’re short on time, pre‑diced frozen mirepoix works, but fresh will give a brighter flavor. Omitting any of these will diminish the depth, so keep the trio intact.
The Unexpected Star
Tomato paste is the secret weapon that enriches the broth with umami and a hint of sweetness. It thickens the sauce slightly, giving the soup a velvety texture that coats the noodles. If you don’t have tomato paste on hand, a tablespoon of tomato sauce can substitute, but the flavor will be lighter. This ingredient is essential for the soup’s signature depth.
The Final Flourish
A splash of milk or heavy cream at the end of cooking adds a silky finish that softens the acidity of the tomatoes. It also rounds out the flavor profile, making the soup feel luxurious. If you’re lactose intolerant, substitute with a non‑dairy milk such as oat or almond. This final touch is what separates a good soup from a great one.
Everything's prepped? Good. Let's get into the real action.
The Method — Step by Step
- Heat a large pot over medium heat and add the tablespoon of olive oil. Once the oil shimmers, add the ground beef in a single layer, letting it sear without stirring for 2–3 minutes. This creates a golden crust that locks in flavor. Flip the beef and continue browning until fully cooked, about 5–7 minutes. The goal is a rich, caramelized exterior, not just a browned interior. Drain excess fat if needed to avoid a greasy broth.
- Add the diced onions to the pot, stirring to coat them in the rendered beef fat. Cook until translucent, about 4 minutes, then stir in the minced garlic and cook for an additional minute until fragrant. The garlic’s aroma should fill the kitchen, signaling that the base is ready. This step is crucial for building depth; skip it, and the soup will feel flat.
- Add the diced carrots and celery to the pot, stirring to combine. Let them cook for 5 minutes, allowing them to soften slightly while still retaining a bit of bite. This texture contrast is essential for a satisfying mouthfeel. The vegetables will also release natural sugars that sweeten the broth.
- Stir in the tomato paste, ensuring it coats the beef and vegetables evenly. Cook for 2 minutes to caramelize the paste, which deepens the color and flavor. This step is a game‑changer; without it, the soup would lack body.
- Pour in the diced tomatoes with their juice, then add the beef broth. Stir to combine, bringing the mixture to a gentle simmer. The broth should bubble softly, not boil aggressively. This gentle simmer allows flavors to meld without breaking down the pasta later.
- Season the soup with salt, pepper, bay leaf, and dried thyme. Stir and let it simmer for 20 minutes, allowing the herbs to infuse the broth. The bay leaf should be removed before serving; it’s a flavor enhancer, not a garnish. This long, slow simmer is where the magic happens, turning simple ingredients into a cohesive, comforting dish.
- Add the elbow macaroni to the pot and stir gently. Let it cook for 8–10 minutes, or until al dente, checking the texture at the 7‑minute mark. The pasta should feel firm to the bite, not soft. Once the pasta is cooked, stir in the splash of milk or heavy cream, allowing it to warm through. Remove the bay leaf, taste, and adjust seasoning if needed.
That's it — you did it. But hold on, I've got a few more tricks that'll take this to another level. Below are insider tips that will help you achieve flawless results every time.
Insider Tricks for Flawless Results
The Temperature Rule Nobody Follows
Cooking at a steady medium heat is crucial. If the pot boils too hard, the beef will release too much fat and the broth will become greasy. Conversely, a too‑low heat will prevent the flavors from fully developing. Aim for a gentle simmer that maintains a steady, low bubble. This ensures the beef stays tender and the broth stays clear.
Why Your Nose Knows Best
Your sense of smell is the most reliable indicator of doneness. As the soup simmers, the aroma will shift from raw beef to a rich, savory bouquet. When the onions are translucent and the beef is browned, you’re halfway there. Trust your nose, and you’ll avoid overcooking the vegetables.
The 5‑Minute Rest That Changes Everything
After removing the pot from heat, let the soup rest for five minutes before serving. This allows the flavors to settle and the pasta to absorb any remaining liquid. A quick rest also lets the broth thicken slightly, giving each spoonful a silky texture. Skip this step and you’ll get a soup that feels rushed.
Use a Splatter Guard for Cleanliness
When browning the beef, a splatter guard keeps the kitchen clean and reduces the risk of flare‑ups. It’s a simple tool that saves time and effort during cleanup. If you don’t have one, a sheet of parchment paper can serve as a makeshift guard.
Add a Touch of Acid at the End
A splash of lemon juice or a pinch of vinegar added just before serving brightens the soup and balances the richness. This small touch can lift the flavors and give the dish a fresh finish. Don’t add it too early, or the acidity will dissipate during simmering.
Keep the Broth Clear
If you prefer a clear broth, strain the soup before adding the pasta. This removes excess solids and gives the soup a pristine appearance. Straining also helps maintain a lighter texture, which is ideal for a lighter meal.
Creative Twists and Variations
This recipe is a playground. Here are some of my favorite ways to switch things up:
Spicy Southwestern
Add a diced jalapeño and a teaspoon of cumin during the browning stage. Finish with a splash of lime juice. The heat and citrus create a vibrant, Southwestern twist that pairs well with tortilla chips.
Creamy Mushroom
Sauté sliced mushrooms with the onions for a meaty, earthy flavor. Replace the milk with a splash of white wine for depth. The result is a richer, more sophisticated soup.
Vegetarian Delight
Swap the ground beef for crumbled tempeh or textured vegetable protein. Use vegetable broth instead of beef broth. Add a handful of spinach in the last 5 minutes for color and nutrients.
Low‑Fat Version
Use lean ground turkey and skip the milk. Add a splash of low‑fat Greek yogurt at the end for creaminess. This version keeps the flavor while cutting down on calories.
Gluten‑Free
Replace elbow macaroni with gluten‑free pasta or small shells. Ensure the broth and tomato paste are gluten‑free. The soup remains hearty and comforting.
Storing and Bringing It Back to Life
Fridge Storage
Cool the soup completely before transferring it to an airtight container. Store in the refrigerator for up to five days. The flavors will deepen, making it even more delicious on the second day.
Freezer Friendly
Divide the soup into freezer‑safe portions and seal tightly. Freeze for up to three months. Thaw overnight in the refrigerator or use the defrost setting on your microwave.
Best Reheating Method
Reheat the soup gently on low heat, stirring frequently. Add a splash of water or broth to restore moisture if it appears thickened. The soup should be heated to 165°F before serving.
If you’re craving the comforting warmth of a homemade soup, this recipe delivers. It’s simple, yet complex in flavor, and it’s a dish that will become a staple in your culinary repertoire. Now that you’ve mastered the basics, you can experiment with variations and make it your own. Enjoy the process, savor every bite, and share the joy with friends and family.