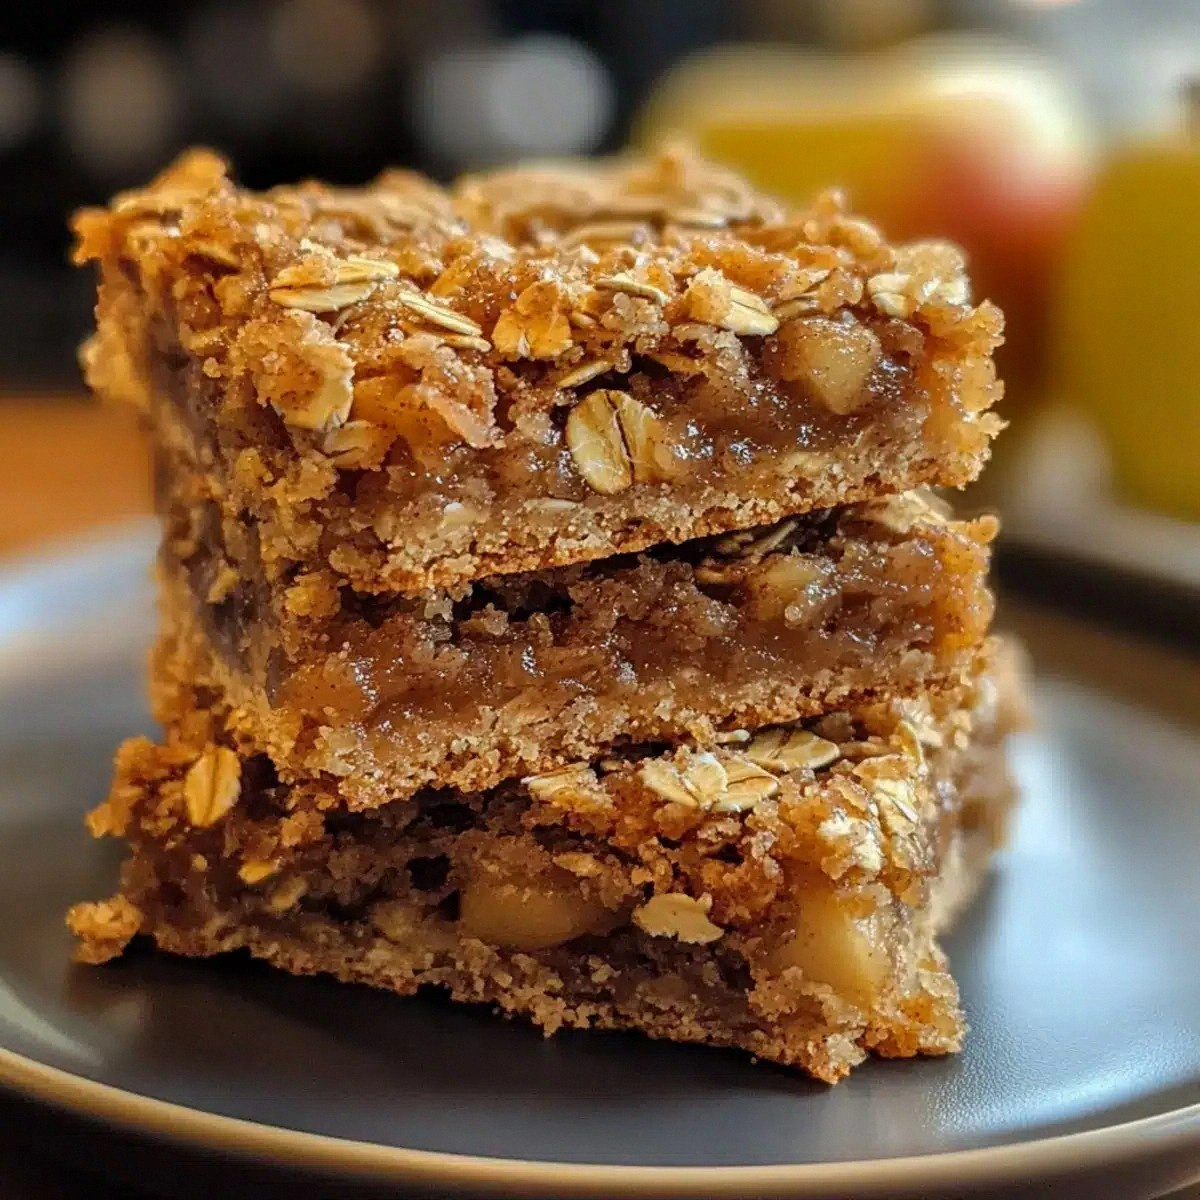
Best Baked Oat Cinnamon Apple
It started with a kitchen calamity that would forever haunt my culinary memories. I had attempted a classic apple crumble, but the crust had turned into a soggy, caramelized mess that left me staring at the oven with a guilty grin. The next day, I found myself craving something that was simultaneously comforting, wholesome, and utterly addictive. That craving sparked the birth of the Best Baked Oat Cinnamon Apple, a recipe that balances crisp edges, chewy centers, and a symphony of warm spices in every bite.
Picture this: a golden loaf of bars emerging from the oven, the air thick with the scent of toasted oats, cinnamon, and freshly diced apples. As the first slice slides onto a plate, the buttery crust crackles like a tiny applause, and the interior releases a steam that tastes like a cozy fireplace. The first bite delivers a burst of sweet apple, a hint of maple, and a gentle spice that lingers on the tongue. It’s the kind of flavor that makes you pause, close your eyes, and let the moment soak in. I dare you to taste this and not go back for seconds.
What makes this version stand out is not just the ingredients, but the intentional layering of textures and flavors that most recipes overlook. The oats create a hearty base that absorbs the apple juices, while the butter forms a delicate, flaky crust that shatters like thin ice when you bite into it. The subtle sweetness of maple syrup balances the tartness of apples, and the nutmeg adds a whisper of earthiness that elevates the entire dish. This is hands down the best version you'll ever make at home, and I’m excited to share every single step with you. By the end, you’ll wonder how you ever made it any other way.
But before we dive into the kitchen wizardry, let’s set the stage with a quick rundown of why this recipe is a game-changer. I’ve spent years experimenting with oat-based desserts, and this one consistently outshines the rest. It’s easy to assemble, forgiving if you’re short on time, and it stores like a champ. If you’ve ever struggled with a bland apple bake, you’re not alone— and I’ve got the fix. Picture yourself pulling this out of the oven, the whole kitchen smelling incredible, and knowing you’ve created something that will become a staple in your recipe rotation.
What Makes This Version Stand Out
- Flavor Depth: The combination of cinnamon, nutmeg, and maple syrup creates a layered taste profile that evolves with each bite.
- Texture Contrast: Oats provide chewiness, butter gives a crisp crust, and apples add juicy bursts.
- Ingredient Quality: Using fresh apples and real butter rather than substitutes elevates the overall experience.
- Make‑Ahead Potential: These bars bake quickly and can be stored for days, making them perfect for busy weeks.
- Crowd Reaction: Friends and family rave about the “home‑baked” feel, even though it’s quick to prepare.
- Health Conscious: Oats bring fiber, and using maple syrup keeps the sugar natural and flavorful.
- Versatility: Swap nuts or spices to create seasonal variations without compromising the core structure.
- Visual Appeal: The golden crust and visible apple chunks make each bar Instagram‑ready.
Alright, let’s break down exactly what goes into this masterpiece…
Inside the Ingredient List
The Flavor Base
Brown sugar and maple syrup are the sweet anchors of this recipe. Brown sugar brings molasses undertones that deepen the apple’s natural sweetness, while maple syrup adds a subtle caramel note that rounds out the flavor profile. If you’re looking to reduce sugar, you can swap maple syrup for honey, though the taste will shift slightly toward floral.
The Texture Crew
Rolled oats and all‑purpose flour form the structural backbone. Oats give the bars a hearty chew and a subtle nutty flavor, while flour ensures the batter holds together without becoming gummy. Skipping the oats will make the bars too crumbly; removing the flour will leave them too wet. For a gluten‑free version, replace the flour with a 1:1 gluten‑free blend.
The Unexpected Star
Apples are the showstopper. Fresh, firm apples like Honeycrisp or Fuji hold their shape during baking and release a sweet, tart juice that moistens the batter. If you prefer a more caramelized flavor, try adding a pinch of brown sugar to the apple mixture. For a lower‑carb alternative, consider using a mix of apples and pears, which have a slightly different sugar profile.
The Final Flourish
Butter and spices bring the final touch. Cold, cubed butter is folded into the dry mix to create a flaky crust that crisps beautifully. Ground cinnamon and nutmeg are the aromatic duo that turns the bars from simple to extraordinary. Lemon juice adds brightness, cutting through the sweetness and preventing the apples from turning brown. If you’re adventurous, sprinkle a dash of cayenne for a subtle kick that pairs surprisingly well with the apple sweetness.
Everything’s prepped? Good. Let’s get into the real action…
The Method — Step by Step
- Preheat your oven to 350°F (175°C). While the oven heats, line a 9x13 inch baking pan with parchment paper, leaving a few inches of overhang on each side for easy removal. This step ensures the bars rise evenly and makes cleanup a breeze. The aroma of warm spices will begin to mingle with the scent of butter as soon as you start mixing.
- Combine the dry ingredients. In a large mixing bowl, whisk together rolled oats, all‑purpose flour, brown sugar, cinnamon, baking powder, nutmeg, and salt. The dry mix should look like a slightly gritty, sandy texture, which is essential for the bars’ chewiness. If you prefer a finer crumb, sift the flour and oats together before adding.
- Cut in the butter. Add cold, cubed butter to the dry mix. Using a pastry cutter or your fingertips, work the butter into the mixture until it resembles coarse crumbs with pea‑size butter pieces still visible. This technique creates a flaky crust that will crisp up beautifully during baking. The butter’s coldness also helps prevent the mixture from becoming too wet.
- Fold in the apples. Gently stir in the diced apples, lemon juice, and maple syrup. The apples should be evenly coated, but avoid overmixing, which can cause them to break apart. The lemon juice not only adds brightness but also keeps the apple pieces from oxidizing and turning brown. The mixture will have a slightly wet appearance—this is normal and will dry out as it bakes.
- Press the batter into the pan. Transfer the mixture to the prepared pan and spread it out with a spatula or your hands. Press firmly to create an even layer; this ensures the bars bake uniformly. If the batter feels too loose, chill it in the refrigerator for 10 minutes before pressing.
- Bake for 30–35 minutes. Place the pan in the oven and bake until the edges turn golden brown and the center is set. A good indicator is the smell of toasted oats and cinnamon filling the kitchen. Avoid opening the door early; the heat loss can cause the bars to rise unevenly.
- Cool and cut. Remove the pan from the oven and allow the bars to cool for at least 15 minutes before cutting. This waiting period lets the internal structure set, preventing the bars from falling apart. Use a sharp knife or a pizza cutter for clean slices.
- Serve or store. Once cooled, lift the bars out of the pan using the parchment overhang. Serve warm or at room temperature. If you plan to eat them over several days, store them in an airtight container in the fridge for up to a week.
Insider Tricks for Flawless Results
The Temperature Rule Nobody Follows
Ovens can be deceptive, so preheat for at least 15 minutes and place the pan on the middle rack. This ensures even heat distribution. If your oven runs hot, lower the temperature by 25°F to prevent the crust from burning before the center sets. Using an oven thermometer can help you keep the heat consistent.
Why Your Nose Knows Best
When the bars start to smell like toasted oats and cinnamon, you know they’re almost ready. This aromatic cue is more reliable than a timer. If you’re uncertain, press a finger into the center; it should feel firm but not hard. The scent is the easiest way to avoid underbaking.
The 5‑Minute Rest That Changes Everything
Letting the bars rest on a wire rack for 5 minutes after cutting helps the steam escape, preventing soggy bottoms. This brief pause also allows the flavors to meld, making each bite more cohesive. The bars will firm up slightly, making them easier to handle.
Add a Splash of Water Before Reheating
If you’re reheating leftovers, sprinkle a teaspoon of water over the bars and cover them with foil for a few minutes. The steam will restore moisture and prevent the bars from drying out. This trick is especially useful if you’ve stored them in the freezer.
Use a Loaf Pan Instead of a Sheet Pan
A loaf pan gives the bars a denser, more compact texture, which some people prefer for a “cake” feel. The walls of a loaf pan also help the batter rise slightly, creating a thicker crust. Just remember to adjust baking time by a few minutes.
Keep the Apples in Small Cubes
Small apple cubes ensure even cooking and prevent large chunks from remaining raw. If you prefer a more pronounced apple bite, dice them slightly larger. The key is consistency; unevenly sized pieces can lead to uneven texture.
Creative Twists and Variations
This recipe is a playground. Here are some of my favorite ways to switch things up:
Nutty Crunch
Add 1/2 cup of toasted pecans or almonds to the batter for an extra crunch. The nuts add protein and a buttery flavor that complements the apple. Serve with a drizzle of maple syrup for a decadent treat.
Cranberry Surprise
Stir in 1/2 cup of dried cranberries for a tart contrast that brightens the dish. The cranberries soften during baking, releasing a sweet‑tart burst in each bite. This variation is perfect for holiday gatherings.
Chocolate Swirl
Drop spoonfuls of dark chocolate chips into the batter before baking. As the bars bake, the chocolate melts into gooey pockets that melt in your mouth. Pair with a scoop of vanilla ice cream for an indulgent dessert.
Spiced Pumpkin
Replace half the apples with 1 cup of pumpkin puree and add 1/2 teaspoon of ground ginger. This gives the bars a fall‑season vibe, perfect for Thanksgiving or a cozy autumn afternoon.
Gluten‑Free Edition
Swap the all‑purpose flour for a gluten‑free blend and use gluten‑free oats. The texture will be slightly different but still satisfying. This version is ideal for those with celiac disease or gluten sensitivity.
Low‑Carb Version
Use almond flour instead of all‑purpose flour and reduce the maple syrup to 1 tablespoon. The bars will be denser and lower in carbs, making them suitable for keto or low‑carb diets. The flavor remains rich and comforting.
Storing and Bringing It Back to Life
Fridge Storage
Wrap the bars tightly in plastic wrap or store them in an airtight container. They will stay fresh for up to a week. If the bars become slightly dry, add a thin layer of butter before reheating to restore moisture.
Freezer Friendly
Place the bars in a freezer bag, pressing out as much air as possible. They can be frozen for up to 3 months. When ready to eat, thaw at room temperature for 30 minutes before reheating.
Best Reheating Method
Reheat the bars in a toaster oven or regular oven at 300°F (150°C) for 5–7 minutes. Add a splash of water or a drizzle of butter before covering with foil. This technique steams the bars back to perfection, restoring the tender crumb and crisp crust.