Picture this: I’m standing in my kitchen, a pot of boiling water, a handful of gnocchi, and a handful of Easter eggs. The stove is a little too hot, the eggs are cracking like a bad joke, and I’m about to create a culinary catastrophe. I’m thinking, “I could totally make this a masterpiece.” The moment I toss the gnocchi into the boiling water, the kitchen smells like a wintry forest after a snowfall, and the sound of bubbling water is like a lullaby that promises something sweet.
The first bite is a revelation: the gnocchi is pillowy, the pesto coats each bite like velvet, and the eggs crack open to reveal a silky yolk that oozes into every crevice. The heavy cream gives it a silky, buttery richness that feels like a warm hug on a cold day. The parmesan adds a nutty crunch, while the mozzarella melts into a gooey, stretchy blanket that keeps everything together. The aroma of garlic and basil makes the entire kitchen feel like a secret garden.
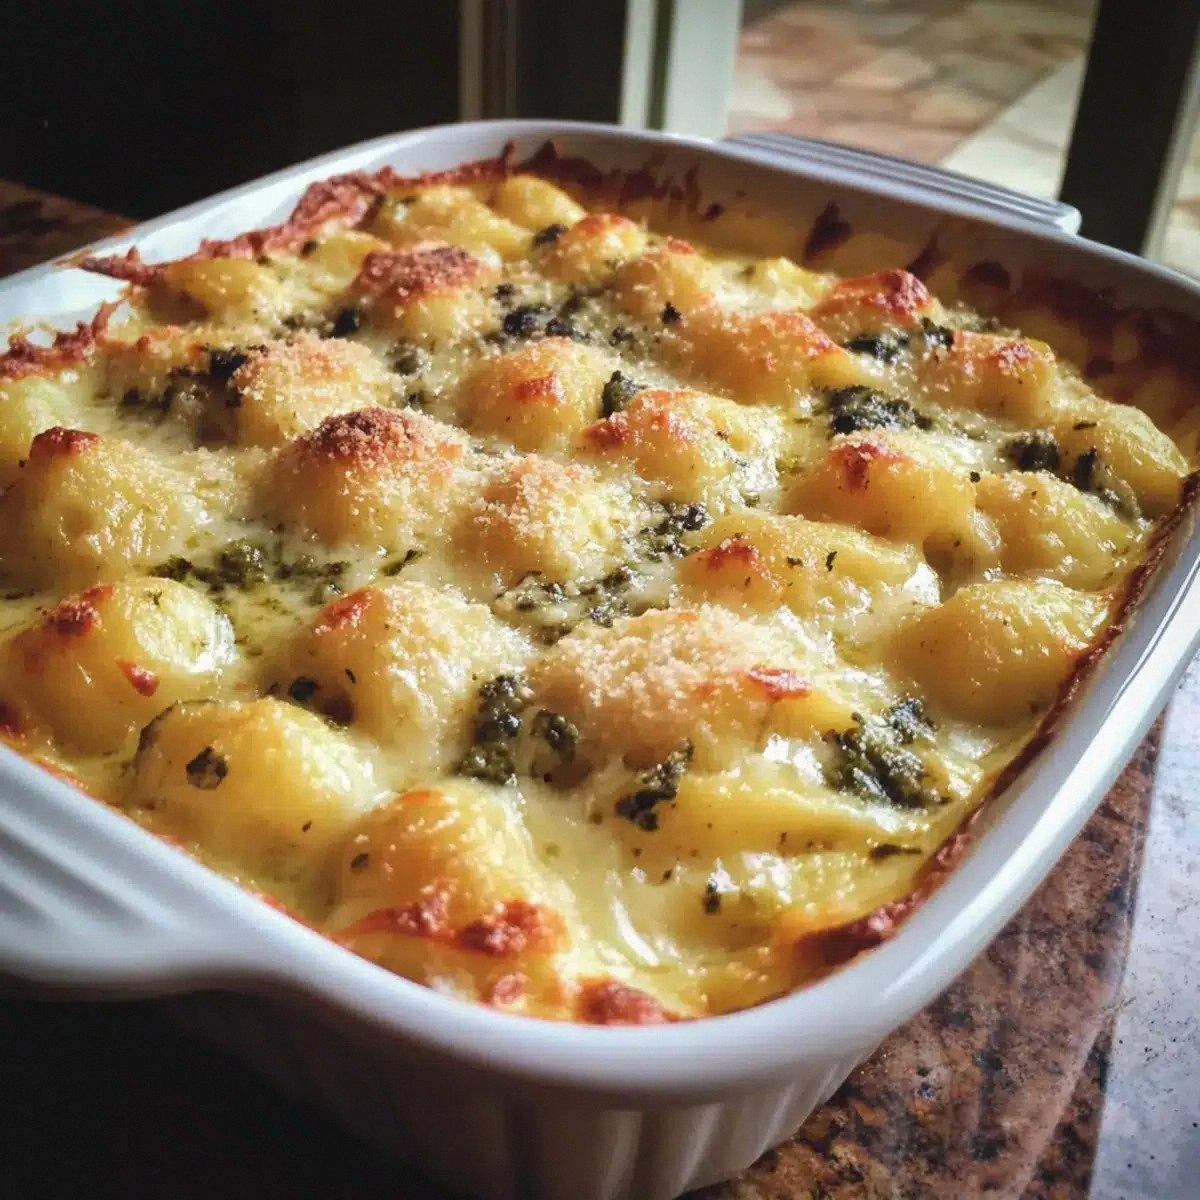
What sets this version apart is that it’s a one-pan, oven-baked wonder that turns a simple pot of gnocchi into a showstopper. I dare you to taste this and not go back for seconds. It’s hands down the best version you’ll ever make at home. The bright, colorful eggs pop against the green pesto, creating a visual feast that’s almost too pretty to eat. The crispy edges of the breadcrumb topping shatter like thin ice when you bite into them.
And there’s a twist you won’t expect: I’m going to finish this dish under the broiler to create a golden, bubbly crust that’s the ultimate crowd‑pleaser. Picture yourself pulling this out of the oven, the whole kitchen smelling incredible, and the family’s eyes widening as they see the golden crust and the glistening yolks. Let me walk you through every single step — by the end, you’ll wonder how you ever made it any other way.
What Makes This Version Stand Out
- Texture: The gnocchi remains pillowy while the breadcrumb topping crisps to a satisfying crunch. The contrast feels like a dance of softness and bite in every forkful.
- Flavor: The pesto’s bright, herbaceous notes marry the rich, buttery cream for a layered, complex taste that lingers on the palate.
- Ease: One pot, one pan, minimal cleanup. Even a novice can master this with a few simple steps.
- Visual Appeal: The vibrant eggs, green pesto, and golden crust create a dish that looks as good as it tastes.
- Make‑ahead: Assemble the dish, refrigerate, and bake right before serving. It stays fresh and flavorful for a day.
- Guest Reaction: Friends say it’s “the best Easter dinner ever.” Their eyes light up, and the conversation never ends.
Inside the Ingredient List
The Flavor Base
The pesto sauce is the heart of this dish, offering a burst of basil, garlic, and pine nuts. It’s not just a sauce; it’s a flavor bomb that coats each gnocchi with a silky, herbaceous coating. Skipping it would reduce the dish to a bland, creamy casserole. If you’re vegan, swap the parmesan for nutritional yeast for a cheesy, umami kick.
The Texture Crew
Potato gnocchi provides that pillowy, melt-in-your-mouth sensation that balances the creamy sauce. The breadcrumbs on top add a crisp, almost crunchy finish that contrasts beautifully with the softness of the gnocchi. If you can’t find breadcrumbs, finely crushed crackers work as a substitute, offering a similar crunch.
The Unexpected Star
The colorful Easter eggs are more than décor; they bring a subtle, savory richness when their yolks break open. The yolk’s silky texture and buttery flavor amplify the dish’s overall richness. If you’re worried about the yolks breaking, place the eggs in the oven first for a few minutes to set them slightly before adding the rest.
The Final Flourish
The heavy cream and mozzarella work together to create a luscious, gooey topping that binds the dish together. The cream adds a silky smoothness, while the mozzarella melts into a stretchy, golden blanket. If you’re watching calories, replace half the cream with Greek yogurt for a tangier, lighter version.
Everything's prepped? Good. Let’s get into the real action.
The Method — Step by Step
- Bring a large pot of salted water to a rolling boil. Drop in the gnocchi and let them cook until they rise to the surface, about 2–3 minutes. Stir gently to prevent sticking. Drain and set aside. This step ensures the gnocchi stay fluffy and not mushy.
- While the gnocchi cooks, preheat your oven to 400°F (200°C). In a small saucepan, melt the butter over medium heat. Add the minced garlic and sauté until fragrant, about 30 seconds. The garlic should release a warm, aromatic scent that signals readiness.
- Stir in the pesto sauce and heavy cream, whisking until the mixture is smooth and slightly thickened. Let it simmer gently for 2 minutes, allowing the flavors to meld. The mixture should look glossy, not watery.
- Add the drained gnocchi to the sauce, tossing gently so each piece is coated. Sprinkle in the grated parmesan, then fold in the mozzarella cubes. The cheese should begin to melt, creating a velvety coating that clings to the gnocchi.
- Transfer the mixture to a 9‑inch baking dish, spreading evenly. Arrange the colorful Easter eggs on top, spacing them to allow the sauce to seep between. The eggs should sit snugly, ready to crack open when baked.
- Sprinkle the breadcrumbs over the top, then drizzle a light mist of olive oil. This will help the breadcrumbs toast to a golden, crunchy finish. The breadcrumbs should be evenly distributed for uniform crispness.
- Place the dish in the preheated oven and bake for 15 minutes. The edges should pull away slightly, indicating a golden crust. Watch the eggs; they should begin to soften and the yolks should become slightly runny.
- Increase the oven temperature to 425°F (220°C) and broil for 2–3 minutes, or until the top is a deep golden brown and the cheese is bubbling. Keep a close eye to avoid burning. The broiling step creates a beautiful, caramelized crust that feels like a crown.
- Remove from the oven, let rest for 5 minutes. This rest period allows the sauce to set and the flavors to deepen. The rest also prevents the yolks from spilling out when you cut into the dish.
- Serve immediately, spooning the creamy sauce over each forkful and allowing the yolk to mingle with the pesto. Garnish with fresh basil leaves if desired. This final touch adds a burst of color and an extra layer of freshness.
That's it — you did it. But hold on, I've got a few more tricks that'll take this to another level. The next section will reveal insider tips that turn a great dish into unforgettable.
Insider Tricks for Flawless Results
The Temperature Rule Nobody Follows
Many people bake at a low temperature, but that can leave the breadcrumbs soggy. I recommend starting at 400°F and finishing with a broil to achieve a crisp, caramelized top. The heat gradient ensures the interior stays creamy while the exterior becomes golden. This trick transforms the dish from good to spectacular.
Why Your Nose Knows Best
Smell the sauce before adding the gnocchi. If it smells slightly burnt, the garlic is overcooked. If it’s too sharp, add a splash of cream to mellow it. Your nose is a reliable guide to flavor balance.
The 5‑Minute Rest That Changes Everything
After you remove the dish from the oven, let it sit for 5 minutes. This rest period allows the sauce to thicken slightly, making it easier to spoon and preventing the yolks from spilling. It also lets the flavors meld, creating a richer taste.
Egg‑Harden Technique
If you’re worried about the eggs cracking unevenly, place them in a preheated oven for 5 minutes before adding the rest of the dish. This slightly sets the yolks, ensuring a controlled release when the dish finishes baking. It’s a simple trick that guarantees a beautiful presentation.
Breadcrumb Crunch Enhancer
Add a pinch of grated parmesan to the breadcrumbs before baking. This infuses the crunchy topping with extra umami flavor and helps it brown evenly. It’s a quick step that elevates the dish’s overall taste.
Cheese Swap for a Vegan Twist
Replace the mozzarella with a dairy‑free cheese that melts well, such as a vegan mozzarella substitute. Use vegan parmesan for extra flavor. The result is a plant‑based version that still feels indulgent.
Creative Twists and Variations
This recipe is a playground. Here are some of my favorite ways to switch things up:
Sun‑Dried Tomato Pesto
Swap regular pesto for sun‑dried tomato pesto for a sweet, tangy twist. The tomatoes add a burst of color and depth of flavor. Pair it with basil for a fresh finish.
Smoked Salmon & Capers
Add smoked salmon and capers to the top before baking for a luxurious, briny flavor. The salmon’s smokiness complements the creamy sauce. It’s a decadent upgrade for special occasions.
Roasted Red Pepper Garnish
Top the finished dish with roasted red pepper strips for a sweet, smoky contrast. The peppers add a pop of color and a subtle sweetness that balances the richness.
Herb‑Infused Breadcrumbs
Mix dried oregano, thyme, and rosemary into the breadcrumbs before baking. The herbs infuse the crust with aromatic layers, creating a Mediterranean vibe. The result is a fragrant, savory crunch.
Caramelized Onion & Mushroom Layer
Sauté caramelized onions and sautéed mushrooms and layer them between the gnocchi and the sauce. The earthy flavors deepen the dish’s complexity. It’s a hearty, comforting variation.
Citrus Zest Finish
Add a sprinkle of lemon or orange zest after baking. The citrus brightens the dish, cutting through the richness with a fresh lift. It’s a refreshing finish for spring.
Storing and Bringing It Back to Life
Fridge Storage
Store leftovers in an airtight container for up to 2 days. Keep the dish in the fridge and reheat gently to avoid overcooking the eggs. The sauce will remain silky and the breadcrumbs will stay slightly crisp if you reheat briefly under a broiler.
Freezer Friendly
Wrap the baked dish tightly in foil and freeze for up to 2 weeks. Thaw overnight in the fridge before reheating. The texture stays close to fresh, and the flavors meld beautifully.
Best Reheating Method
Reheat in a preheated oven at 350°F (175°C) for 15 minutes. Add a splash of water before reheating to steam back to perfection. Finish with a quick broil to revive the golden crust.